Free Click & Collect within 30 minutes
 Free delivery on orders over £39.99
 Free Next Day Delivery on orders over £75
 Gift Cards available
How to Make Kinetic Sand for Your Child’s Activity Table
6 min read
Last Modified 18 June 2025 First Added 18 June 2025
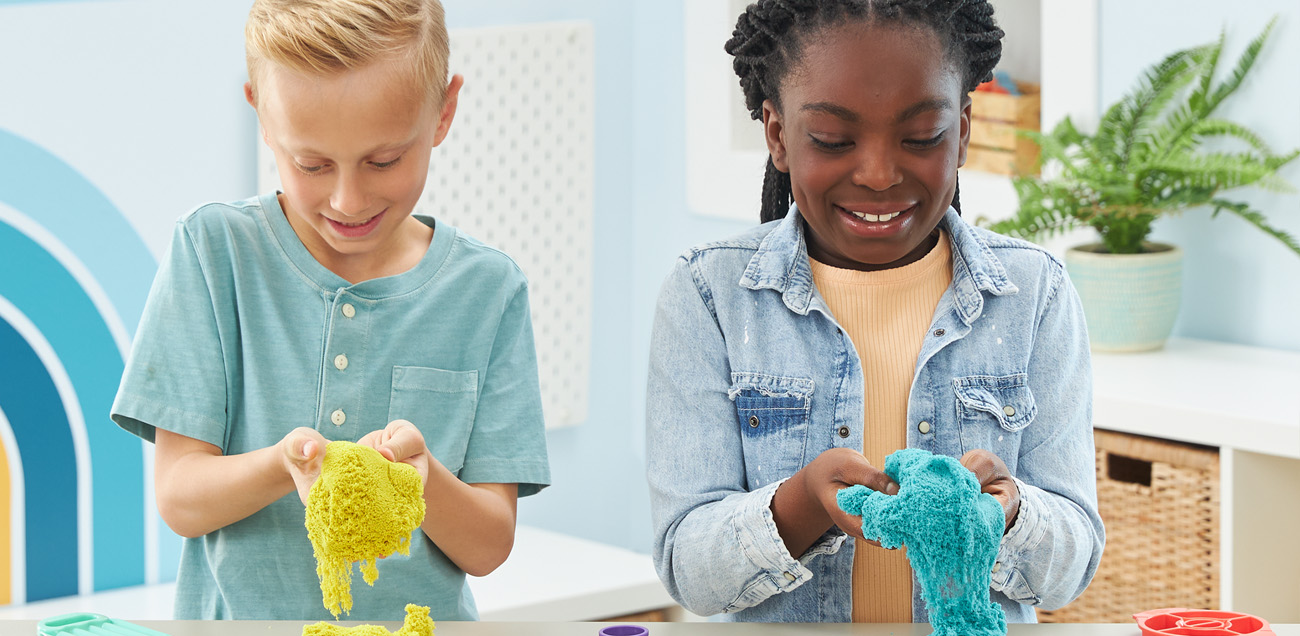
If you’ve ever sat and watched a child play with kinetic sand, you’ll know what we mean when we say there’s something a little bit magical about it. The way it crumbles but holds its shape and flows through their fingers. It’s properly mesmerising. And for a child, it’s a whole world of sensory play packed into one excellent material.
It’s one of those rare toys that genuinely calms them down, focusing all their busy energy on scooping, moulding, and creating. It’s a perfect indoor activity, especially on a rainy day, so it’s just brilliant for a good activity table. So, the question is, how do I make my kinetic sand? Turns out, it’s a fun and easy craft project.
You might wonder what kinetic sand is before we get the mixing bowl out. Essentially, sand is coated with something special that makes it act a bit like a solid and a bit like a liquid. It’s mouldable sand, like wet sand at the beach, but it oozes and flows in a completely unique way. It’s a weird and wonderfully soft texture that makes it a brilliant form of sensory play for children.
The developmental benefits are huge. All that squishing, patting, and scooping is fantastic for strengthening little hands and improving motor skills. For anxious children, the repetitive motion can be incredibly calming. And if you have more than one child playing, it’s a lovely, gentle way to encourage social play and sharing.
The official brand, Kinetic Sand, is typically made of very fine sand and a silicone-based polymer. That polymer is the secret ingredient that holds kinetic sand together.
Shop Kinetic Sand with us here!
For DIY kinetic sand, we’re going to use common household ingredients. There are a few popular kinetic sand recipe options out there. Some use baby oil, and some use dish soap. We’ll cover the two containing the ingredients you’re most likely to have lying around the house or in the back of a cupboard.
Remember: The cup size you use for measuring doesn’t have to be exactly one cup. As long as the ratios are as stated in each recipe, this method will work with any size cup.

This version has a texture closest to the classic moon sand.
If you want to make kinetic sand with two ingredients, this recipe is for you. It has a slightly different, silkier feel.
We’ll start with Recipe 1.
The process is even simpler for the oil-based recipe. Just mix your cups of sand in a bowl and slowly add the baby oil, kneading it with your hands until the sand mixture holds its shape when squeezed.
In our soapy water recipe, that mix of cornflour and water creates a non-Newtonian fluid which coats each grain of actual sand. The dish soap acts as the glue and helps it all bind together. In the oil-based version, the oil coats the sand, making the grains stick to each other instead of your hands. Clever, eh?
The shop-bought stuff rarely dries out. Our homemade versions are a little different. The oil-based one is very stable, but the water-based one will dry out over time.
That’s no problem, though. Just store your sand in an airtight container or a sealed plastic container. When you get it out next time, if it feels dry, just spritz it with a little water and knead it until it’s as good as new.
This is where the real fun begins. An activity table is the perfect place to play with kinetic sand because it keeps the sand (mostly!) contained. Here are a few craft ideas and sand activities to get you started:
While the ingredients are simple, they are still not for eating, so always supervise children when making or playing with kinetic sand. For clean-up (and, let’s face it, your sanity), lay an old sheet under the table. It makes gathering up the spills so much easier.
So, there you have it. A simple, affordable way to bring one of the best sensory toys into your home. Give it a go and enjoy the quiet focus that descends when your little one gets lost in their world of wonderful, mouldable sand.
Read our disclaimers.