 Free Click & Collect within 30 minutes
 Free delivery on orders over £39.99
 Free Next Day Delivery on orders over £75
 Gift Cards available
How to Wrap Gifts Perfectly
15 min read
Last Modified 29 August 2025 First Added 30 October 2023

Have you completed your shopping – but now have no idea where to begin with the wrapping? Well look no further – we have you covered. No matter how big, how small or awkwardly shaped your gifts are – there will be a technique here for you to perfectly wrap your presents.
Gift wrapping can be fun, we will take you step-by-step through a variety of shaped gifts to try and help provide solutions.
There will be tips and tricks along the way to make things easier for you and provide you with the confidence to get creative. In addition to the standard materials list – we will later provide useful suggestions for alternative gift wrap solutions.
So let’s grab a cuppa, gather our materials – and get wrapping!

You will need:
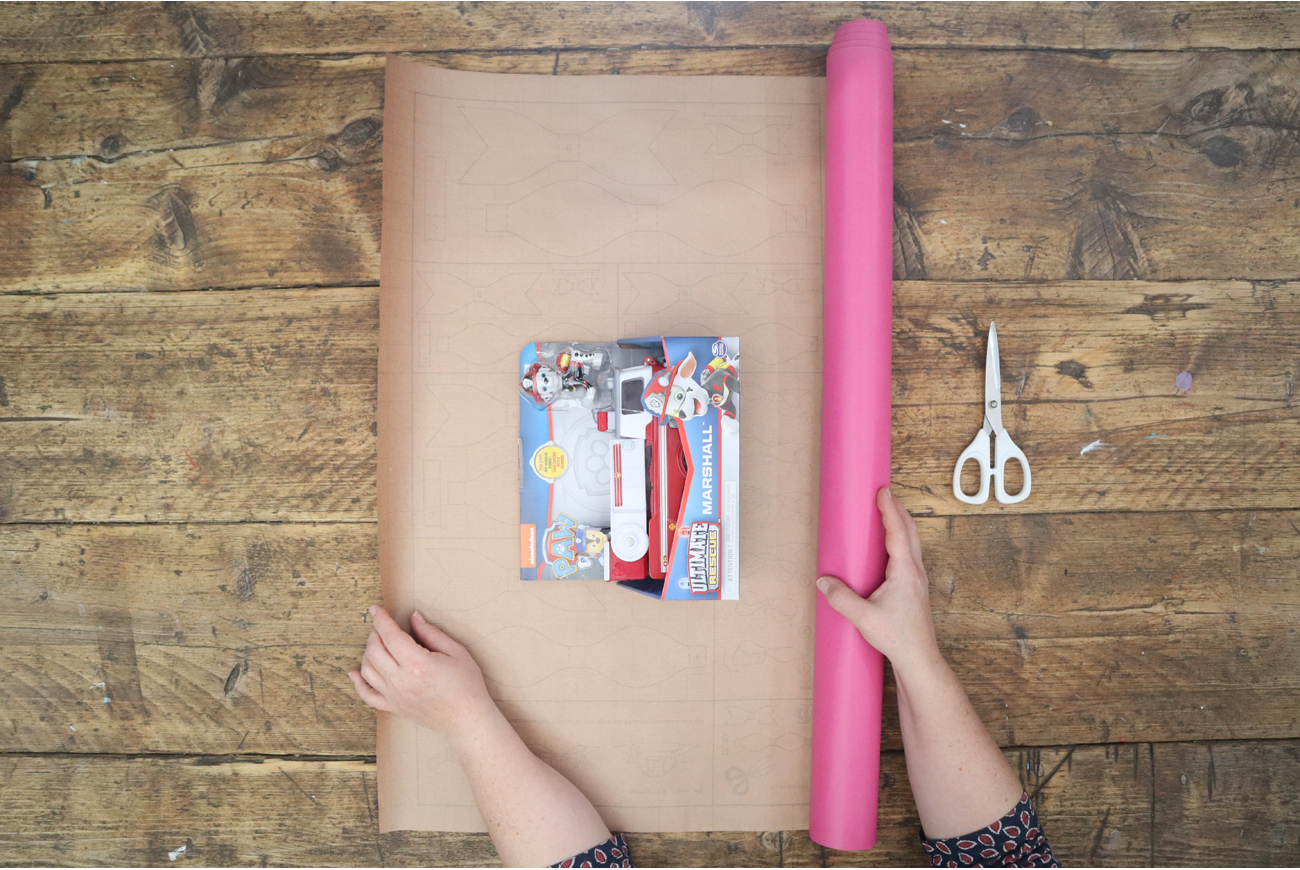
Allow yourself plenty of space to wrap your gift, ideally on a smooth flat surface.
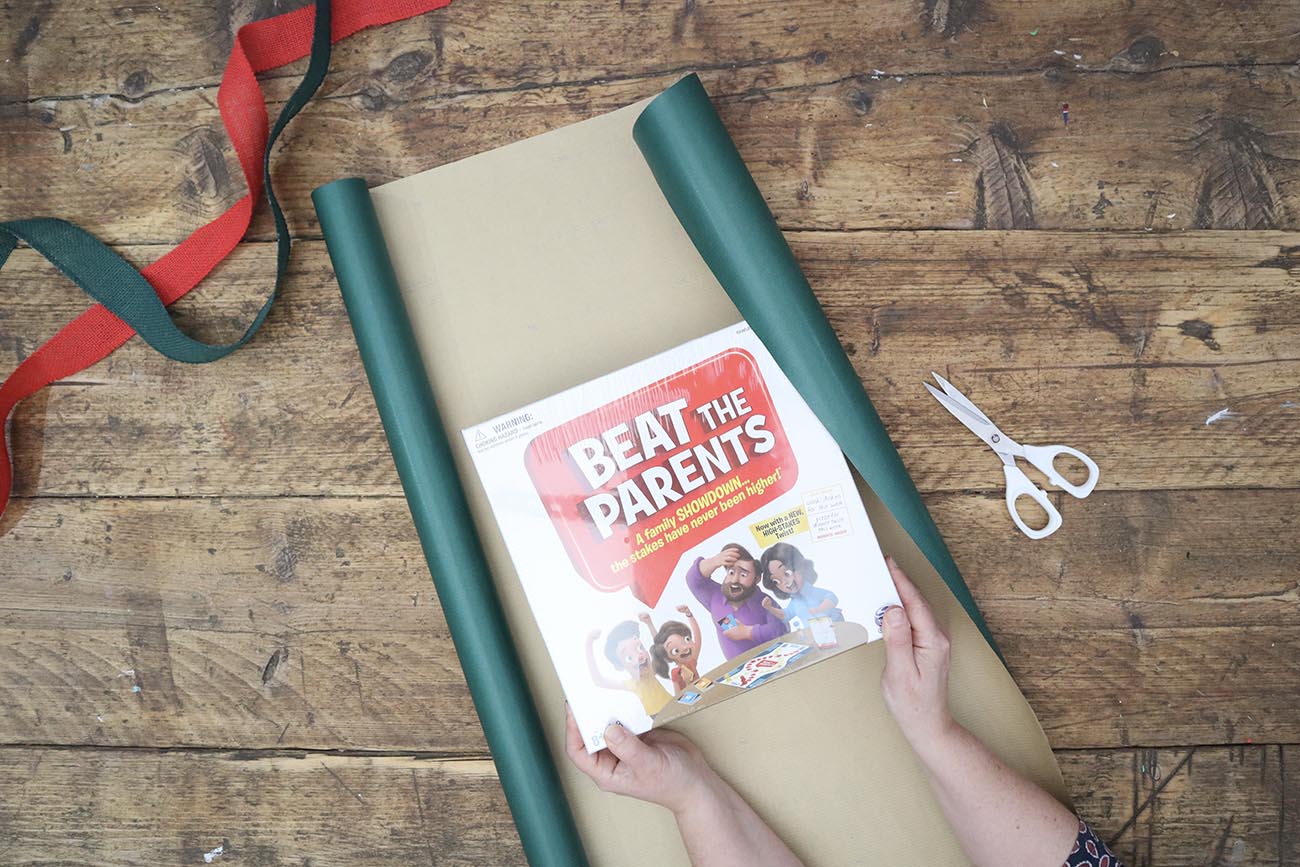
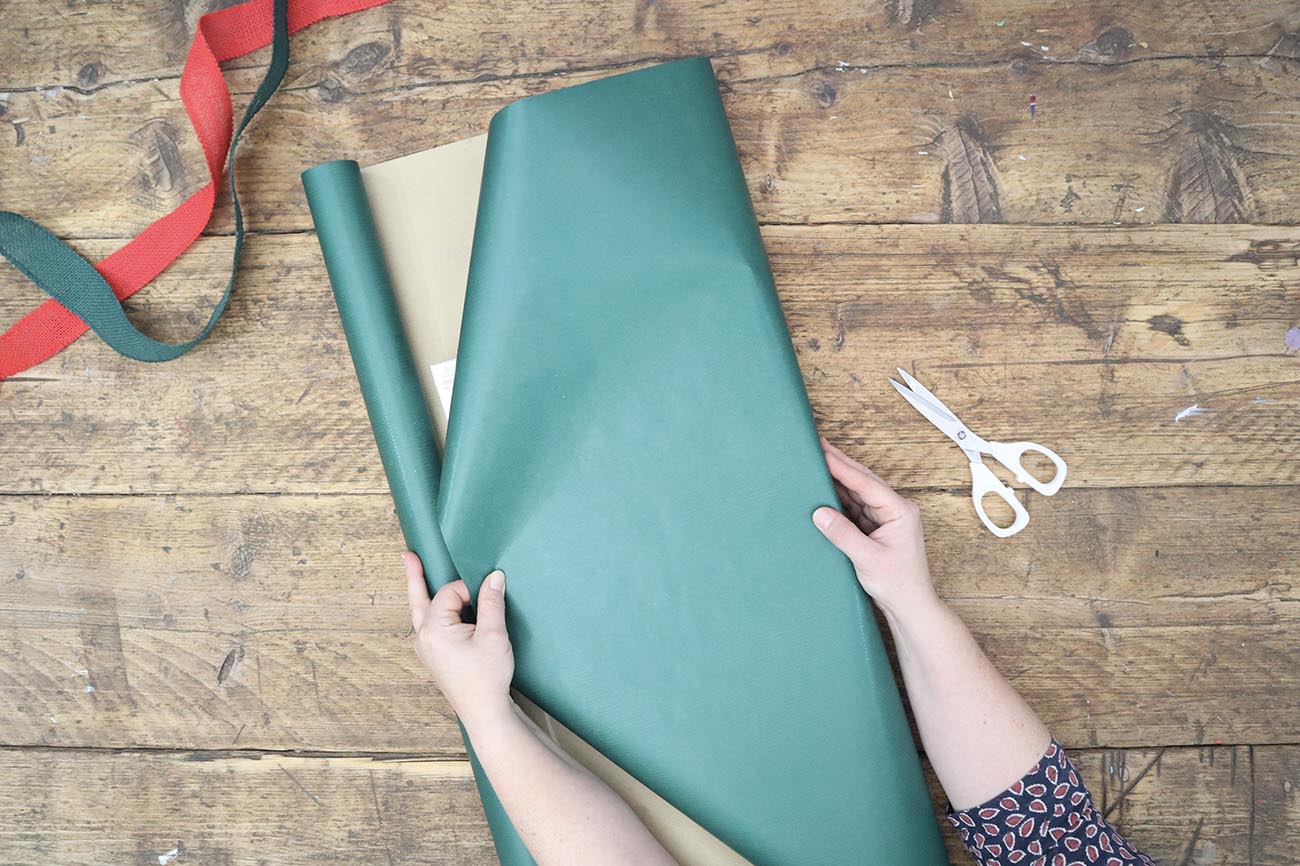
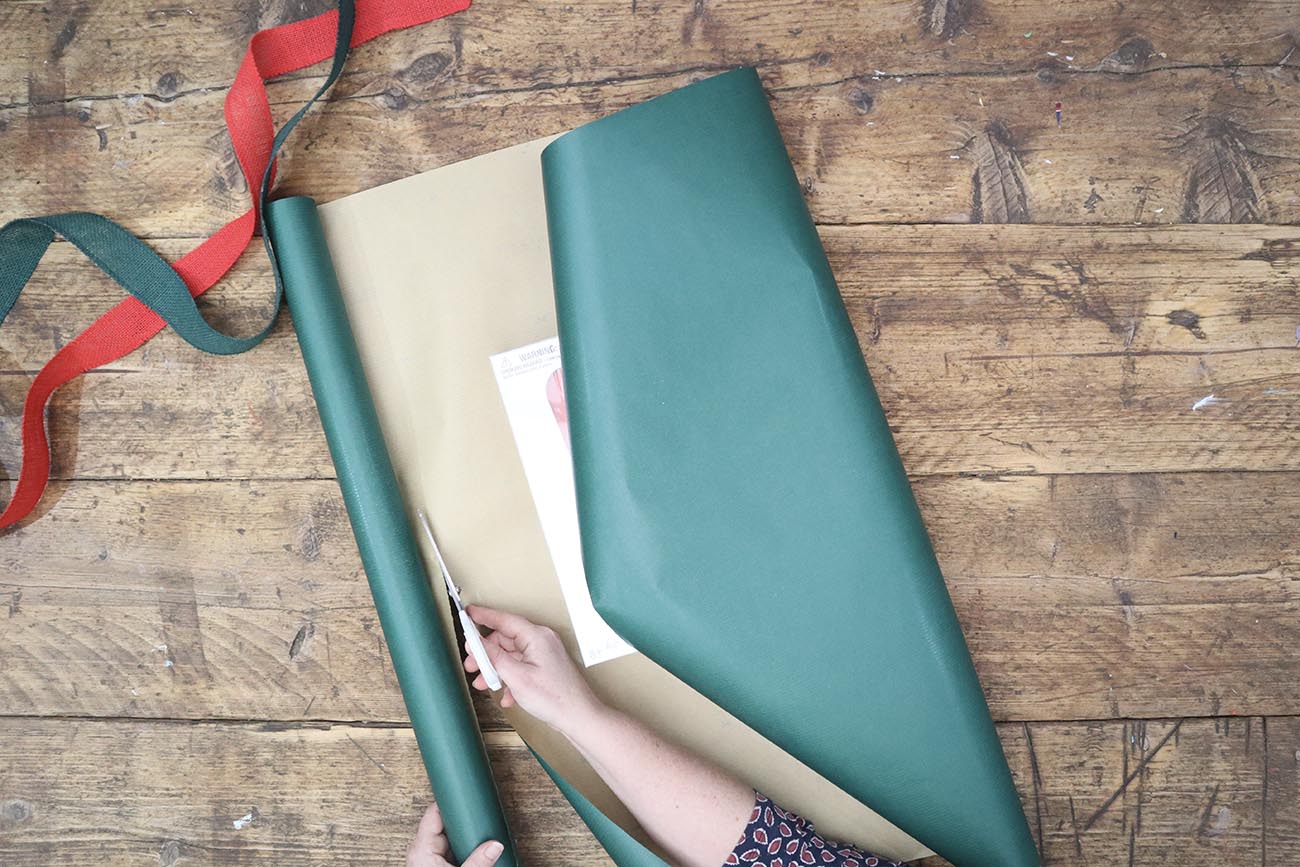
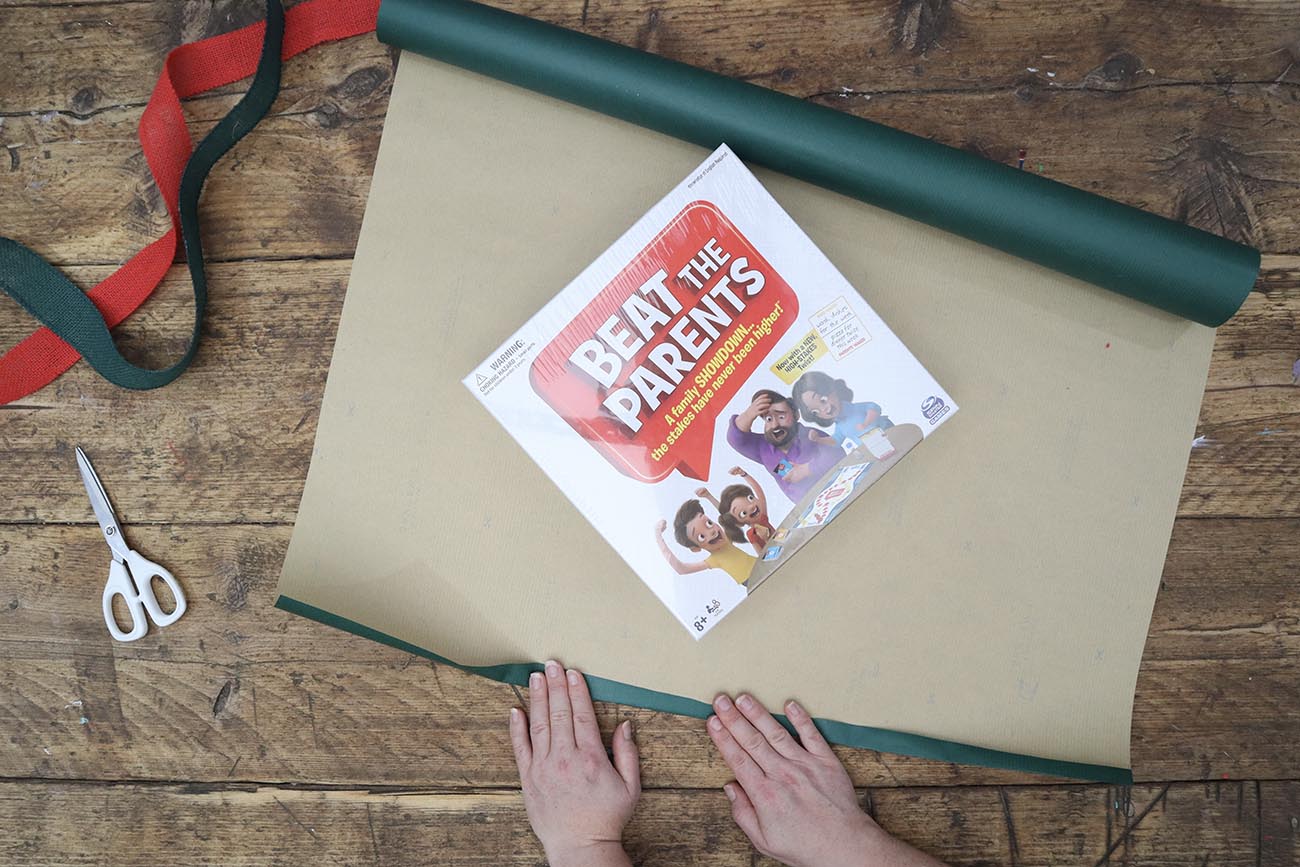
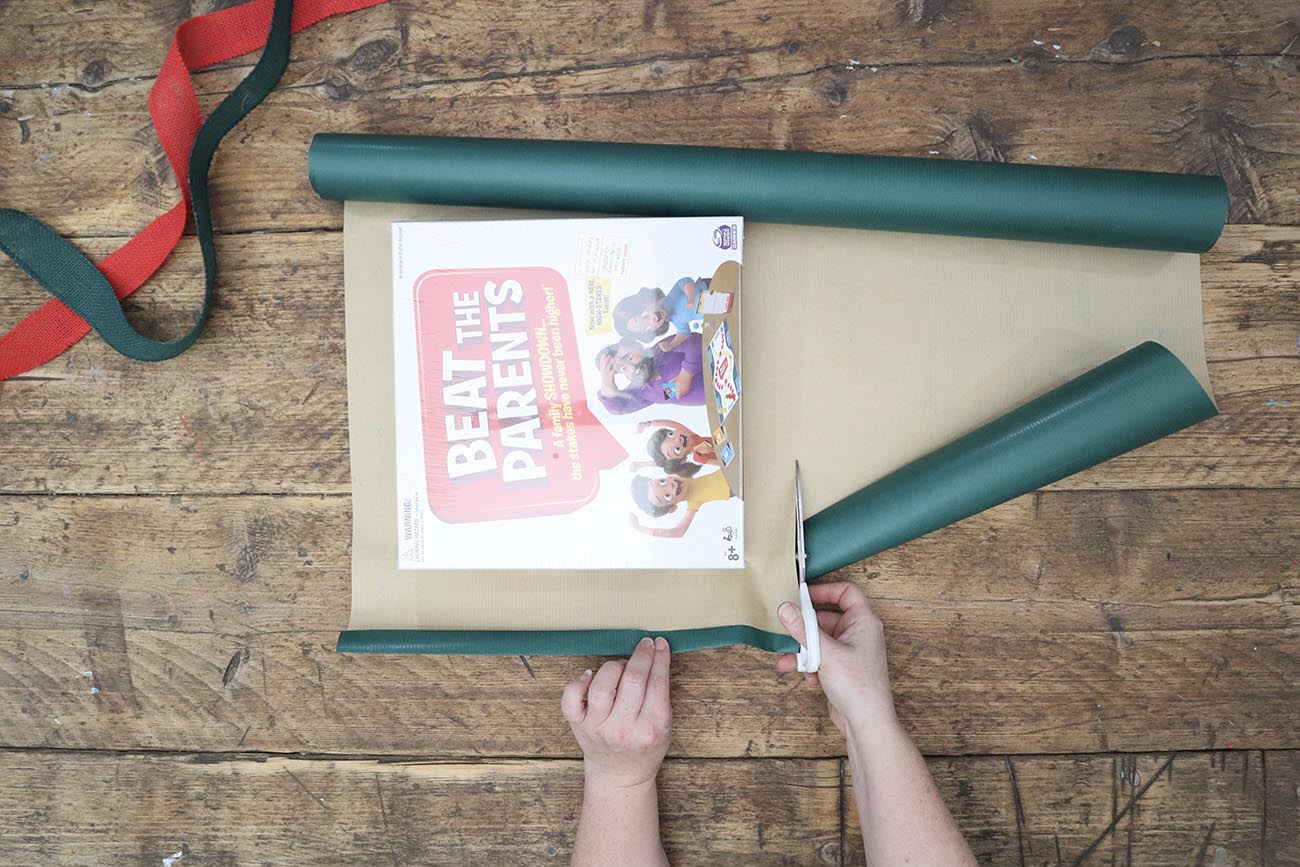
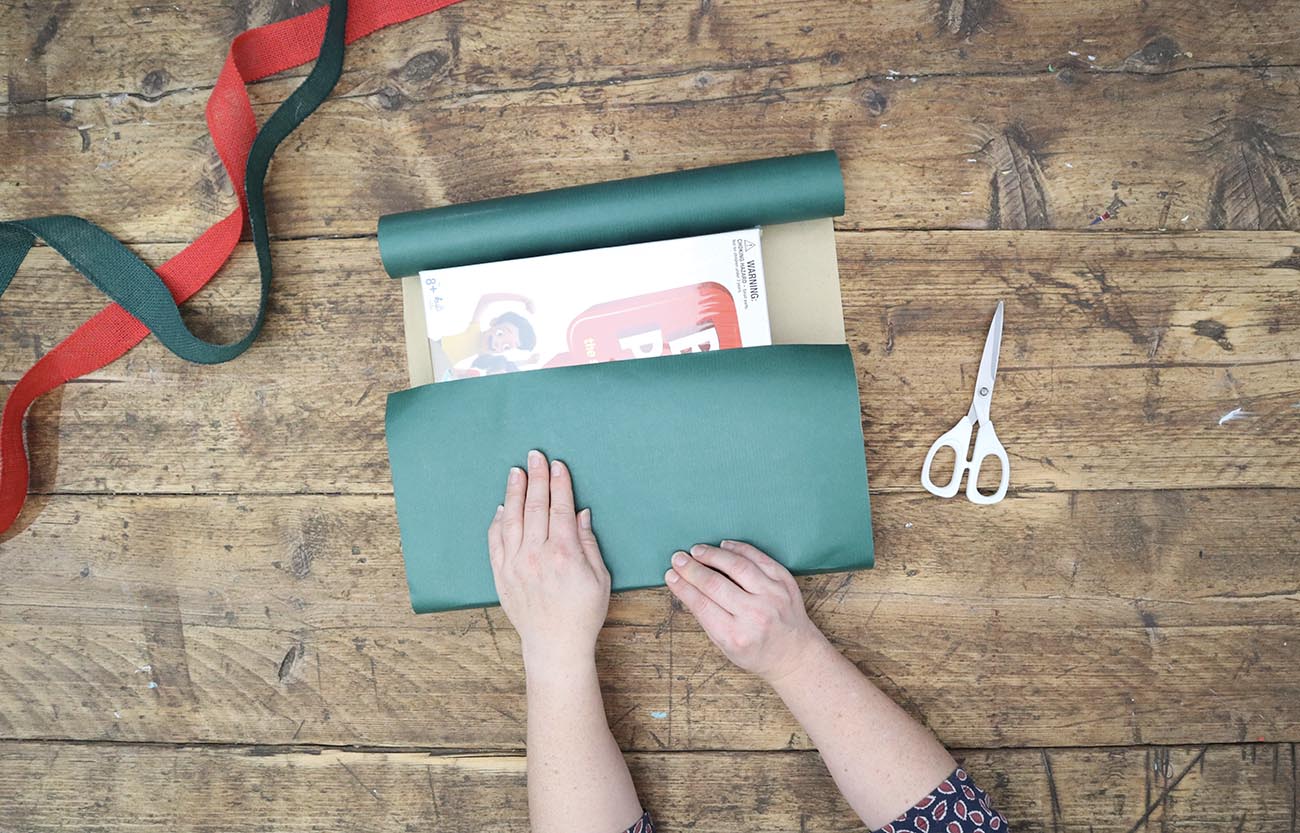
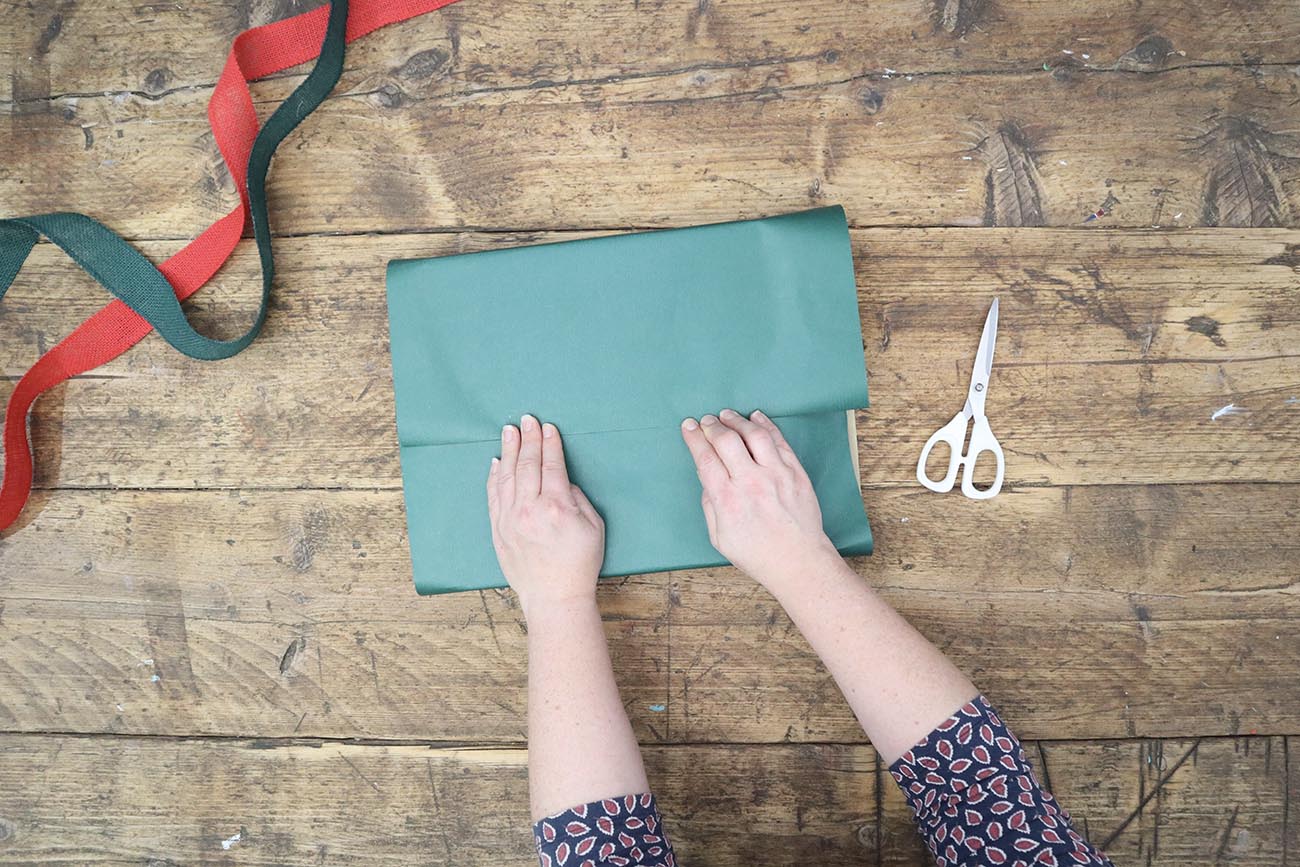
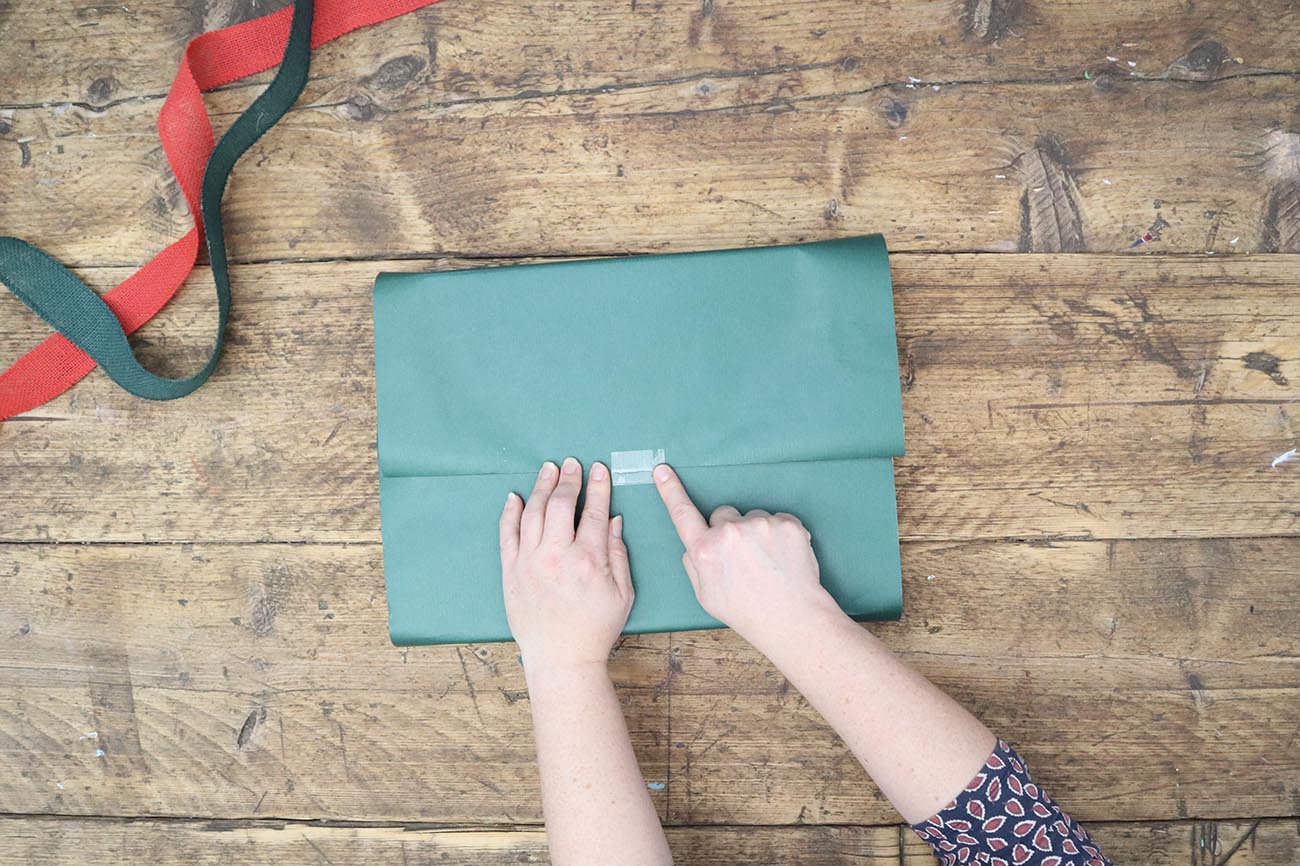
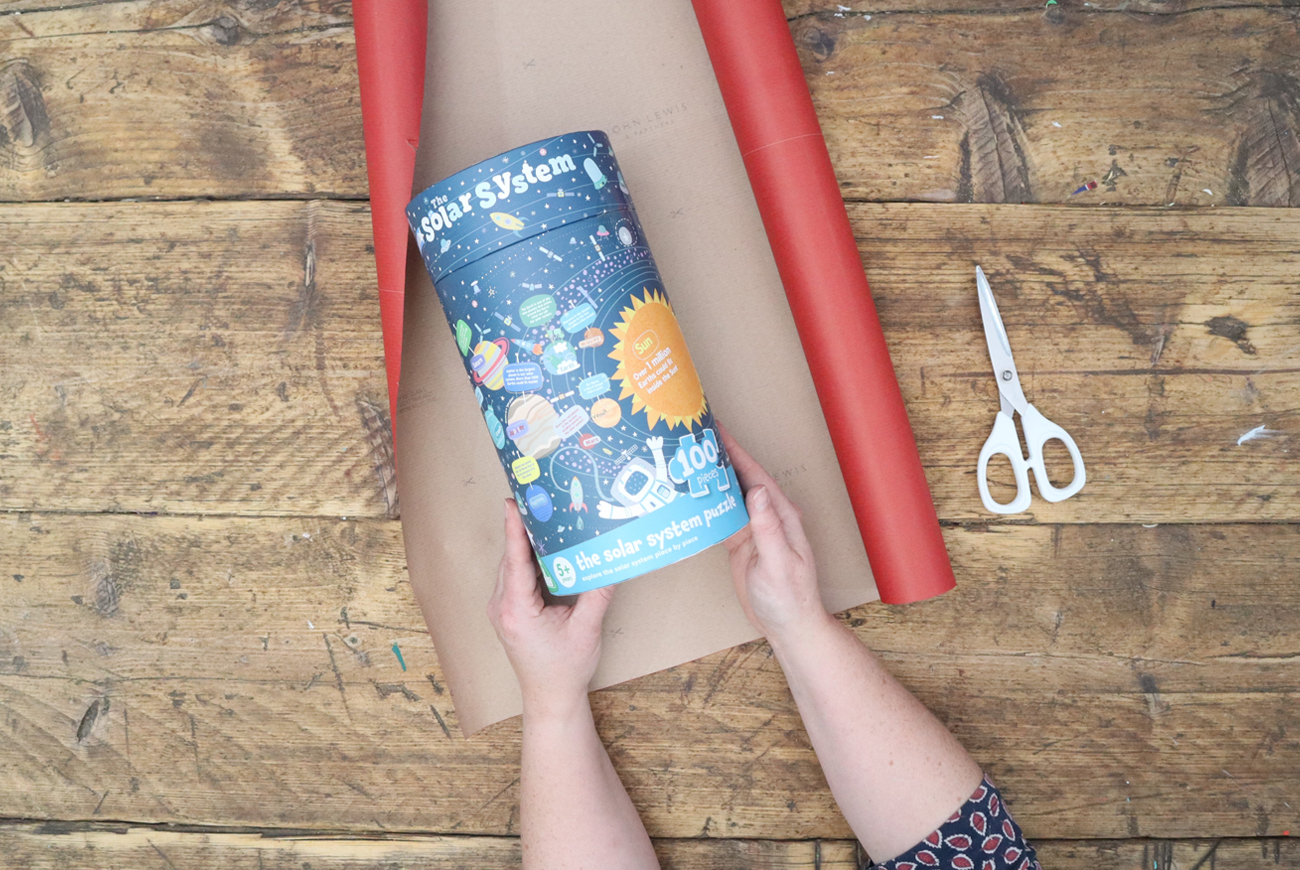
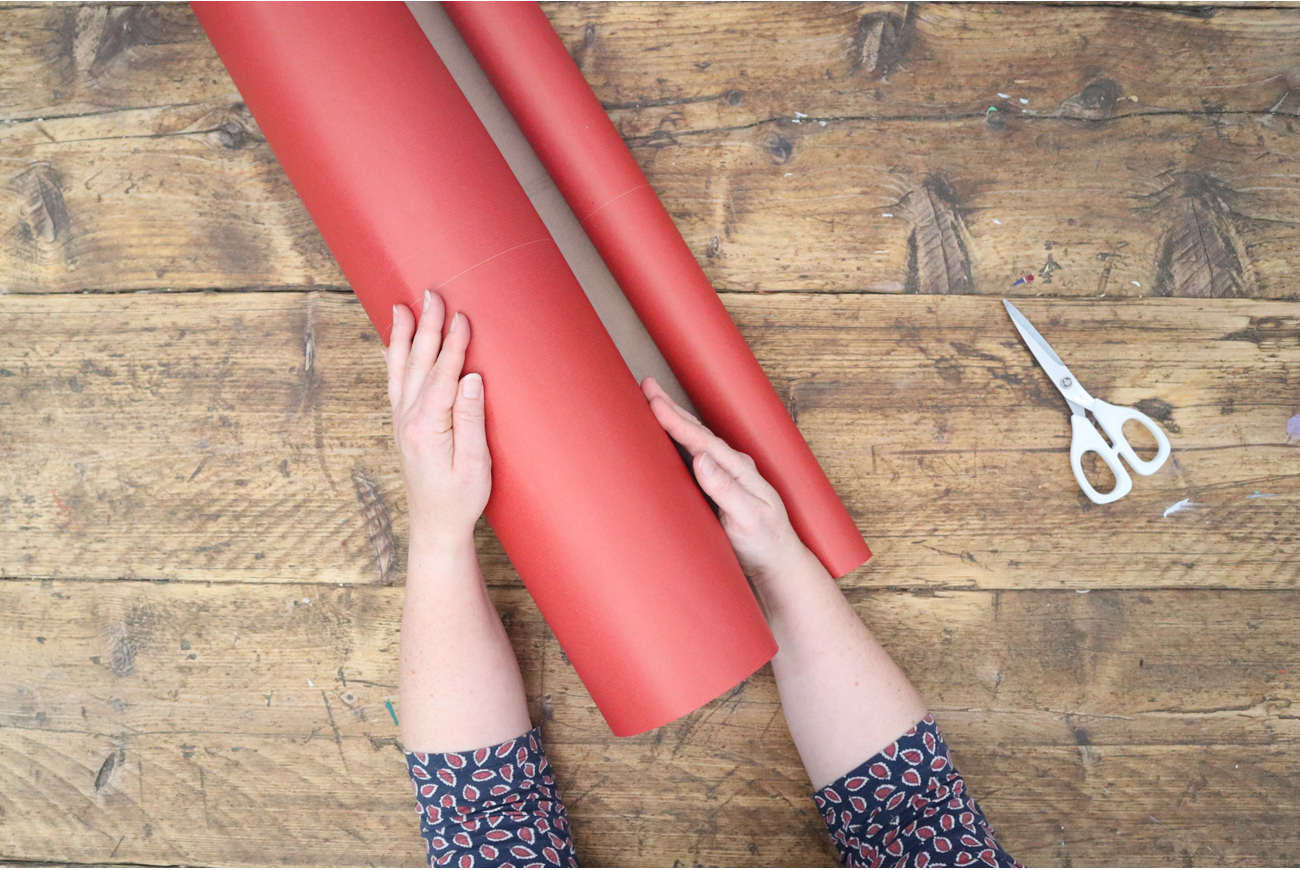
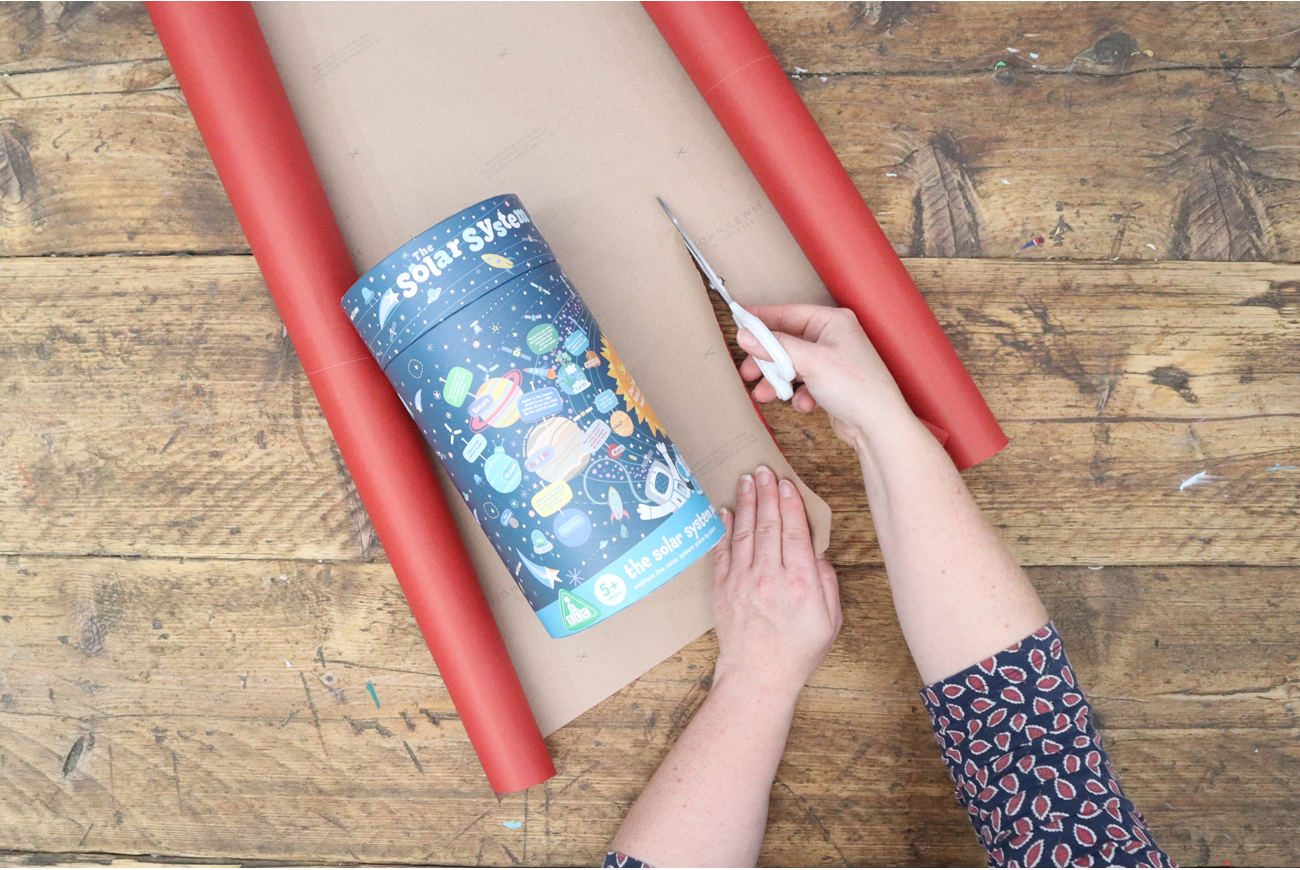
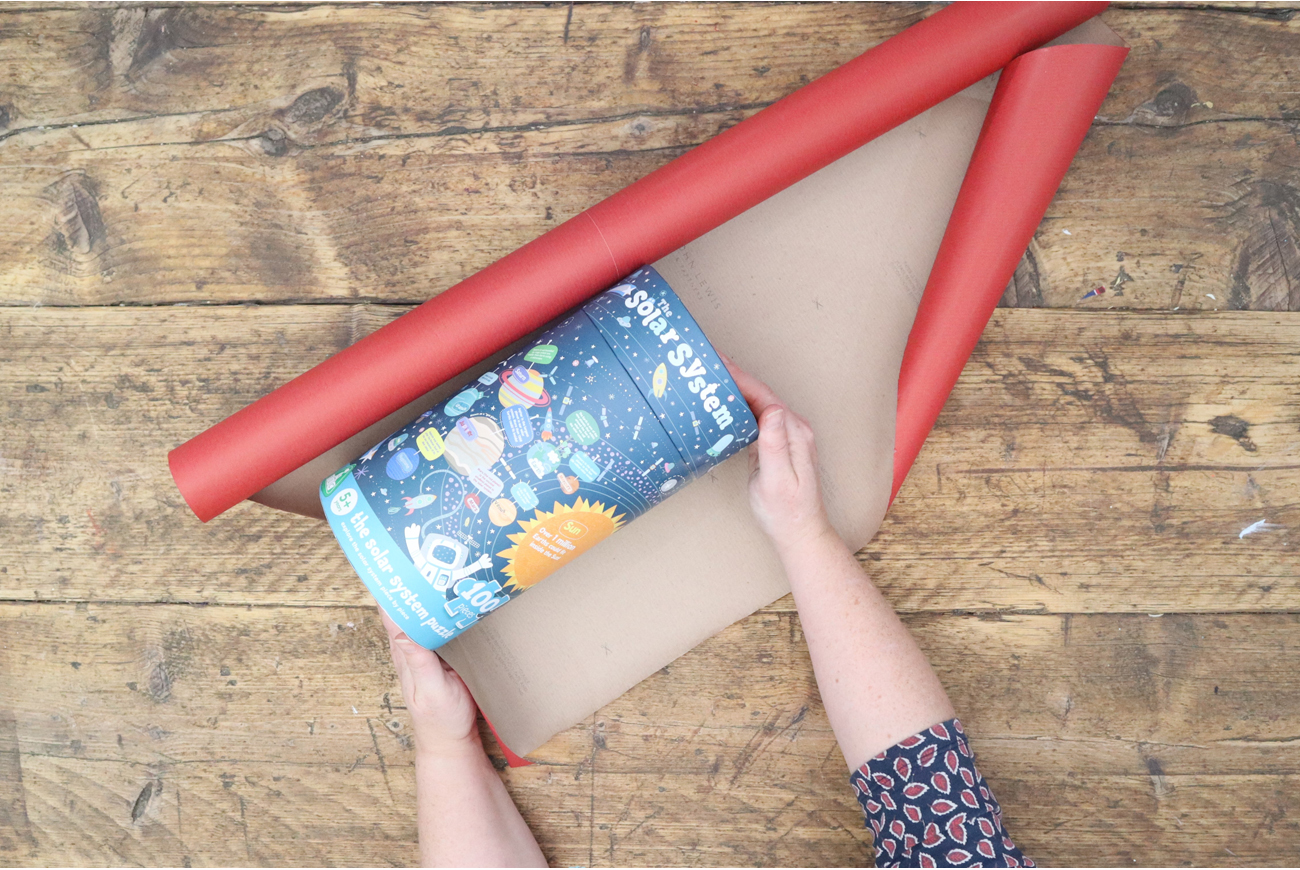
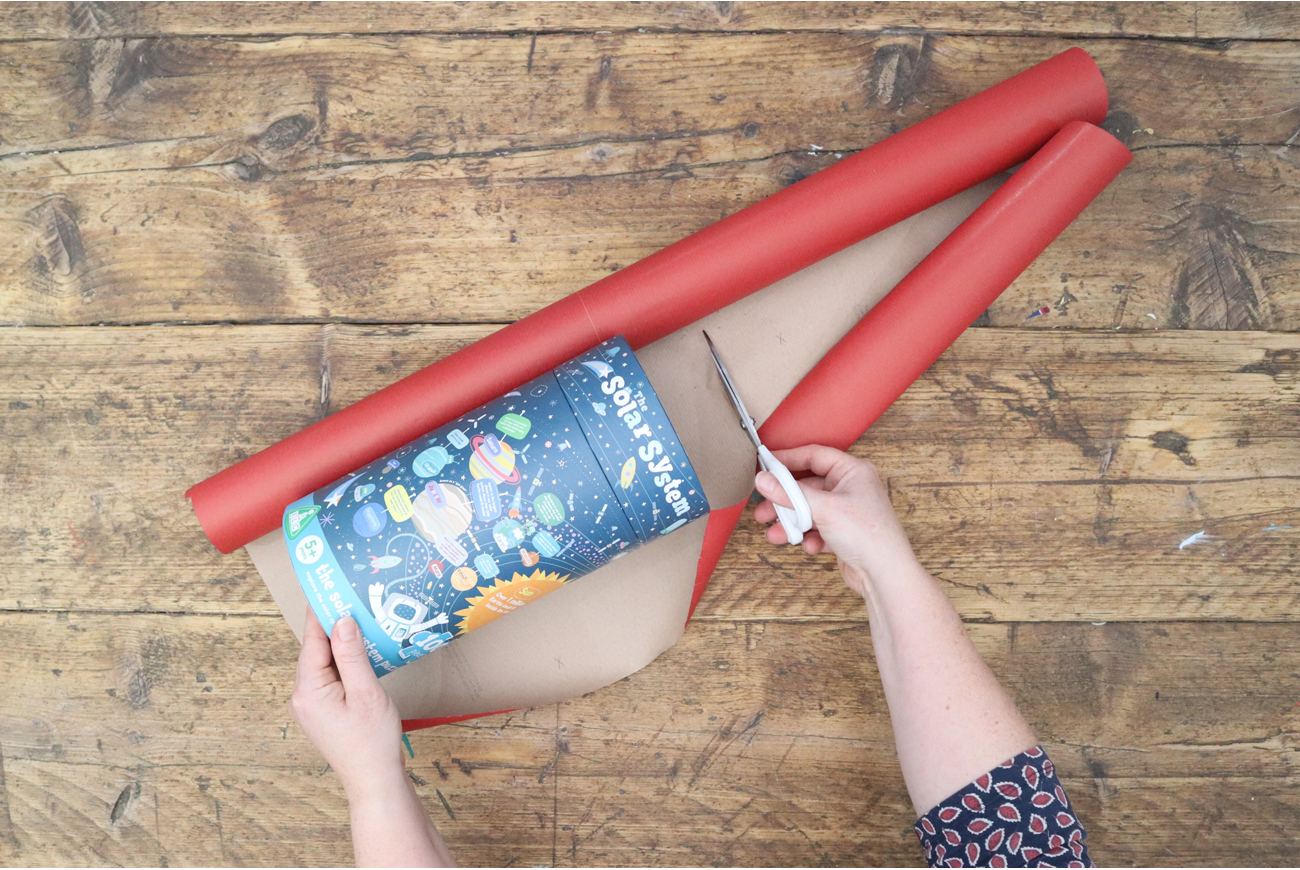
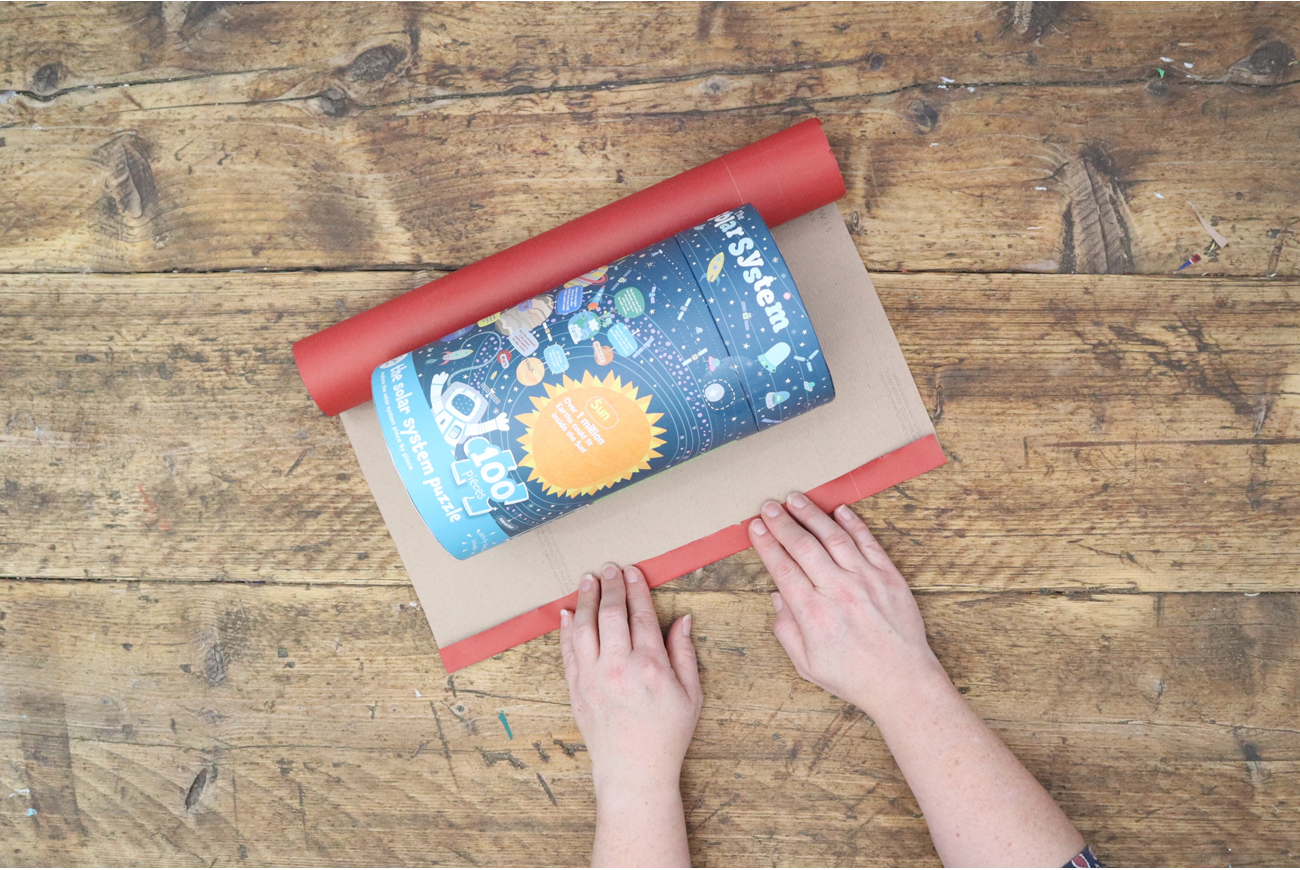
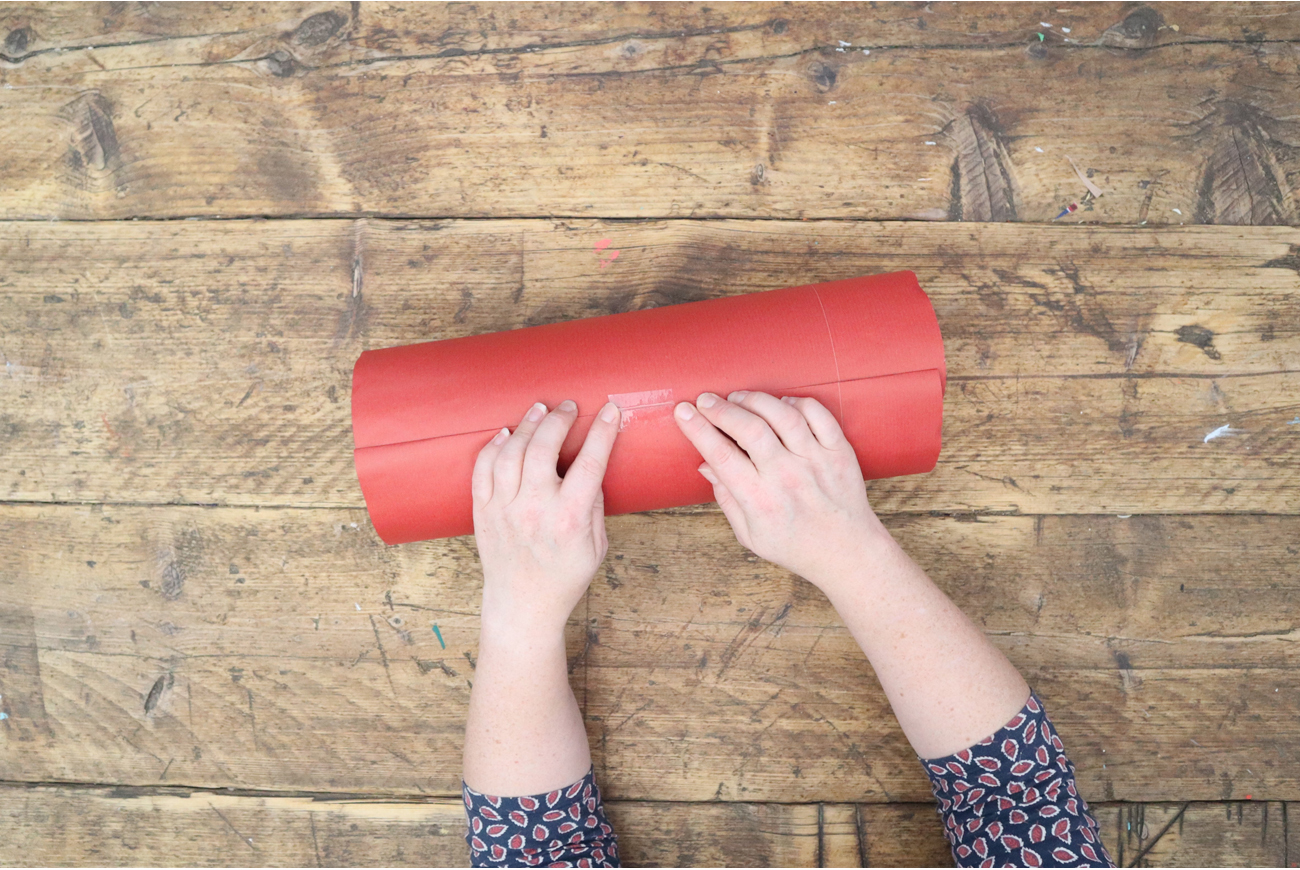
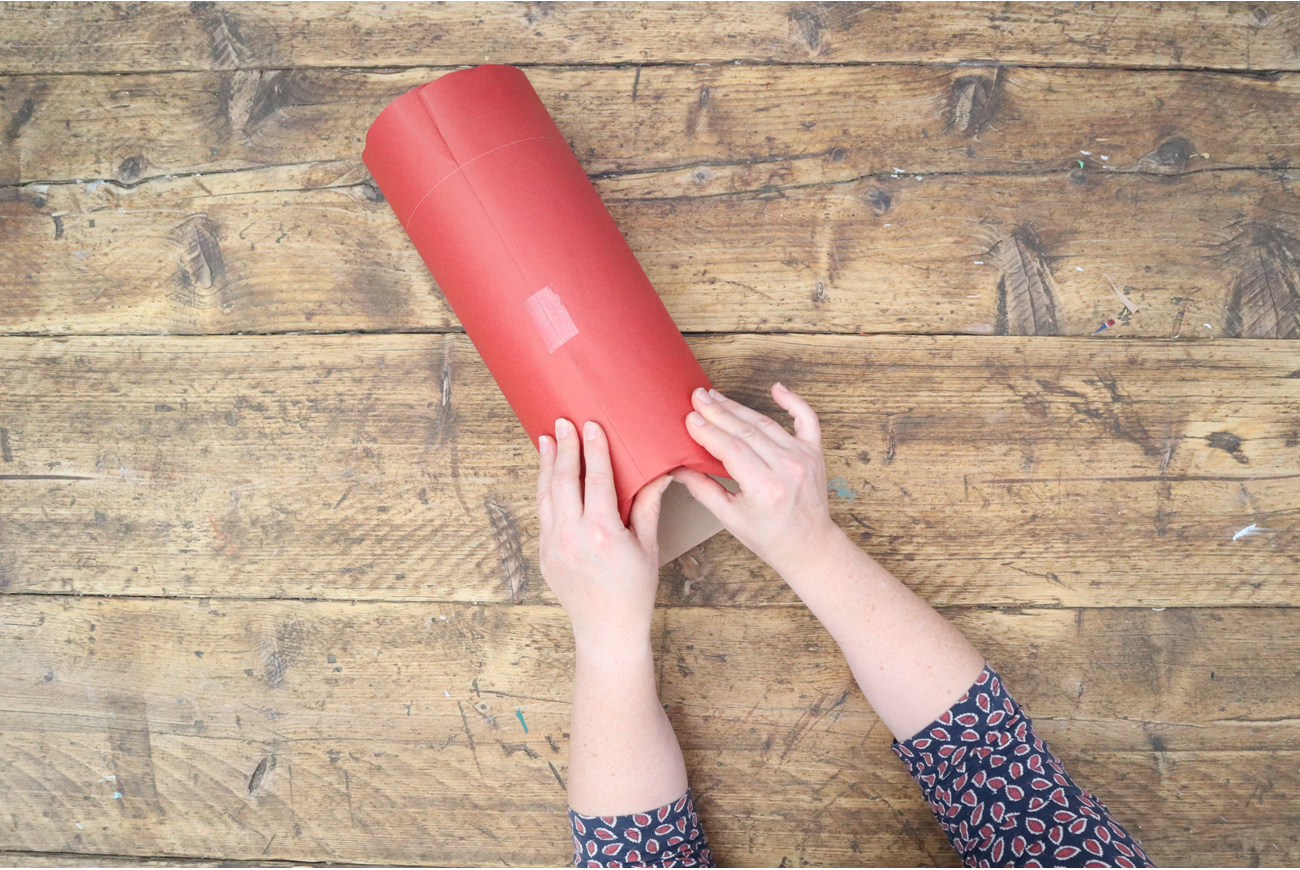
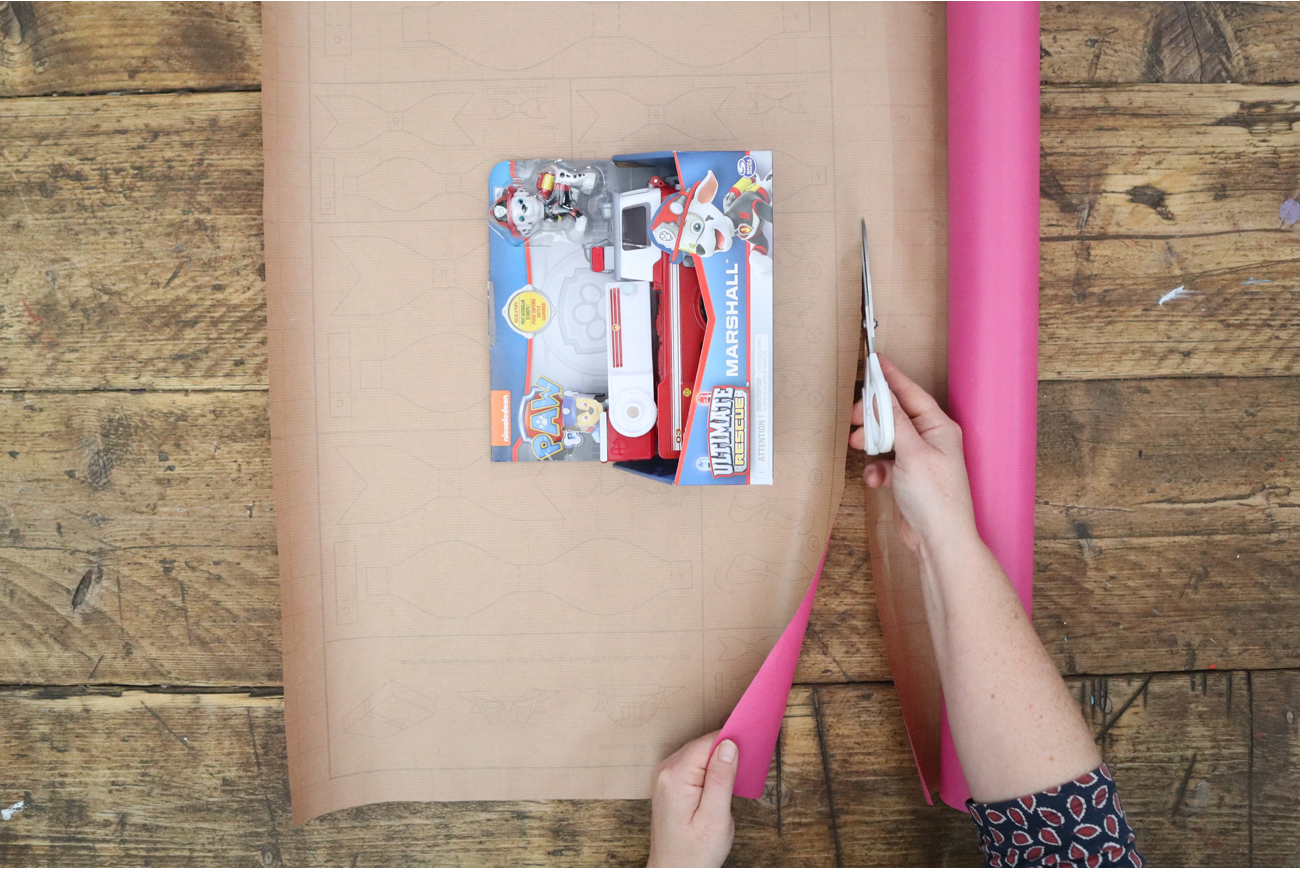
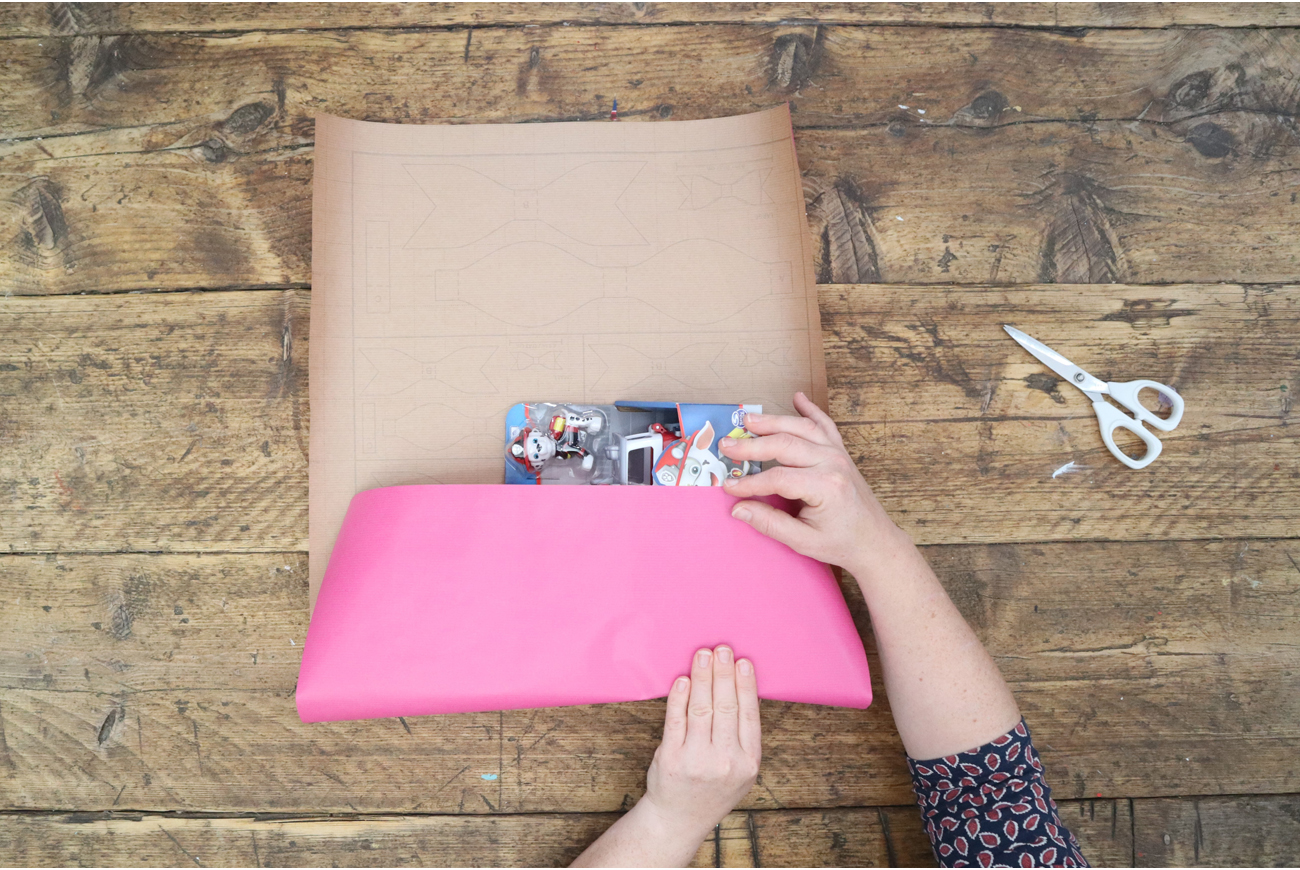
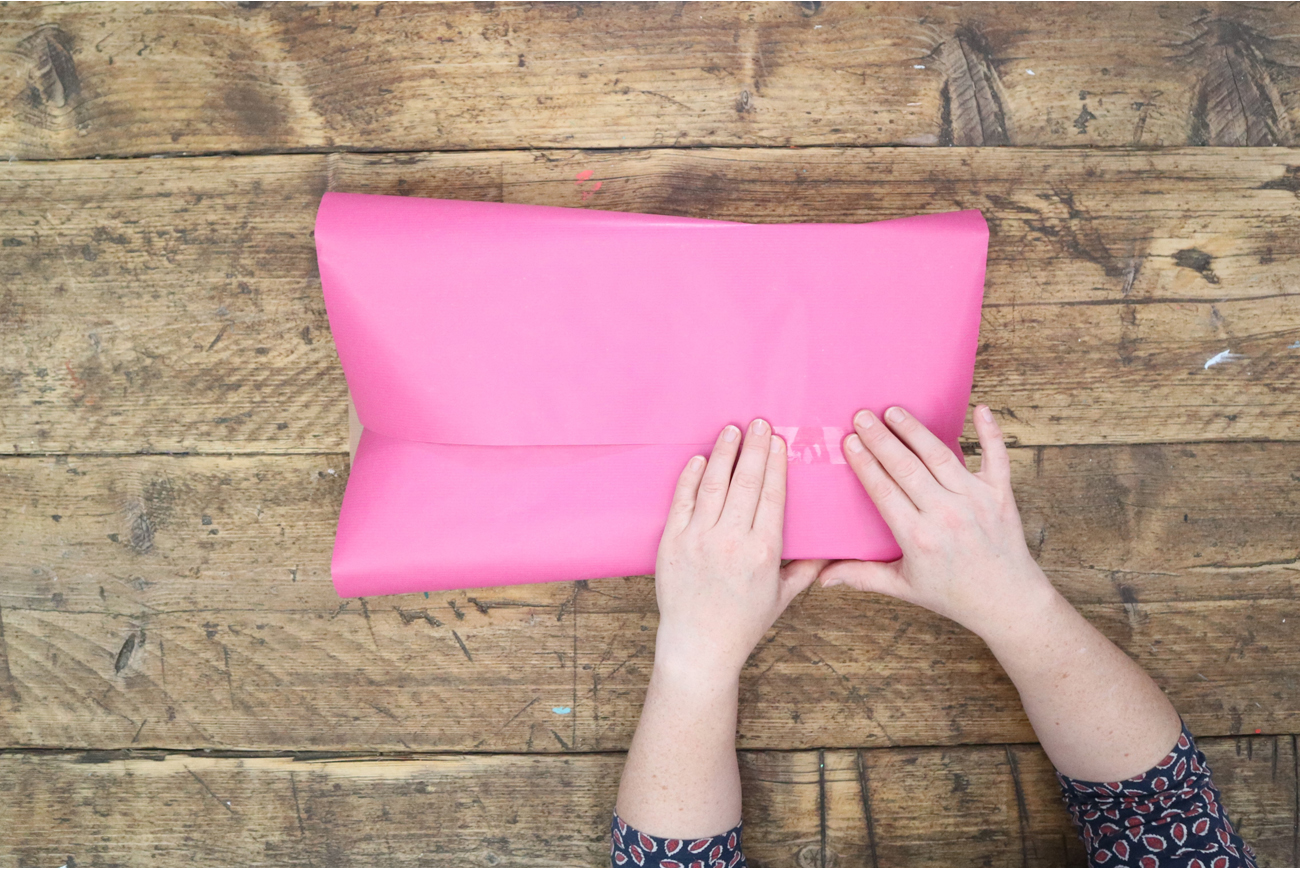
You will need: Wrapping paper, tape, scissors.
And your wrapping is done! You could now add a tag or decorations if desired.
Thicker kraft style wrapping papers help to create neat, crisp folds in this simple but effective technique.
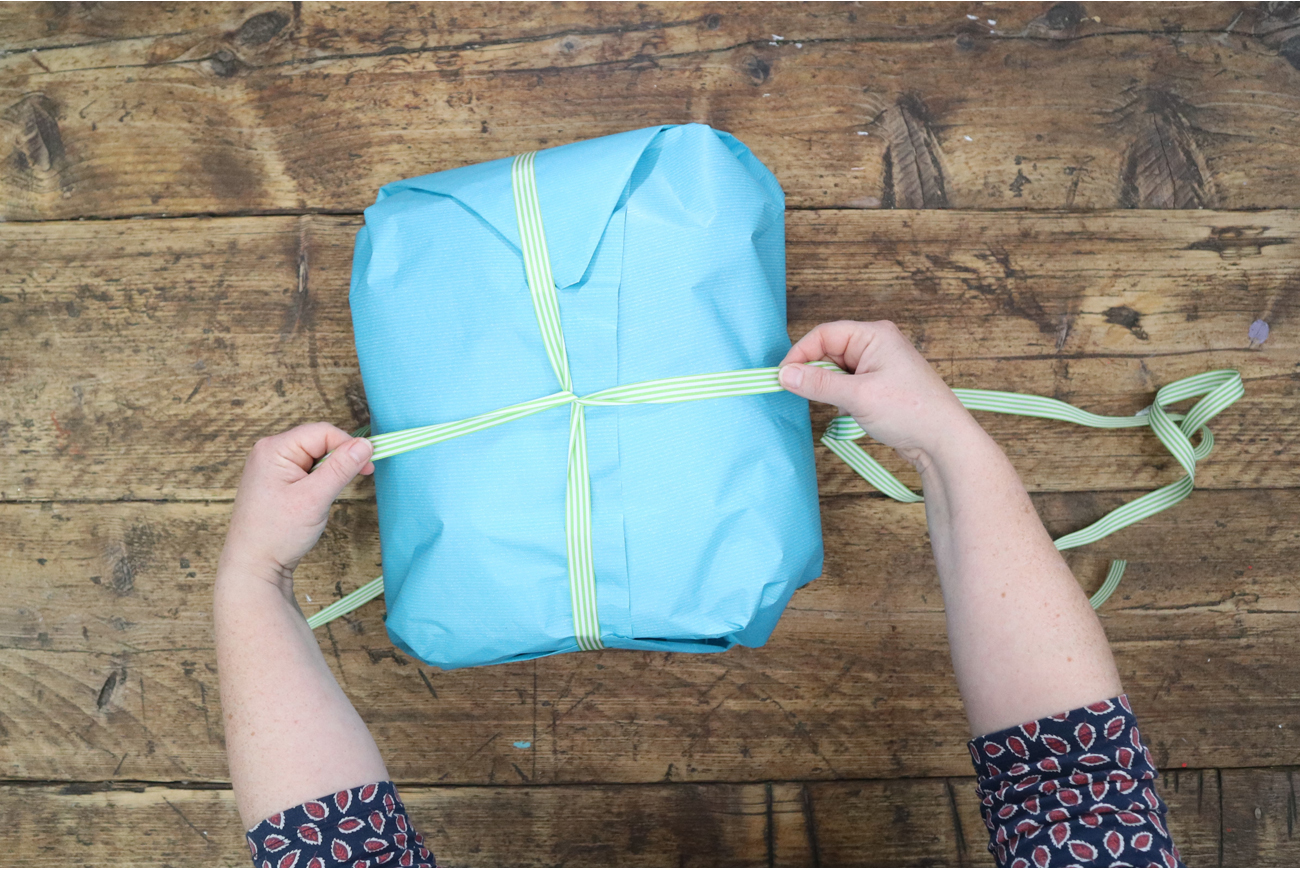
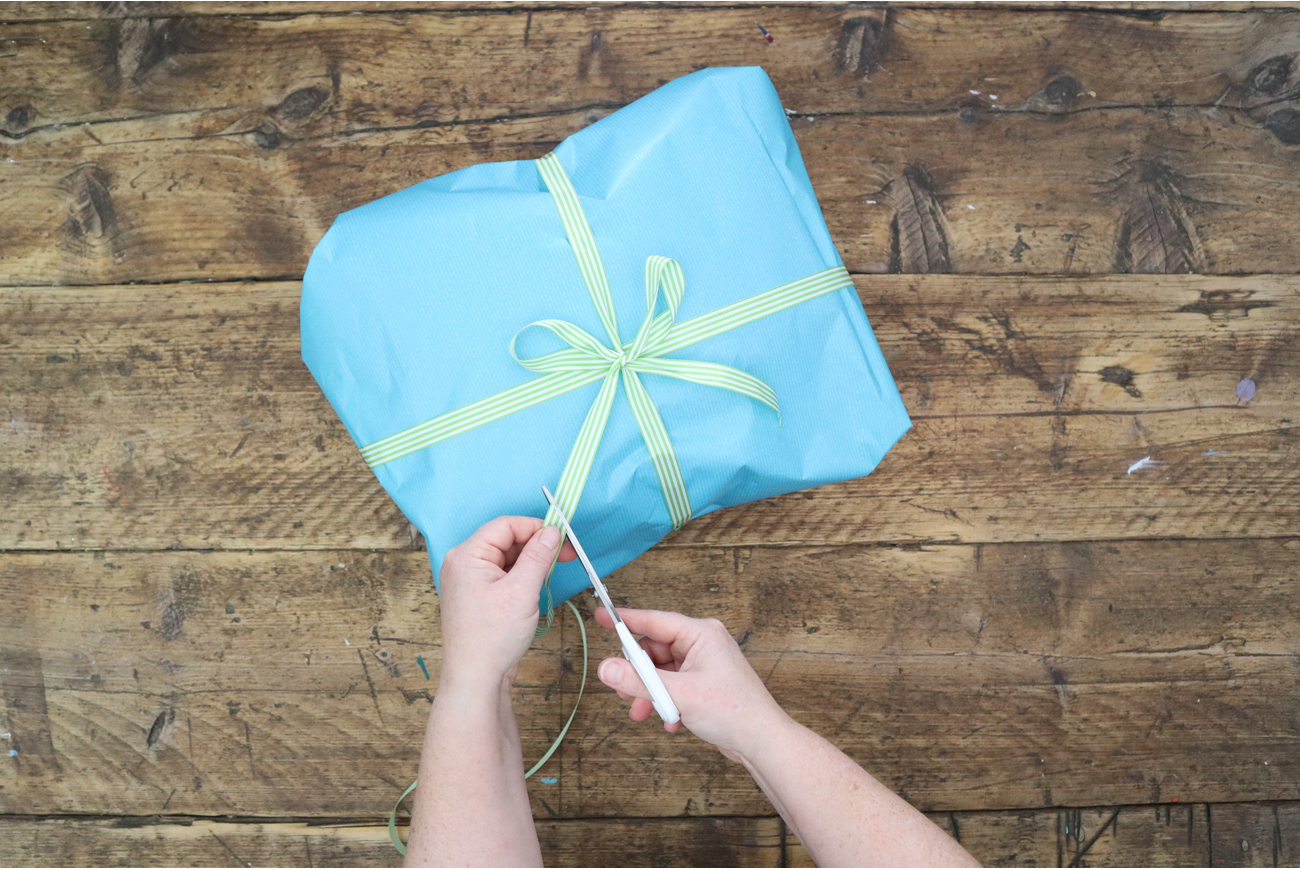
You will need: Wrapping paper, tape, scissors, and ribbon(s) optional.
And your wrapping is done! You could now add a tag or decorations if desired.
We are using a thin kraft wrapping paper in the images above – but alternatively, tissue paper could work well for this. Remember, with thinner paper you may need more than one layer to ensure your lovely gift is hidden inside.
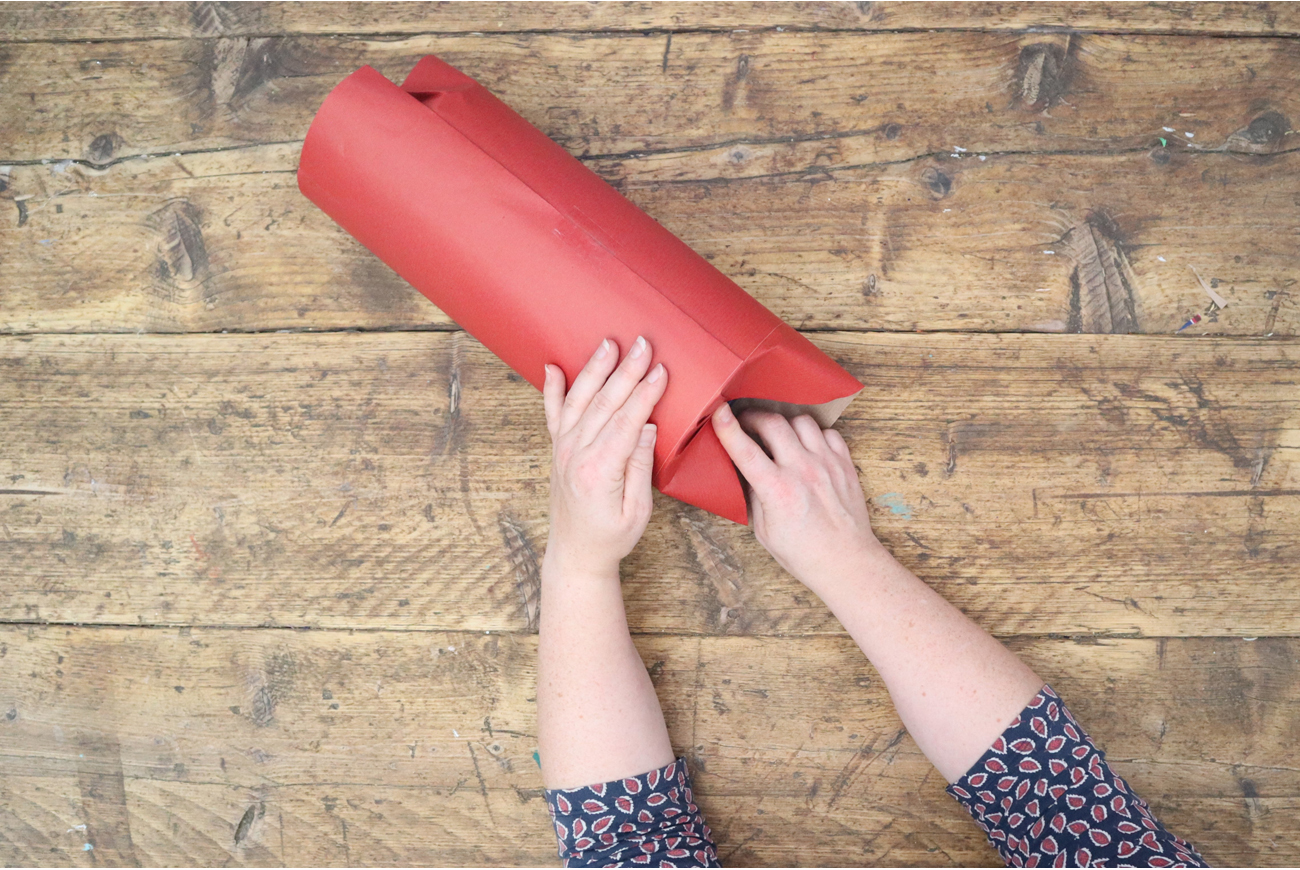
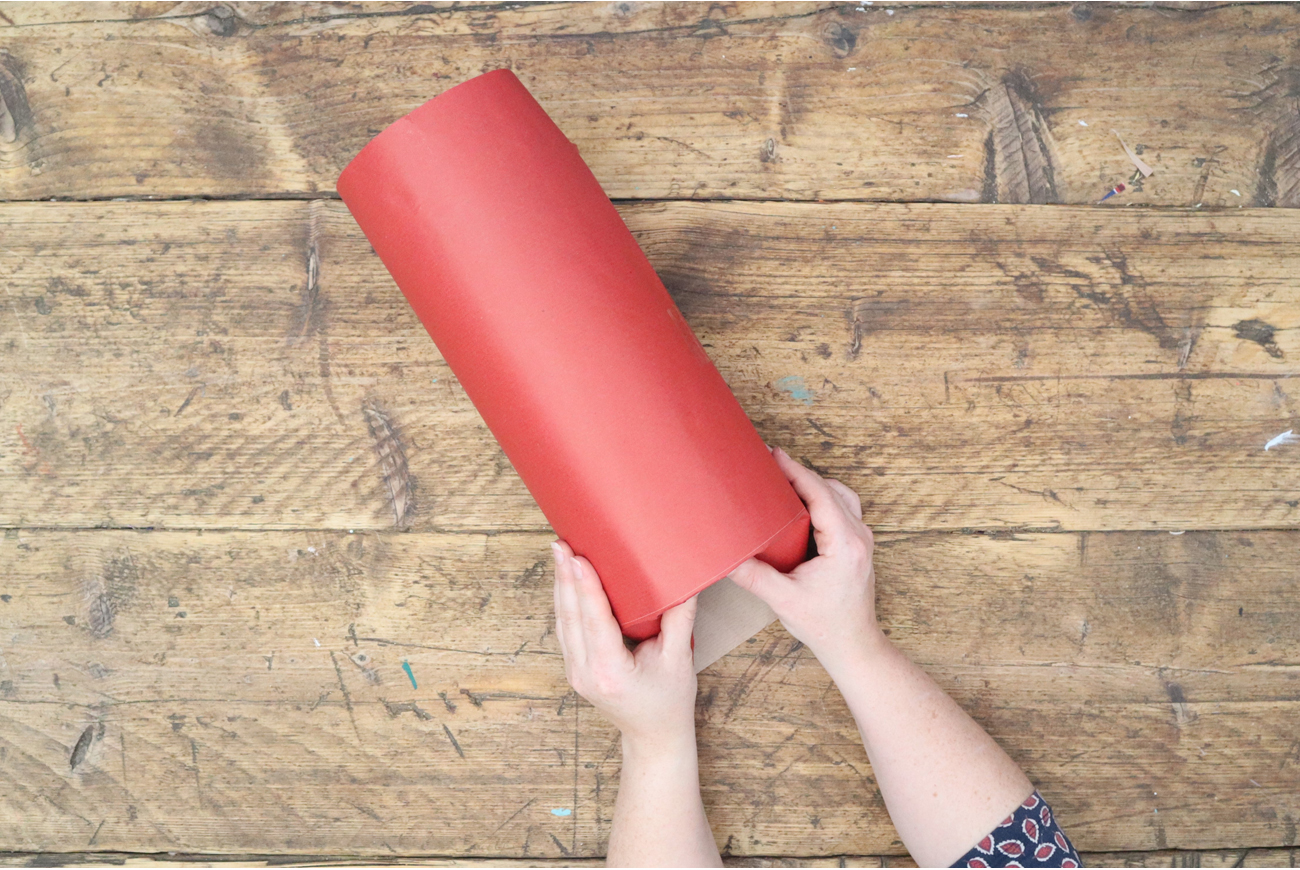
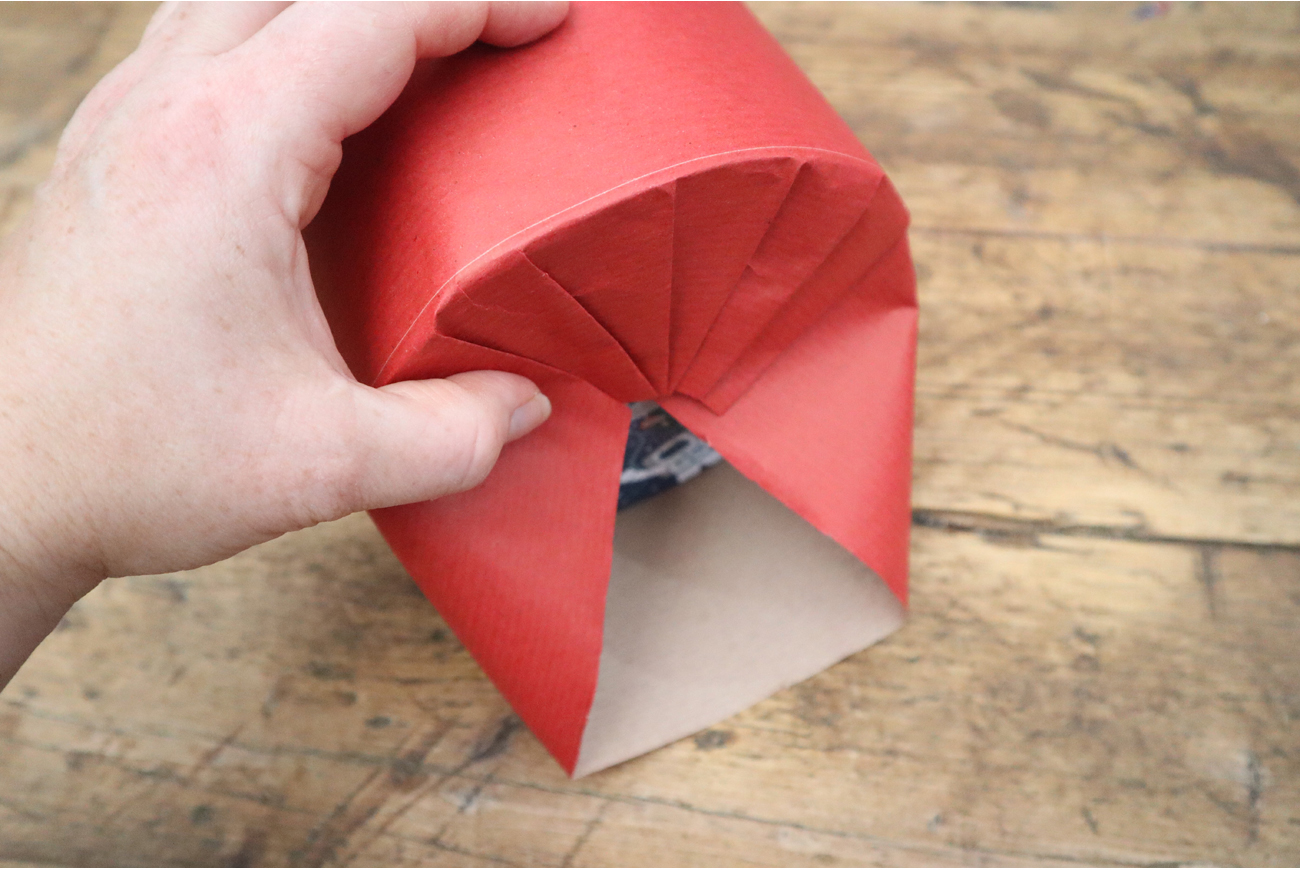
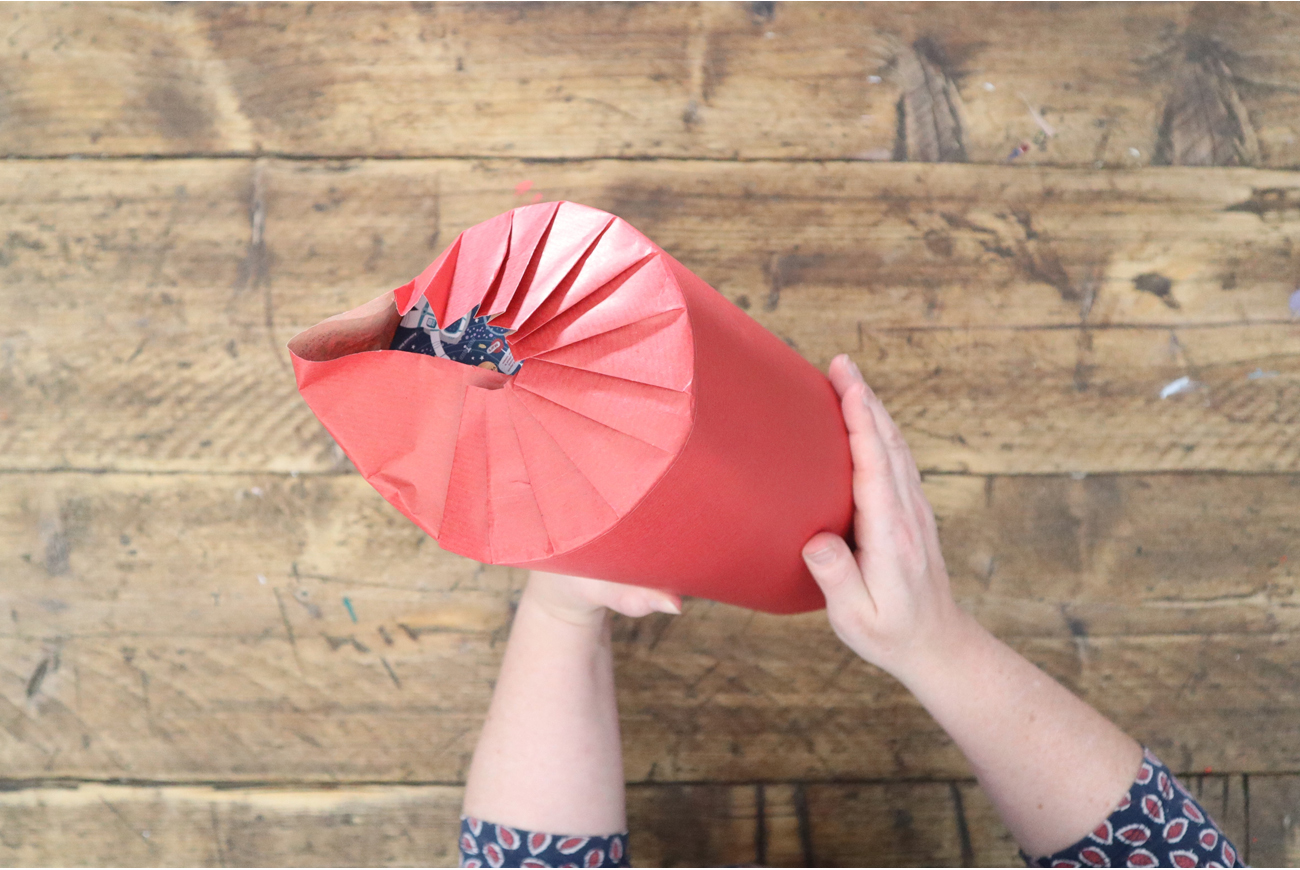
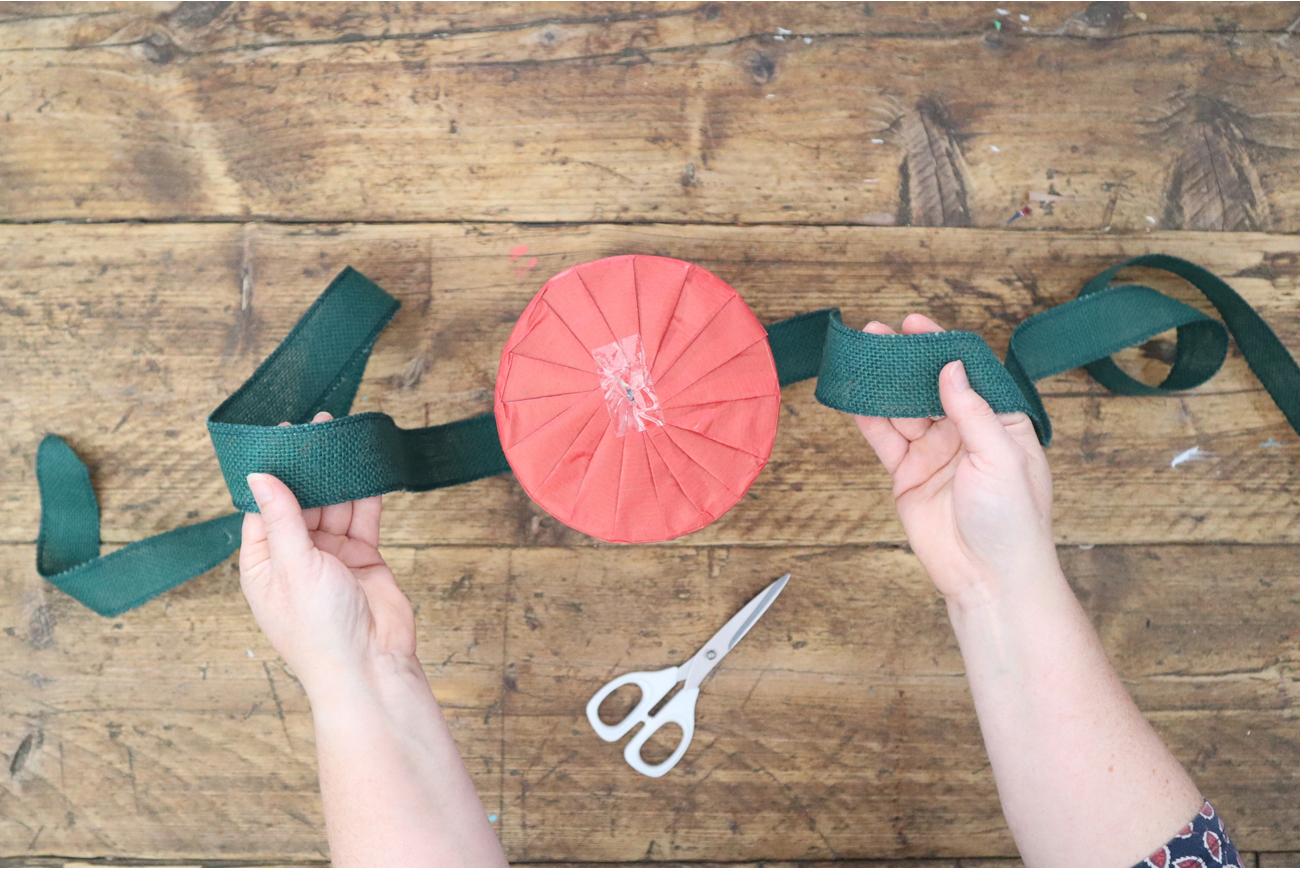
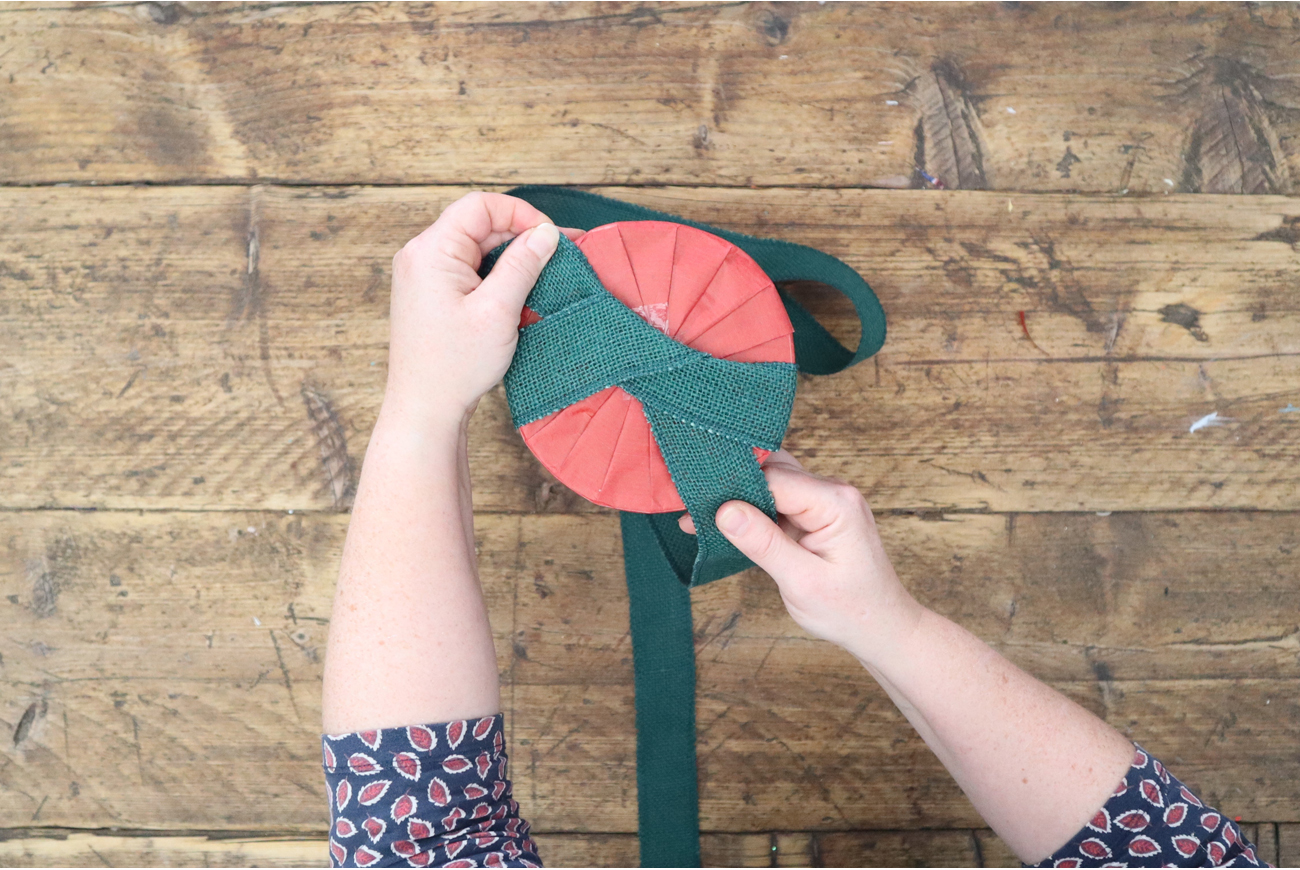
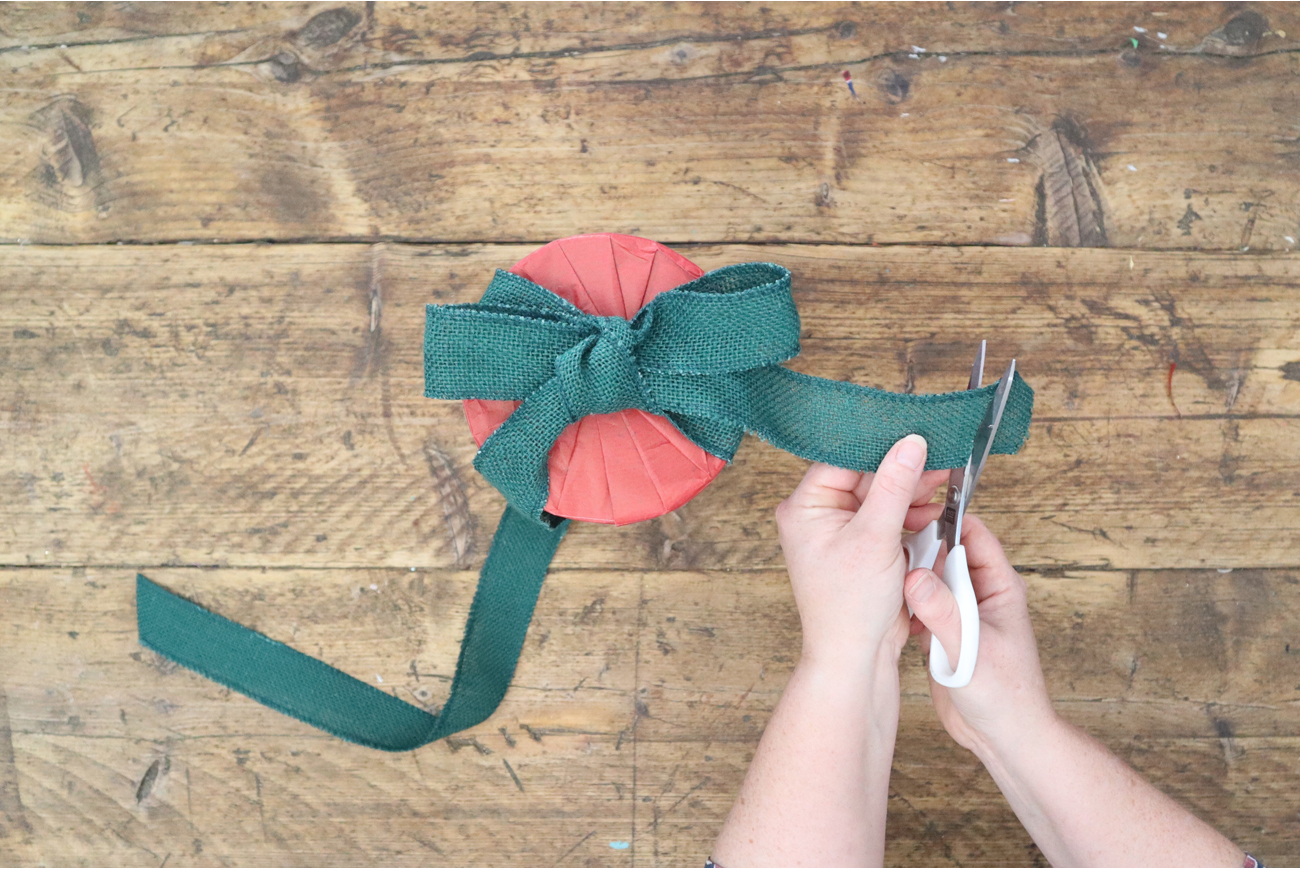
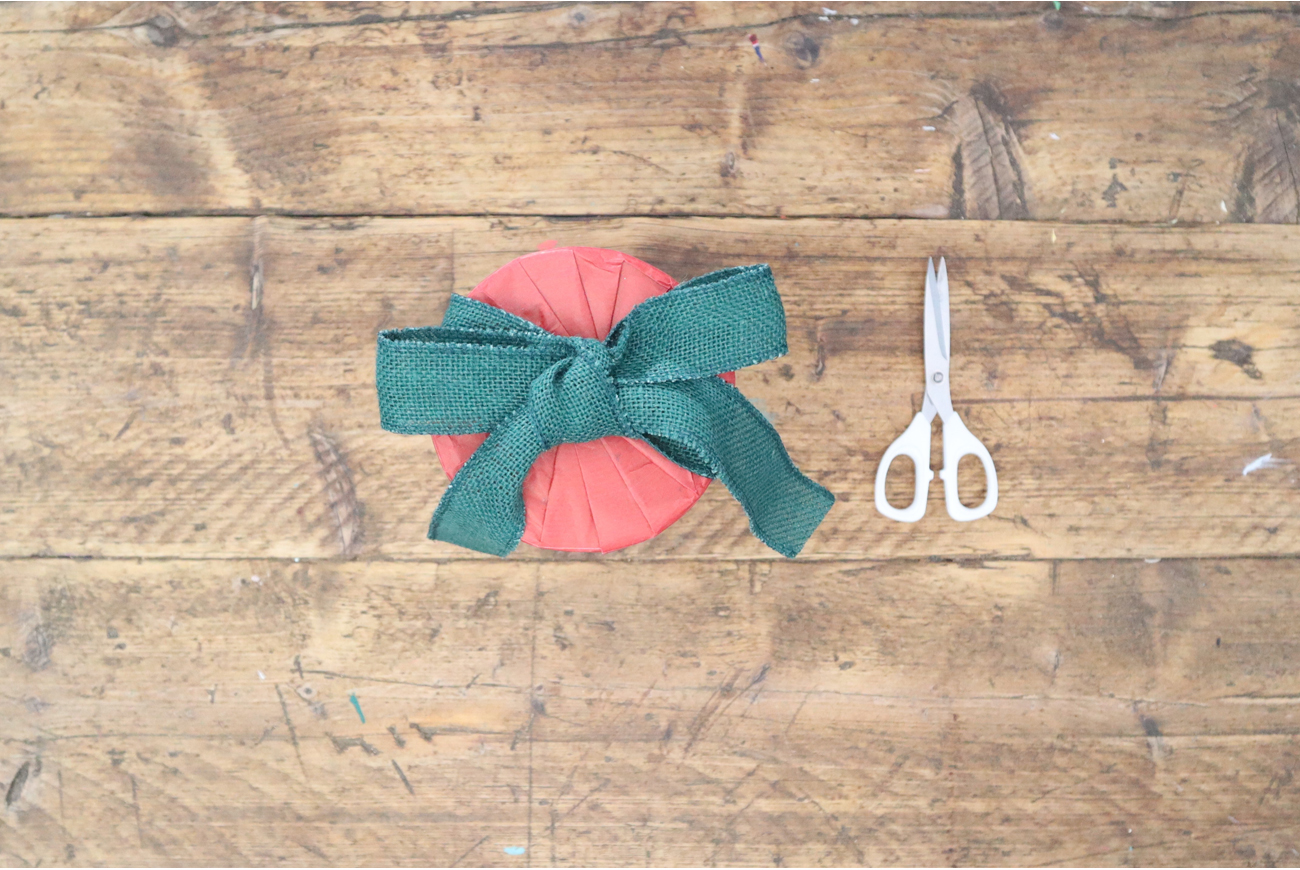
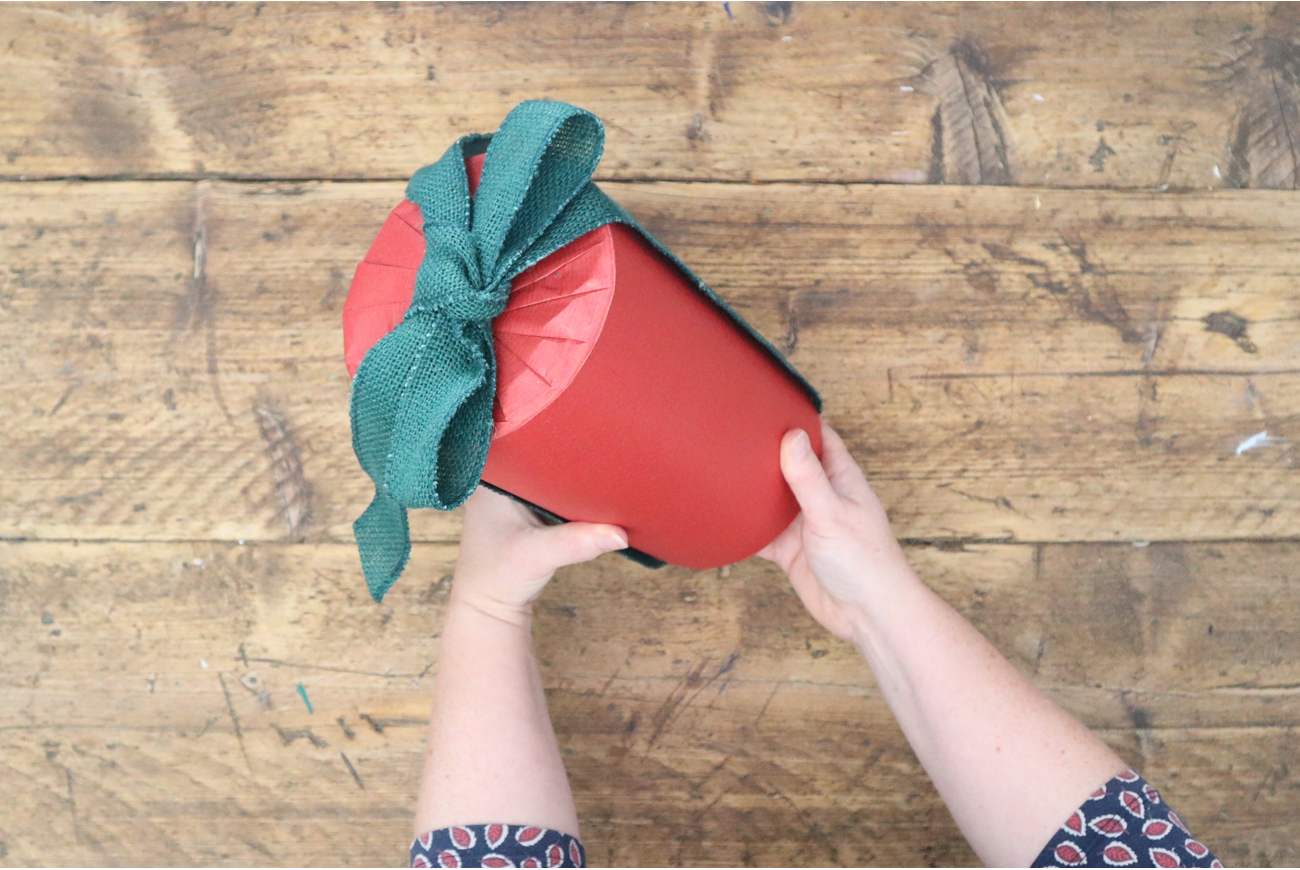
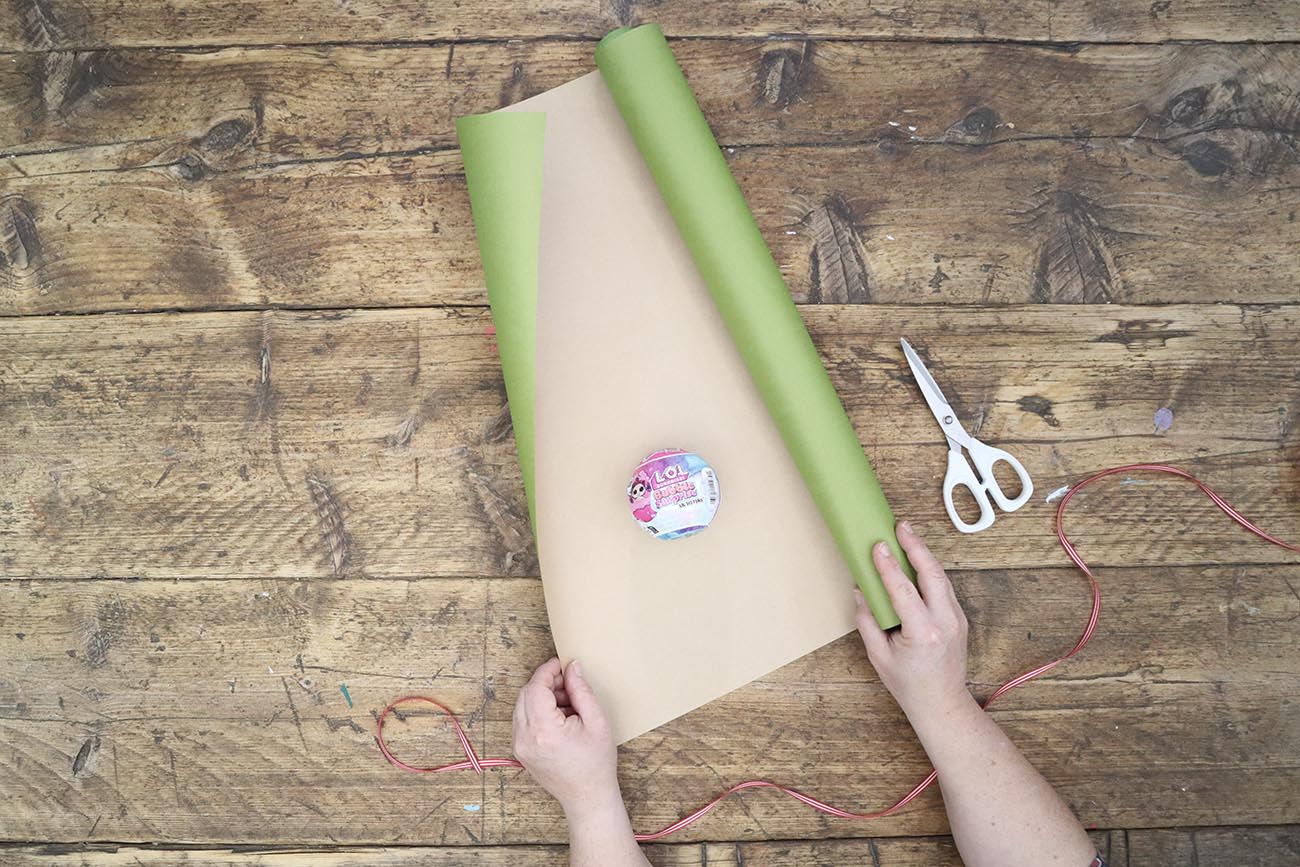
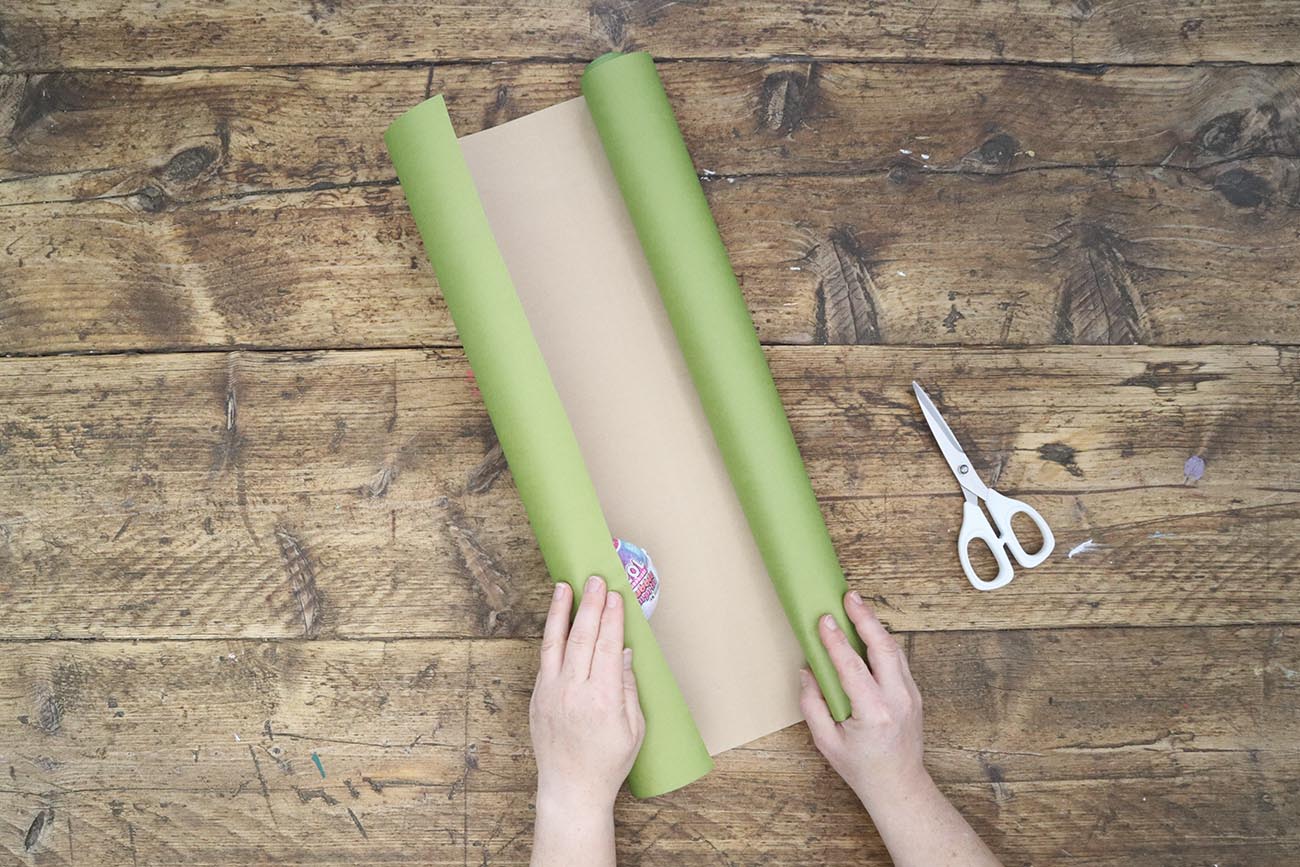
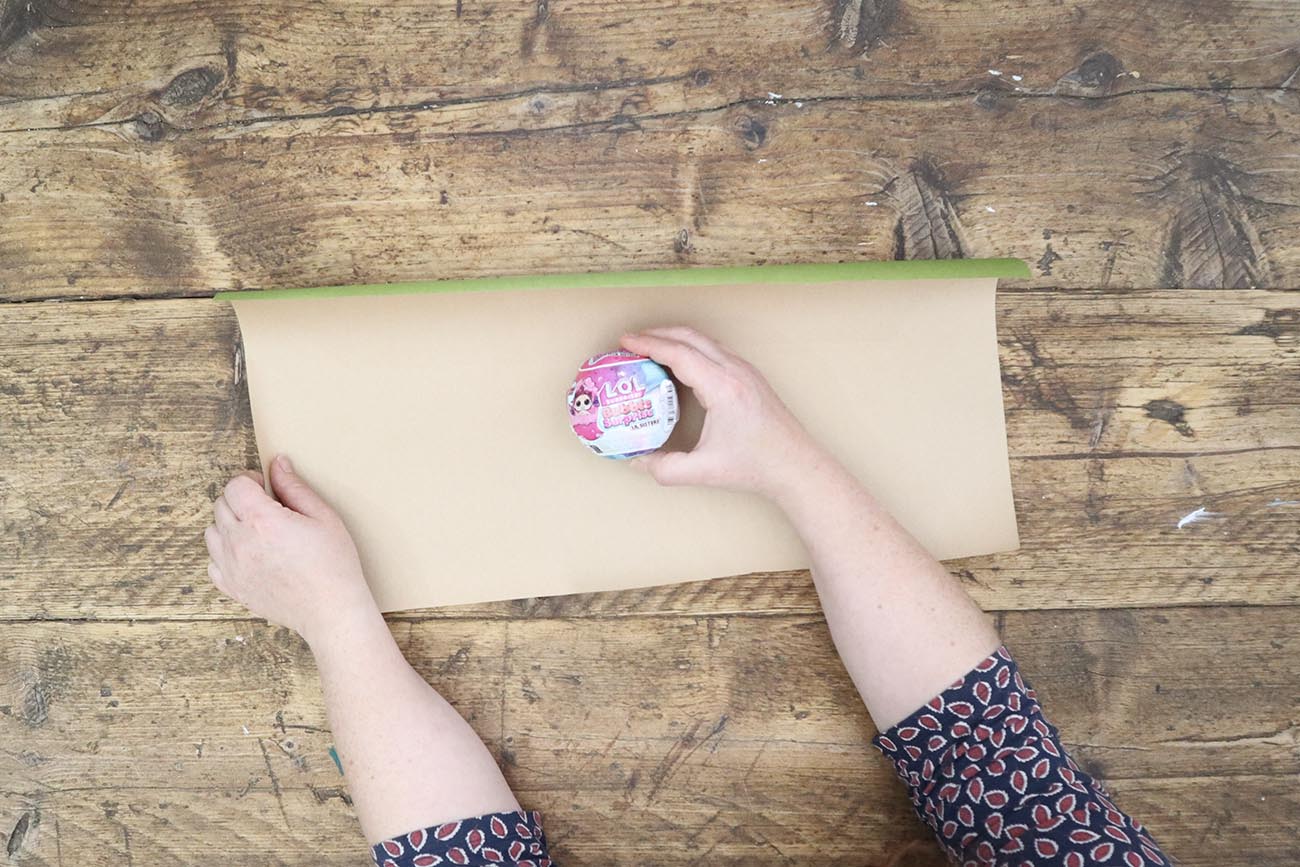
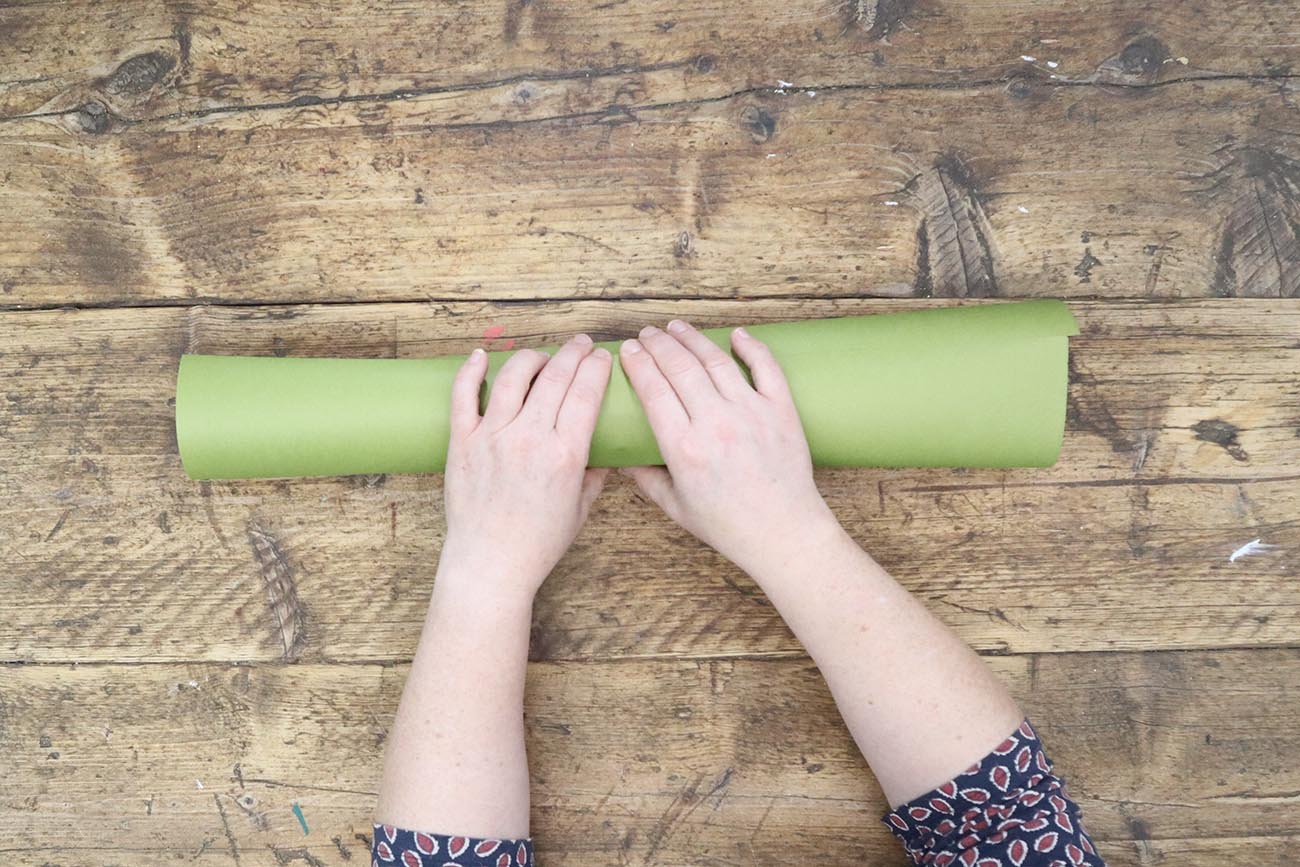
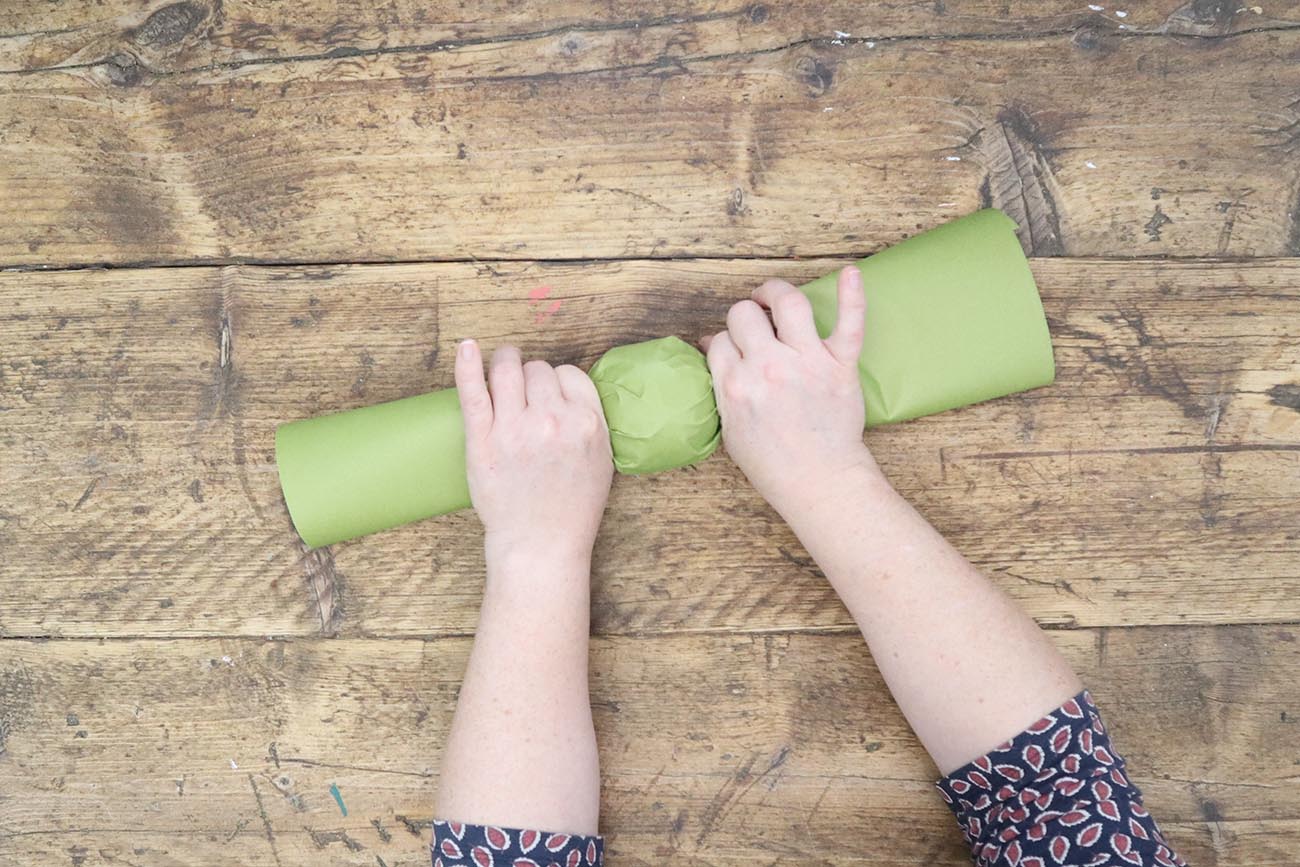
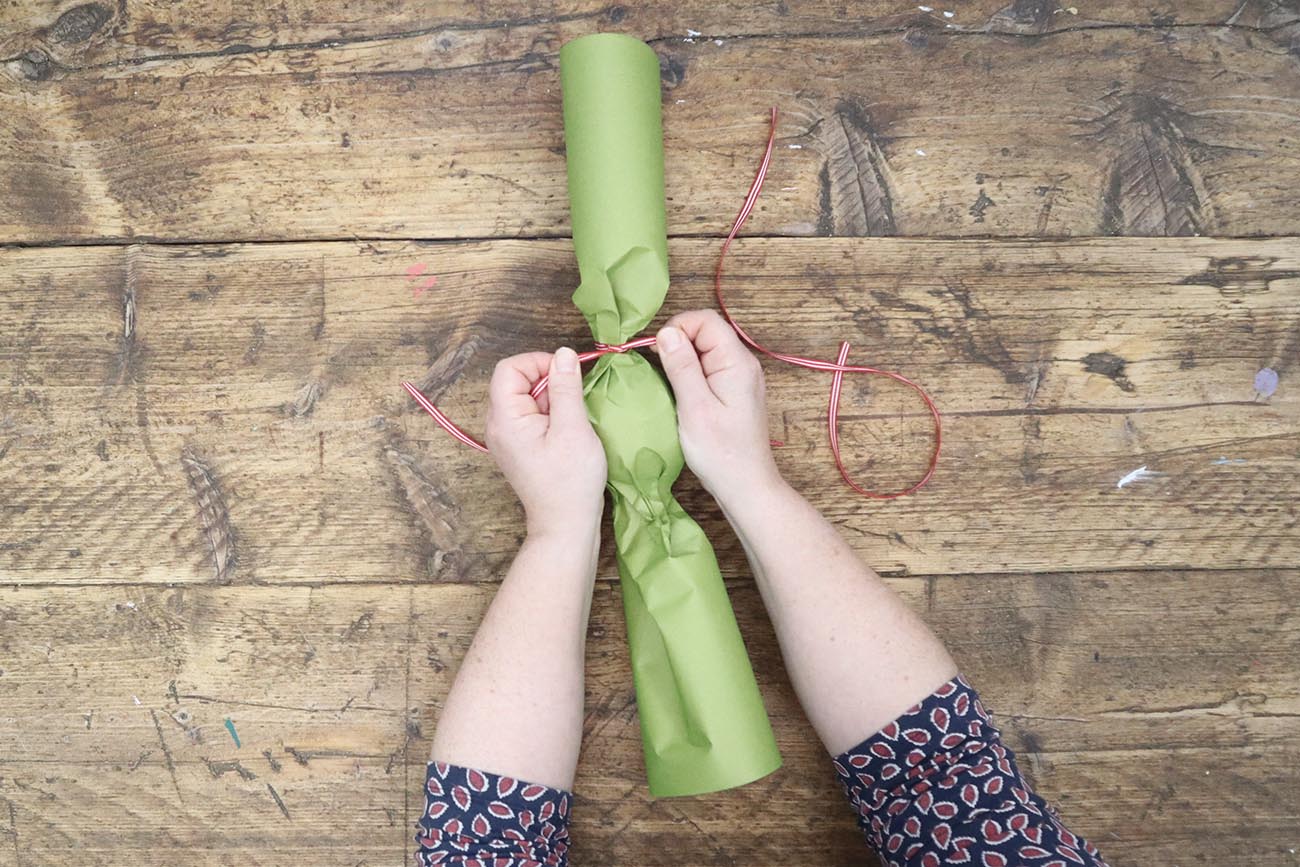
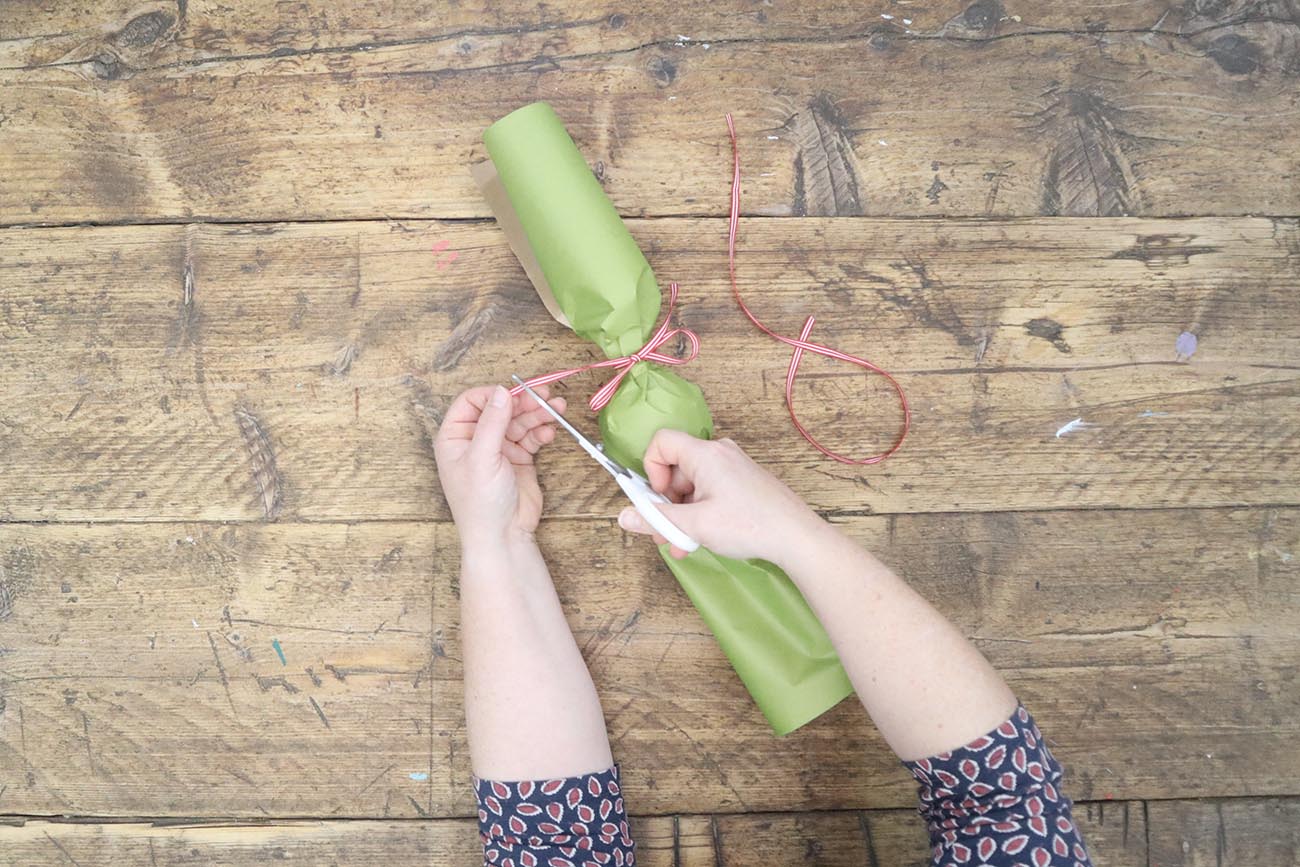
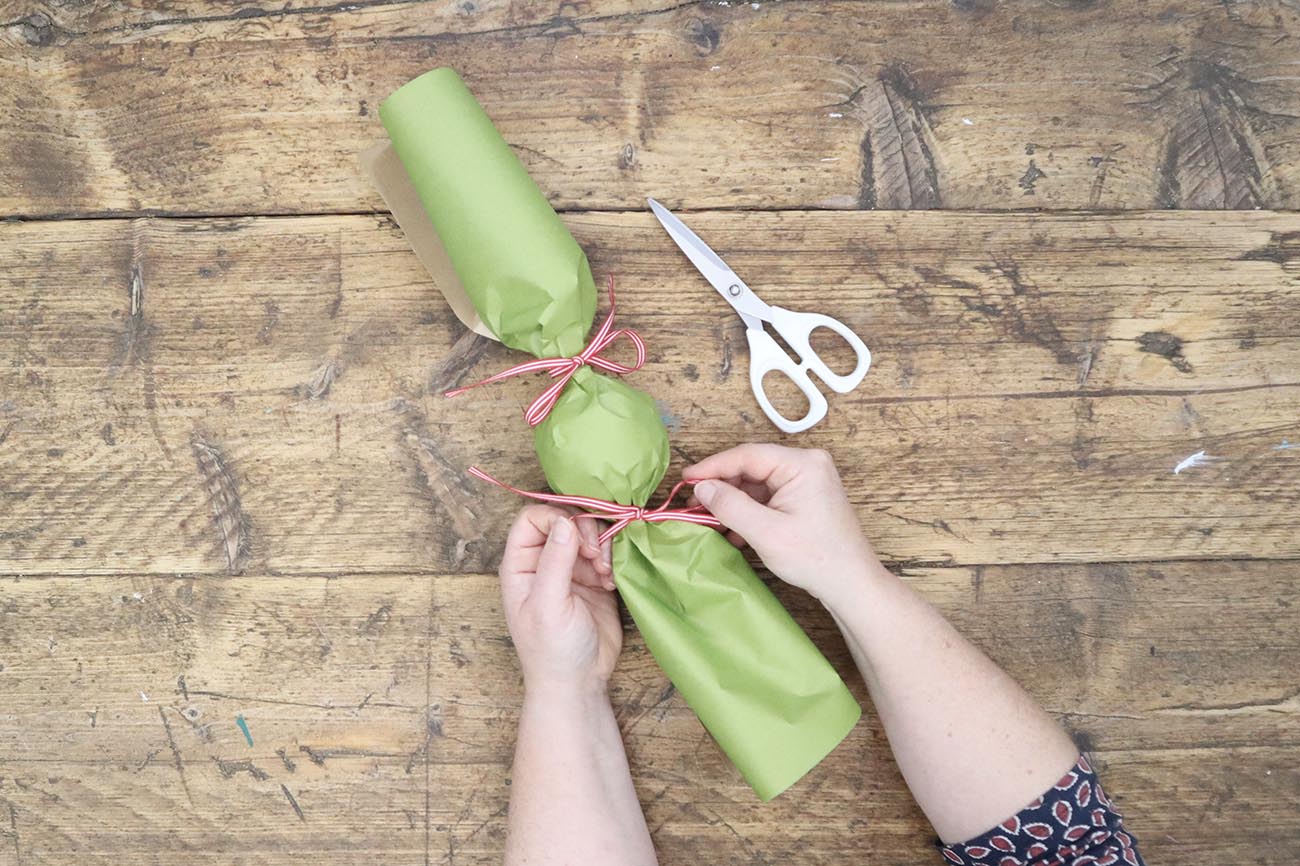
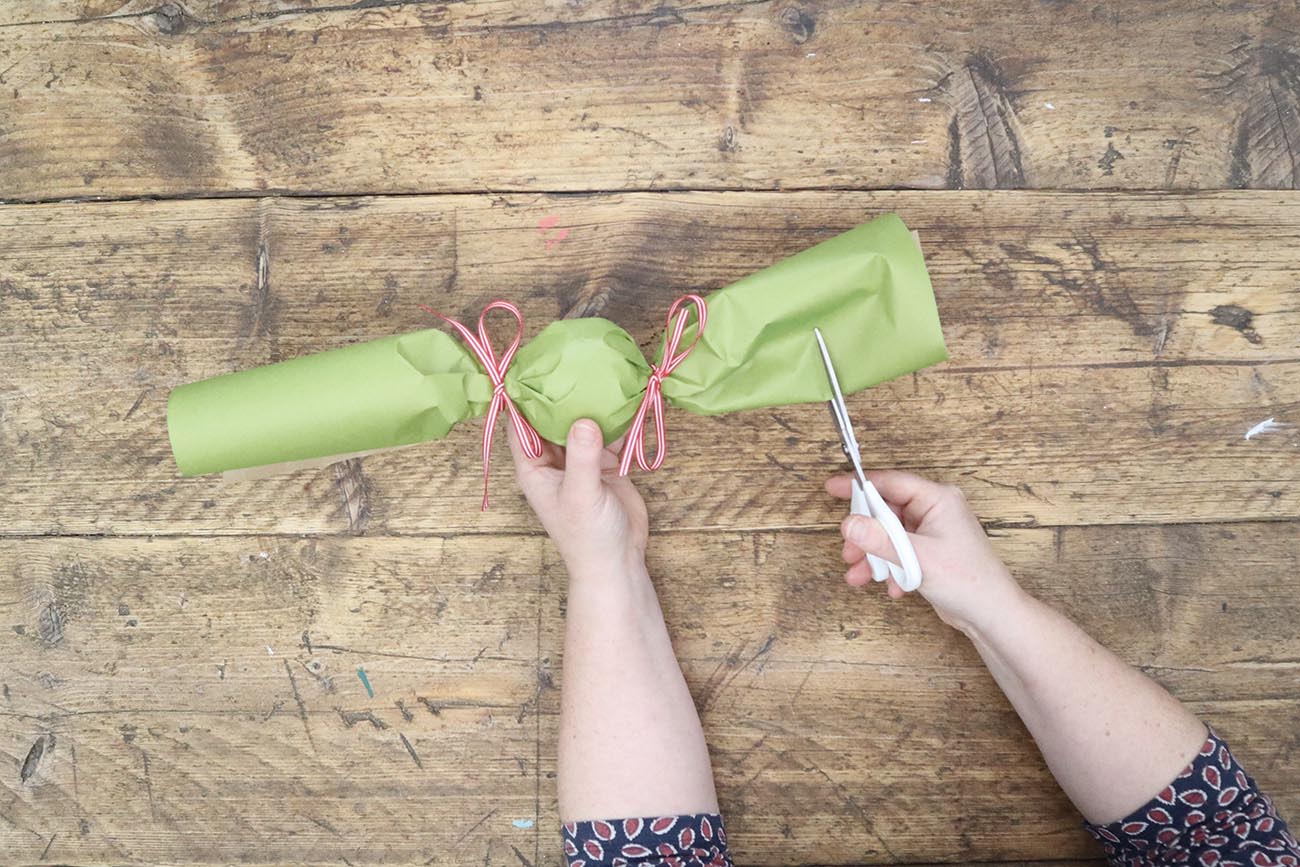
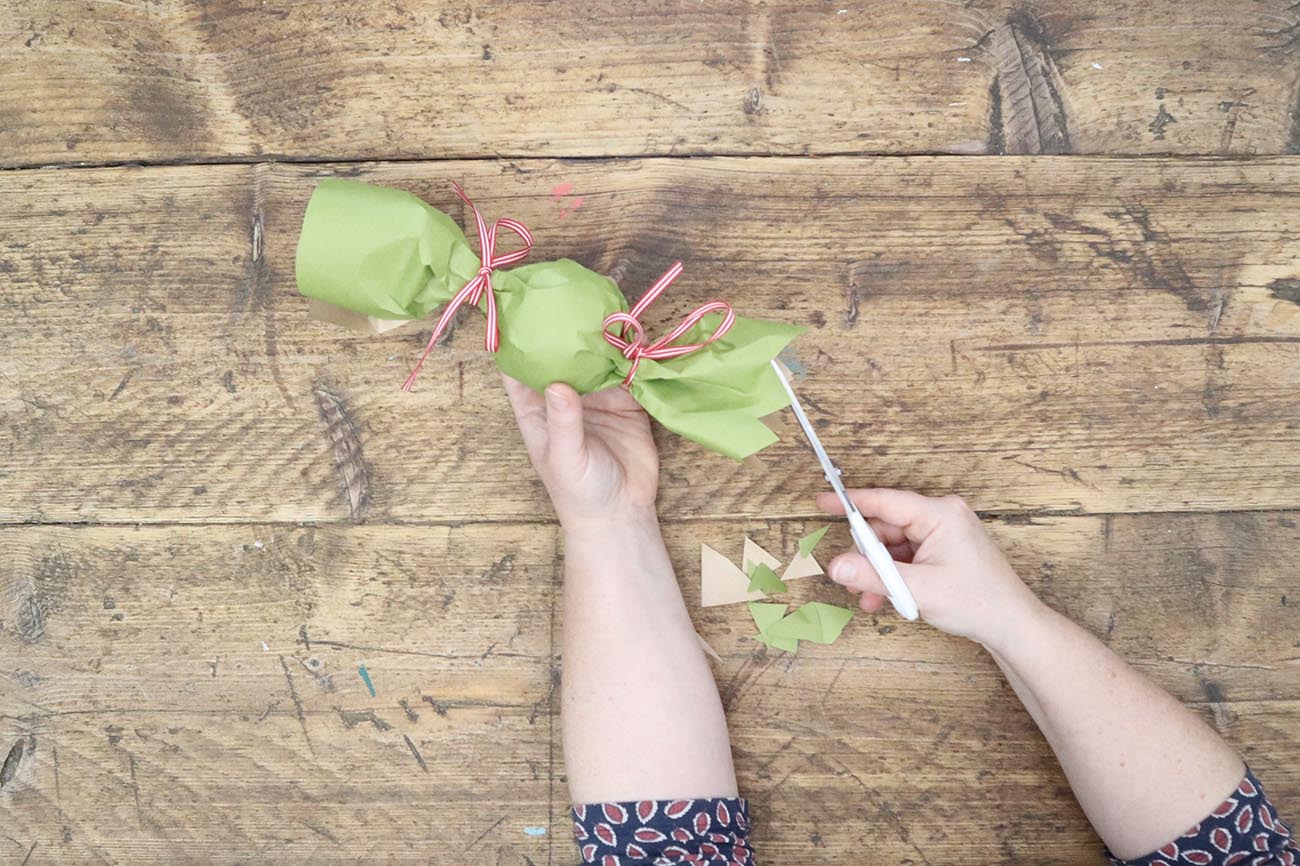
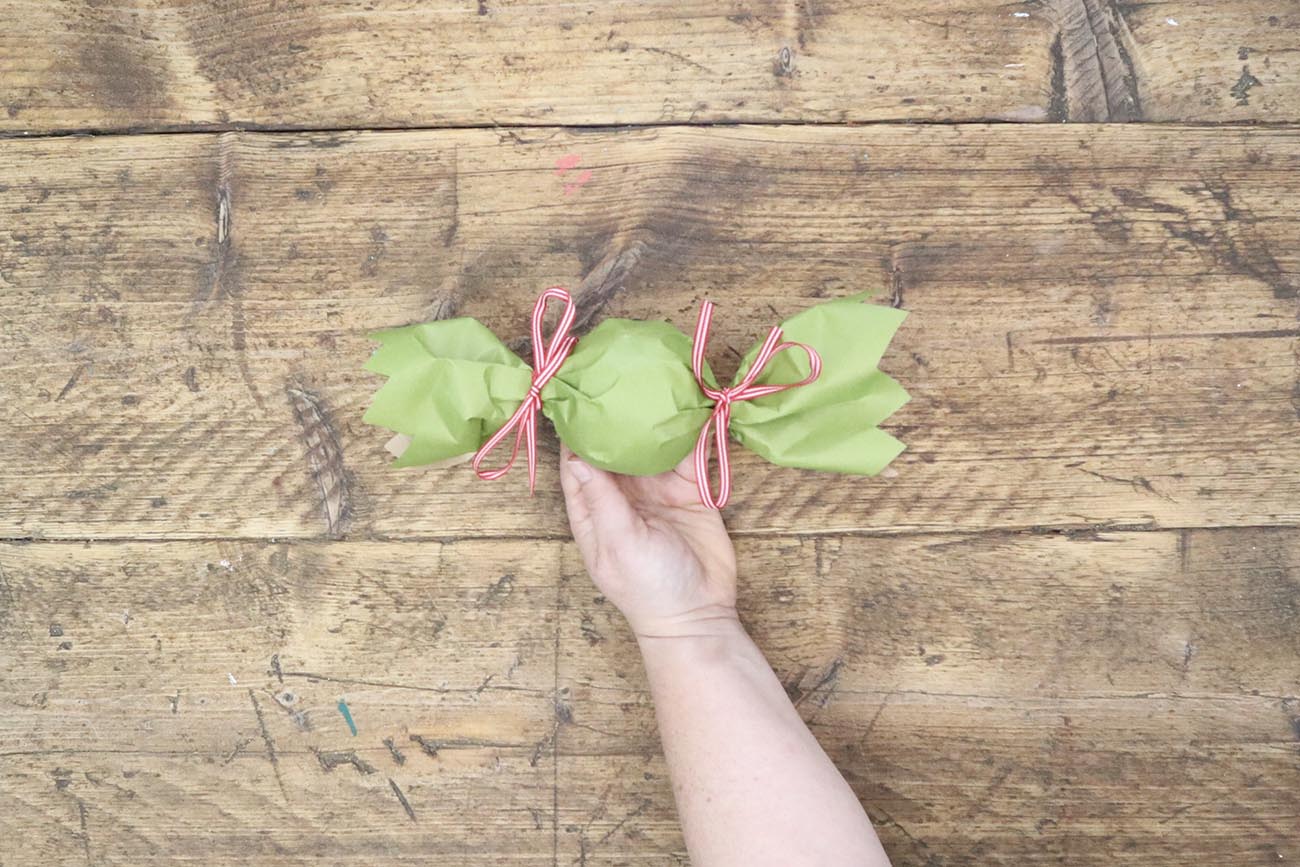
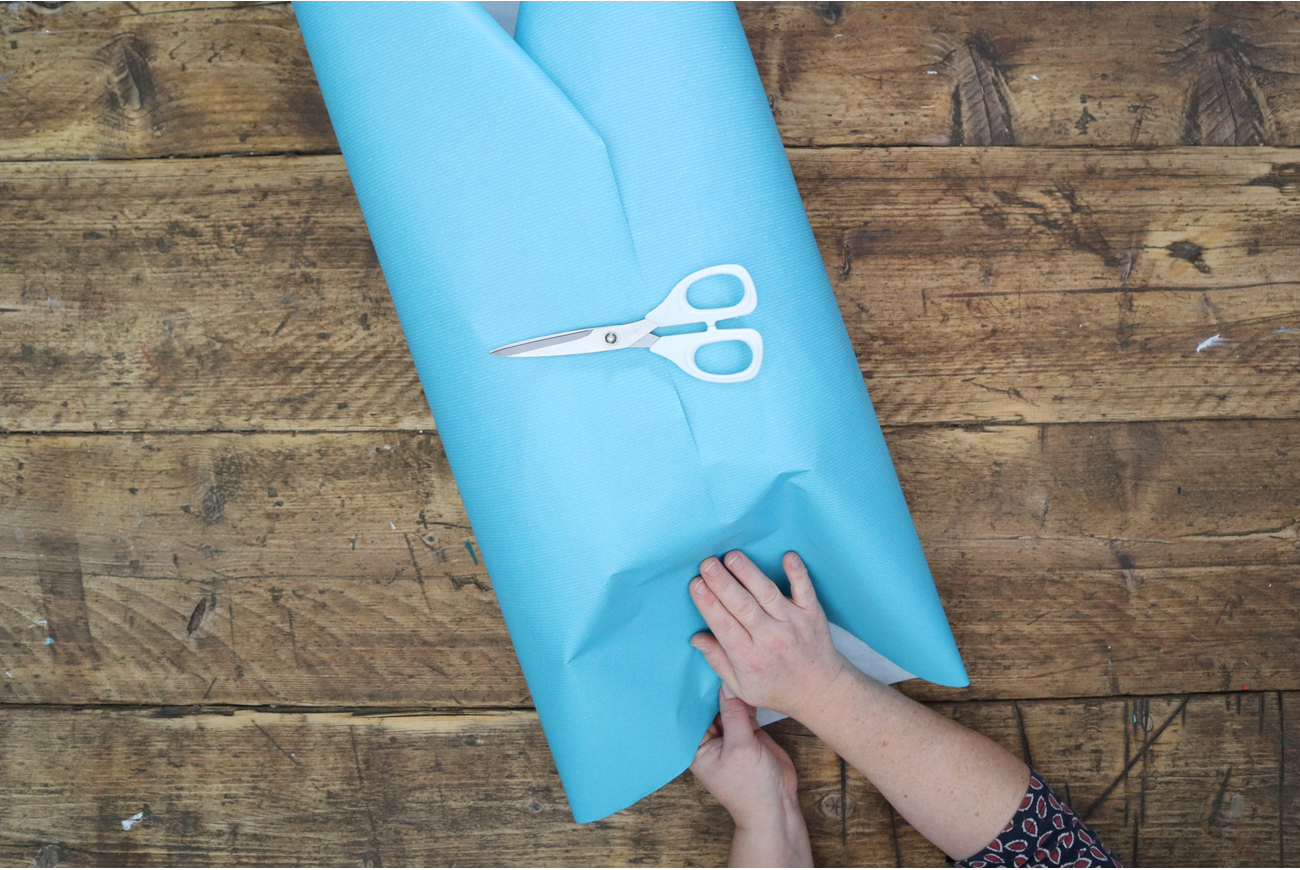
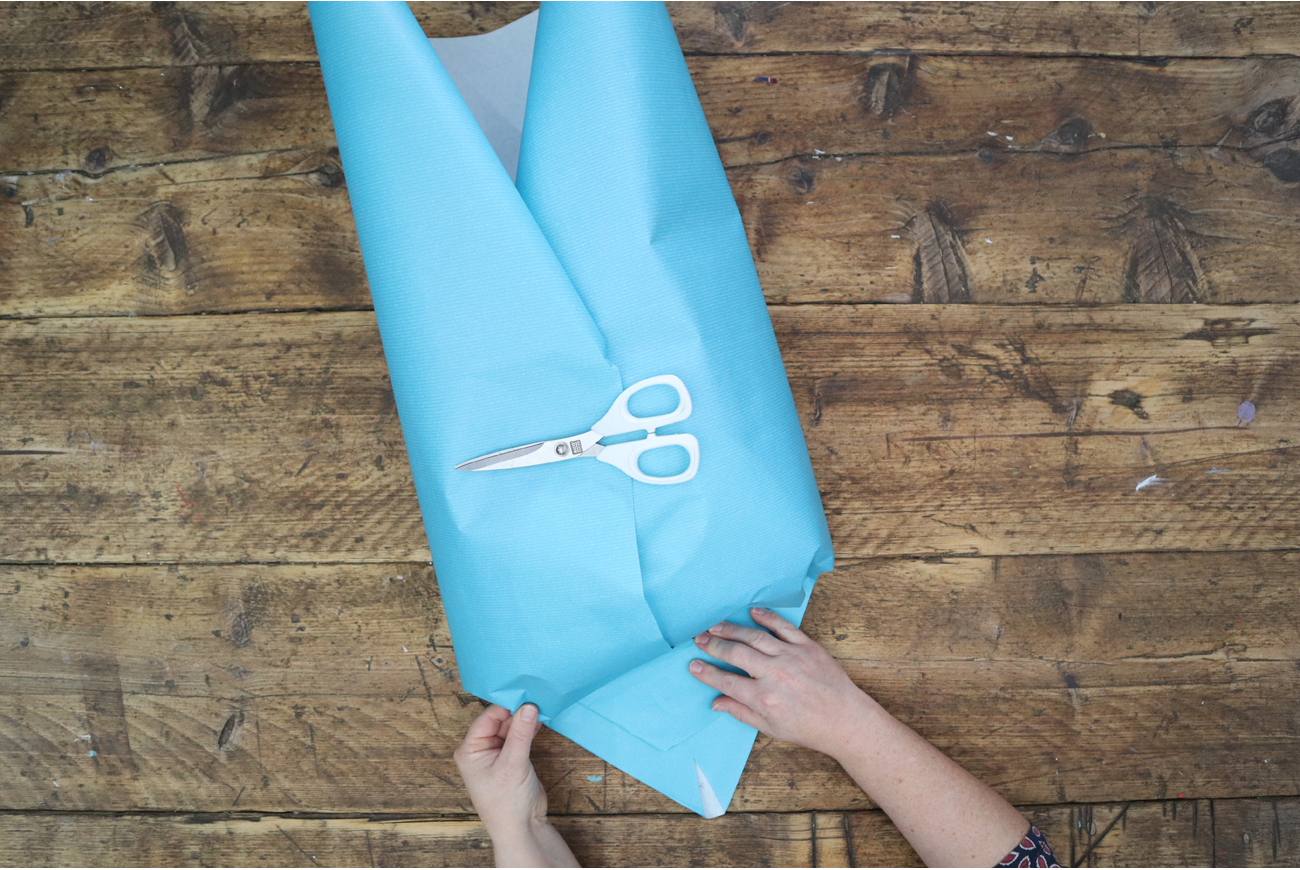
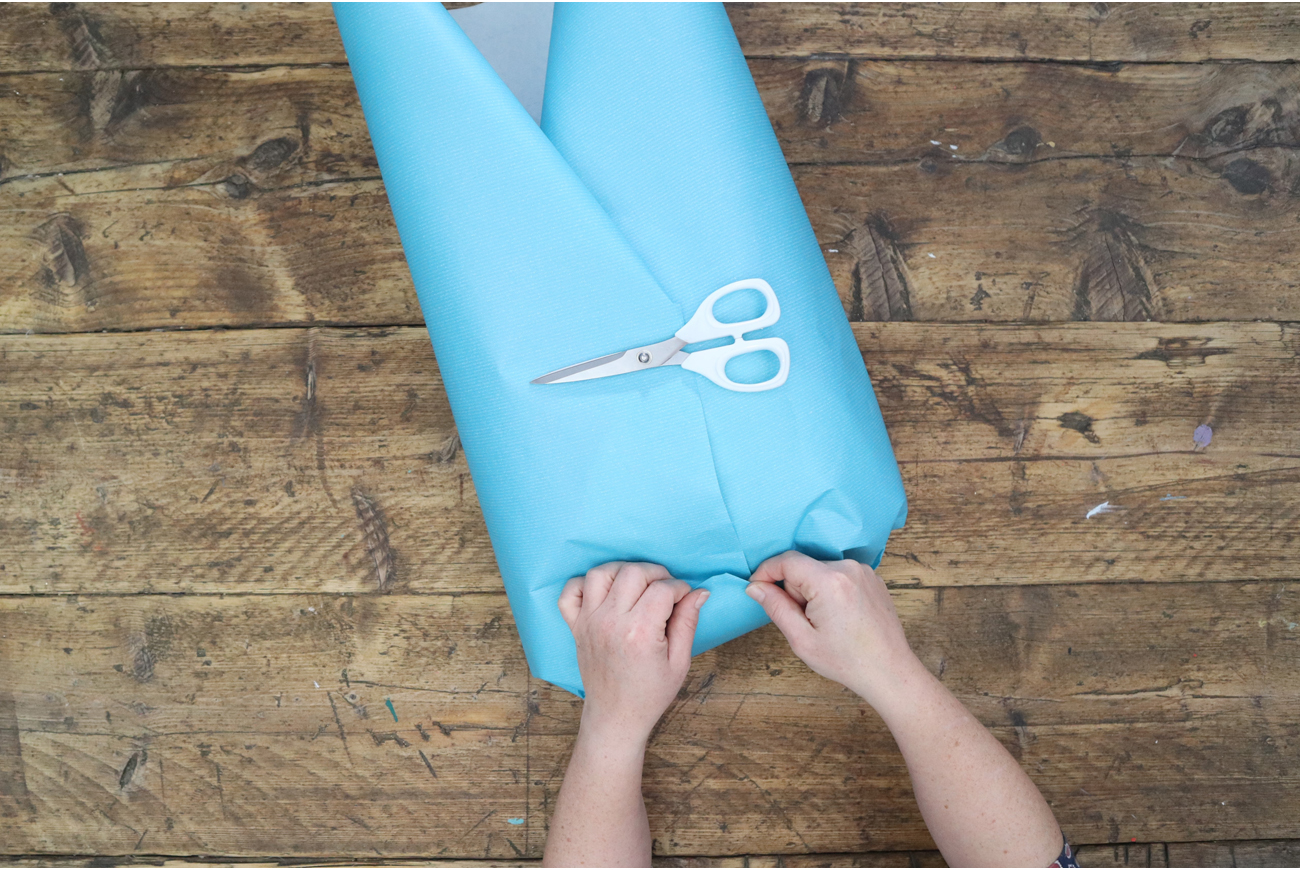
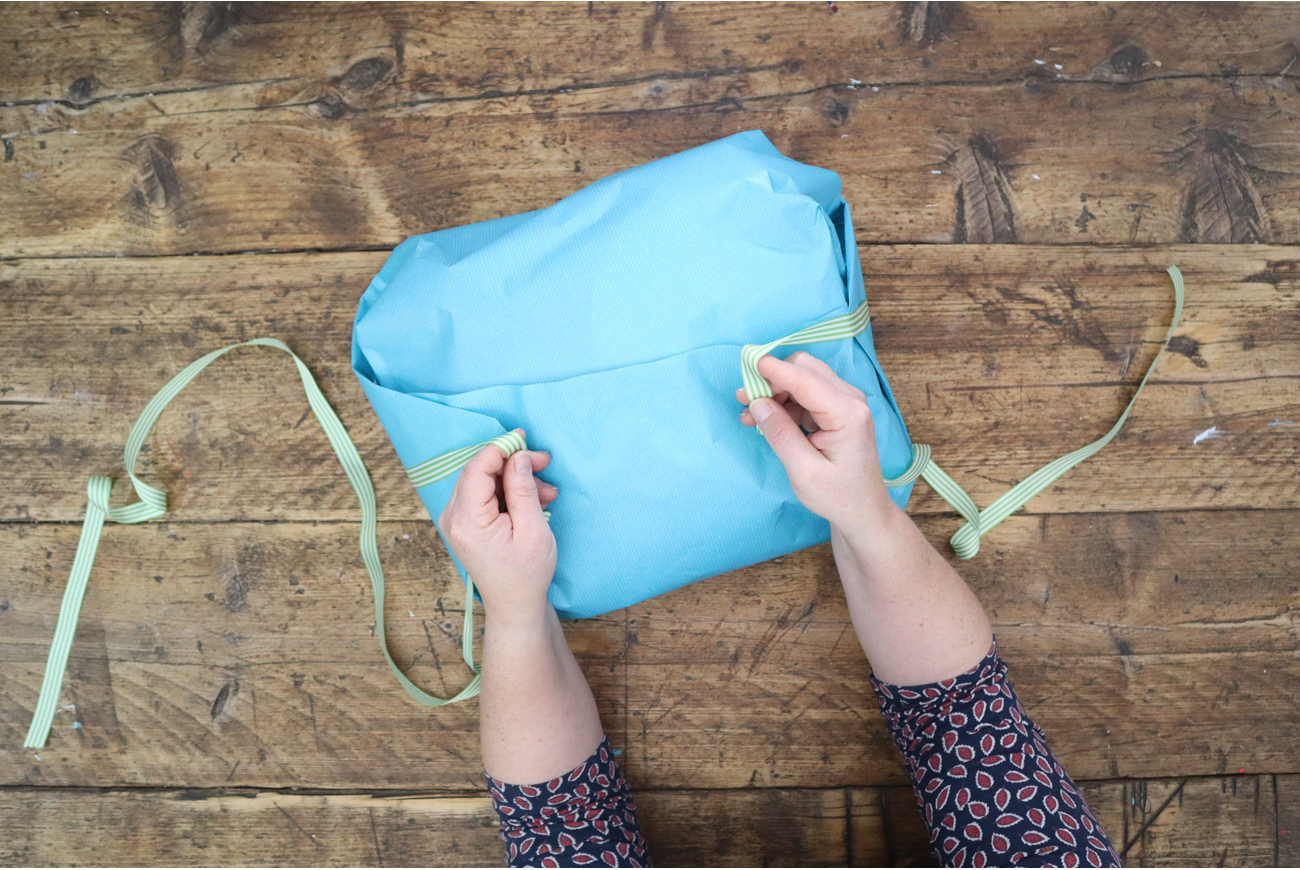
Follow our step-by-step guide to create a perfectly wrapped ‘sweetie/cracker’ style look.
You will need: Thinner wrapping paper, scissors, and ribbons.
And your wrapping is done! You could now add a tag or further decorations if desired.
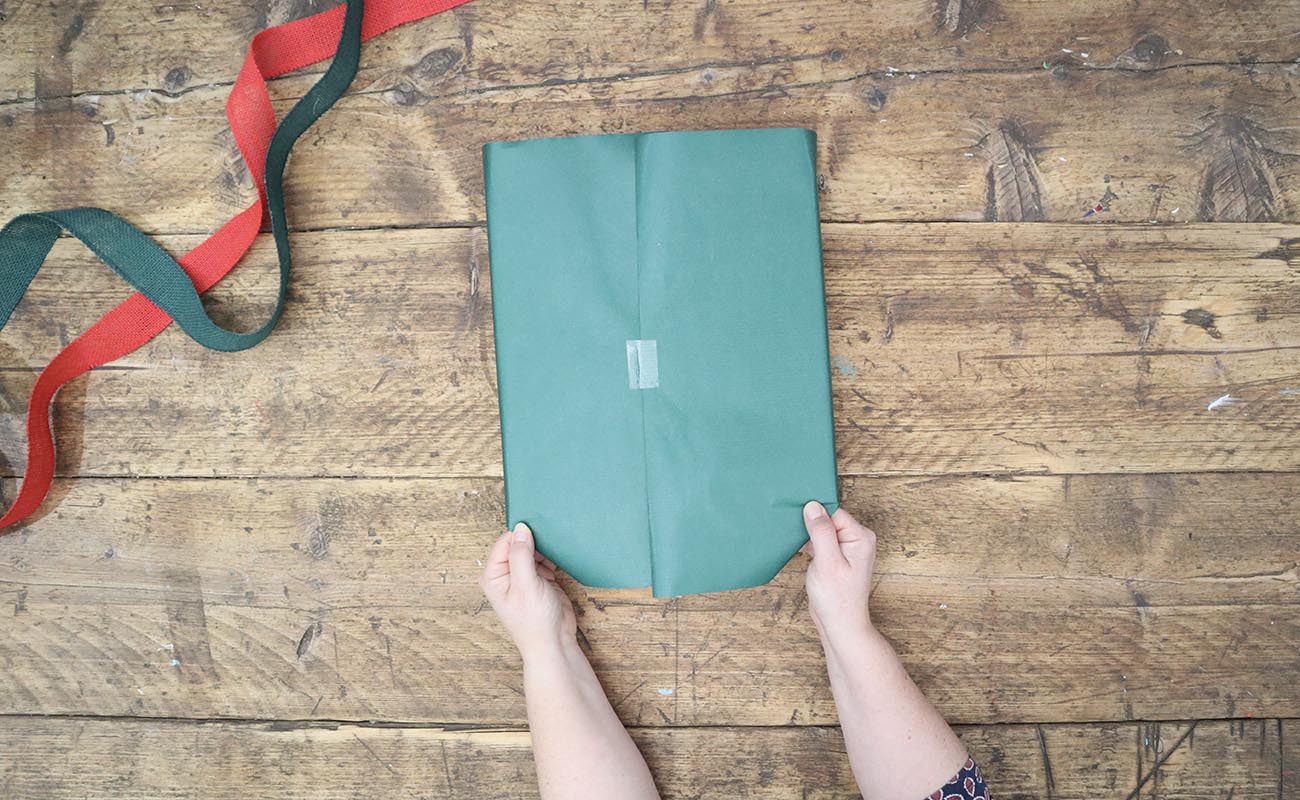
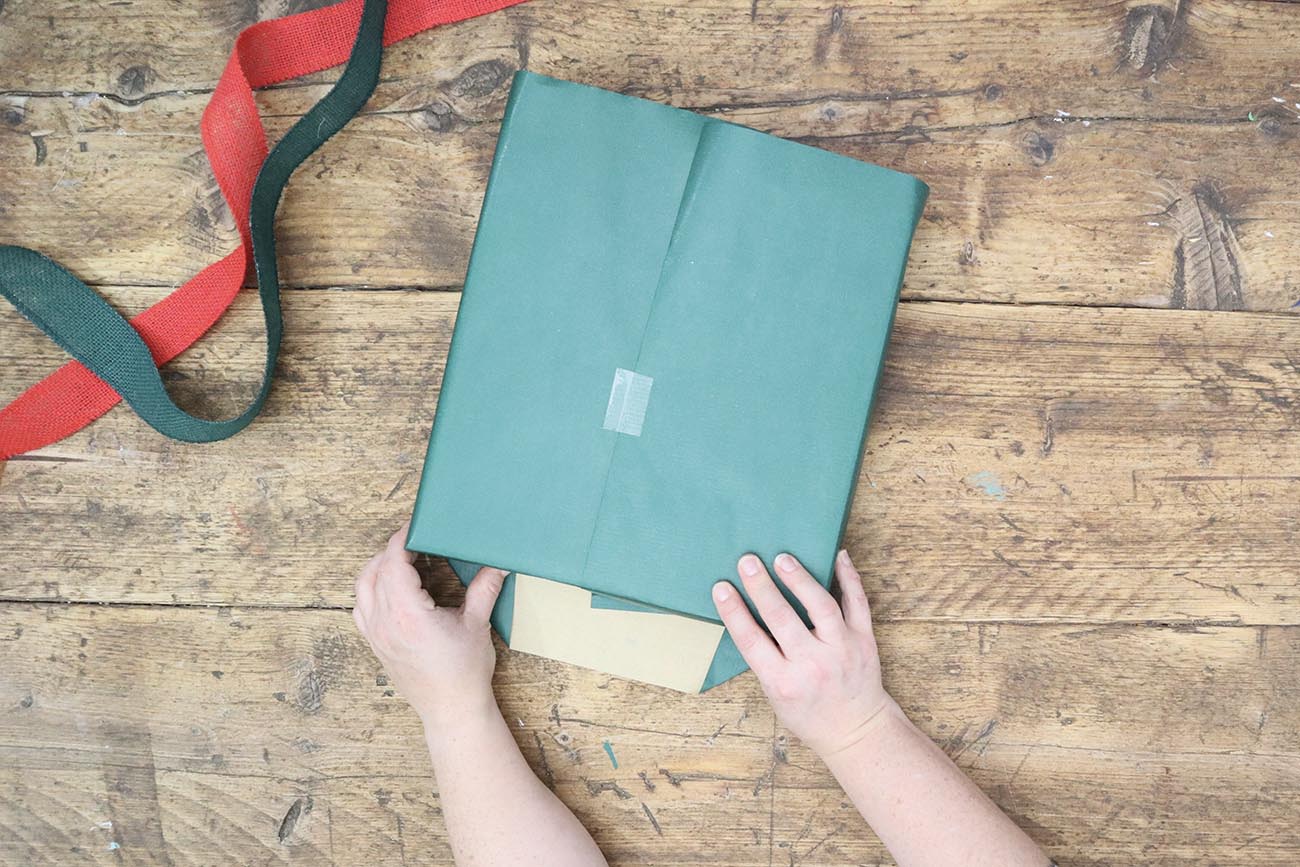
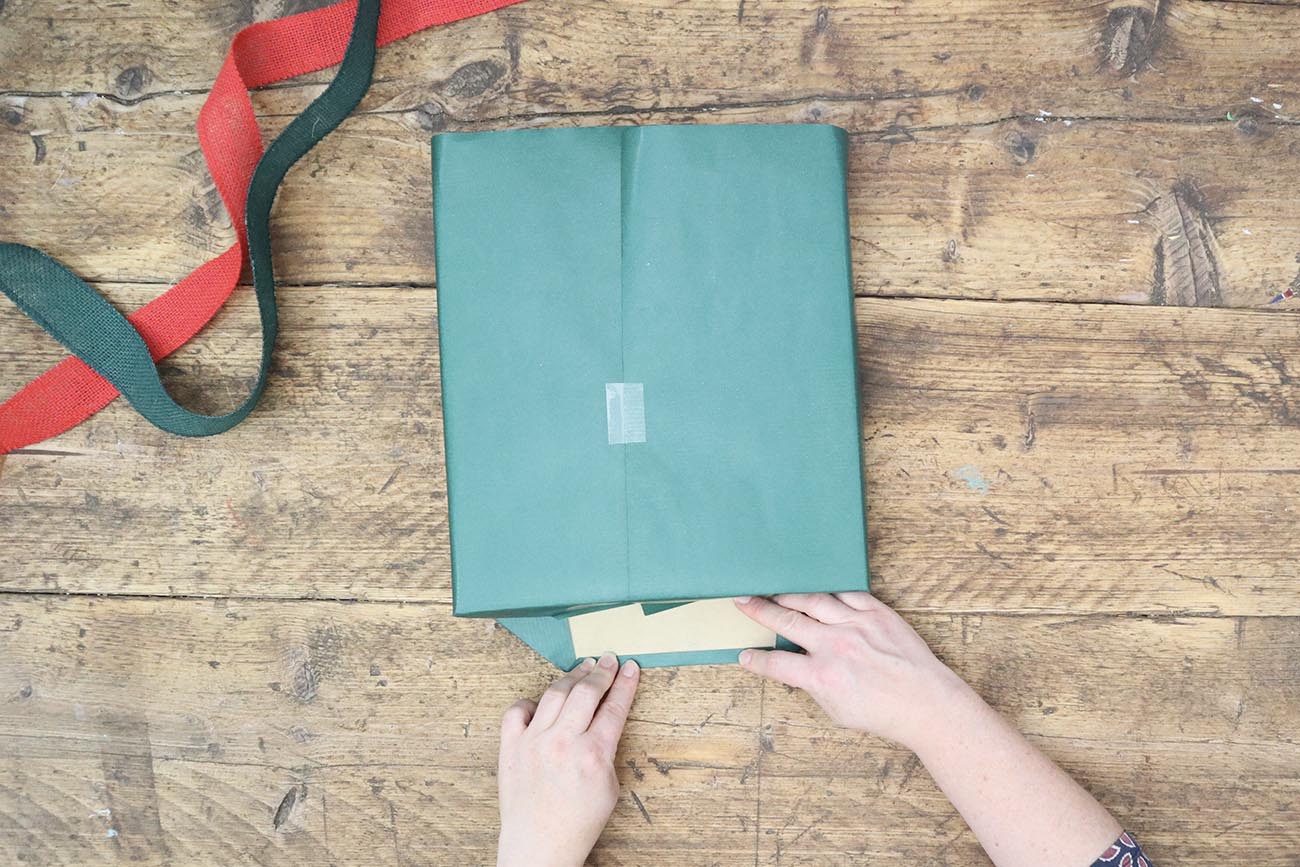
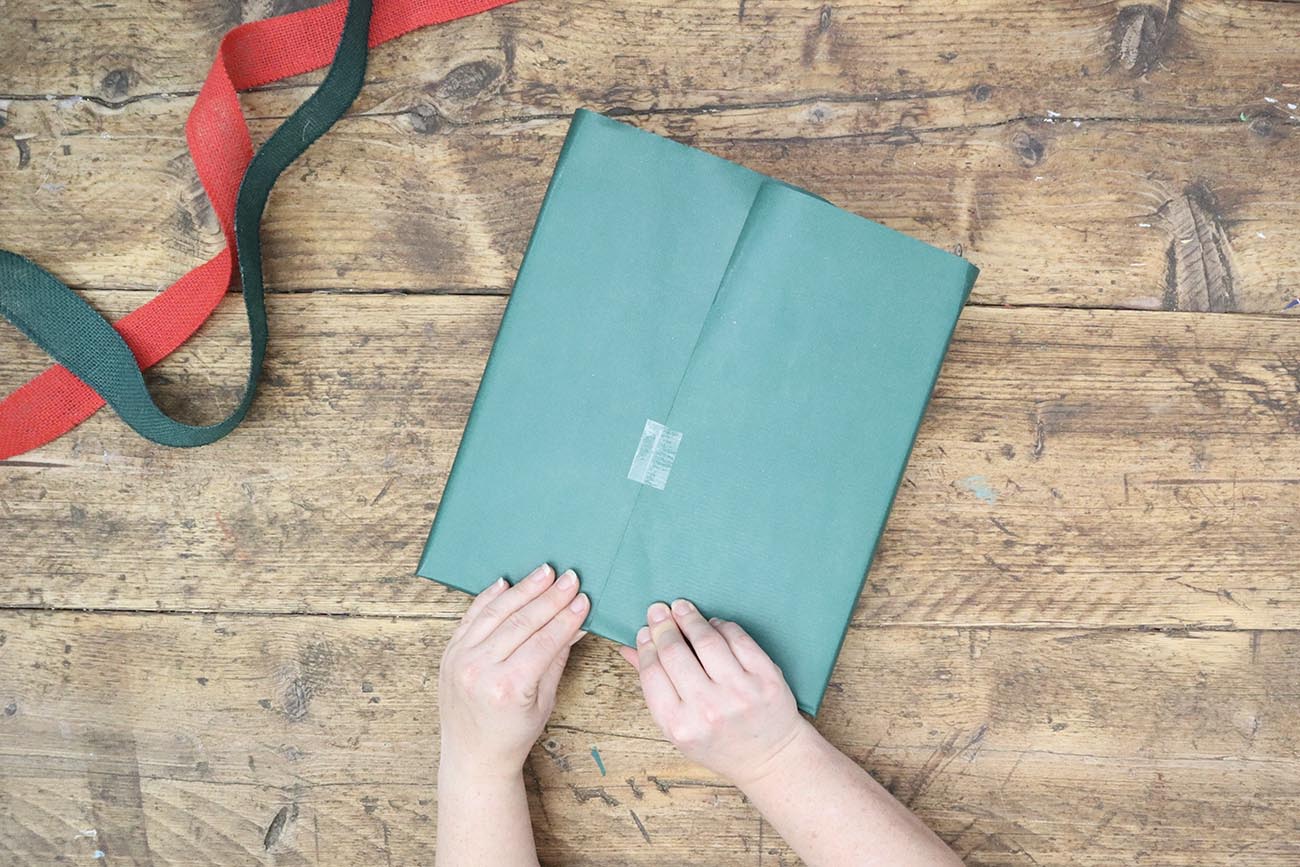
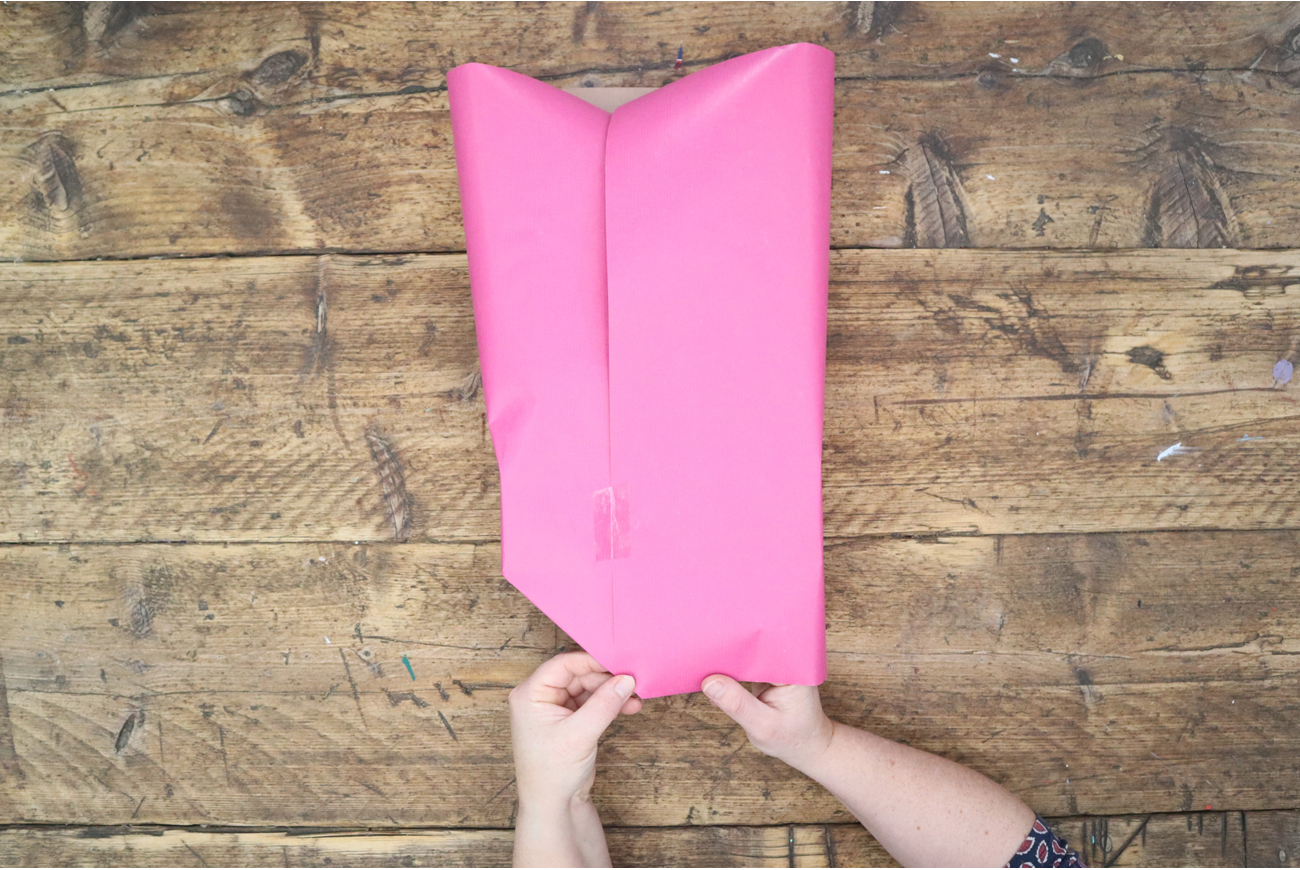
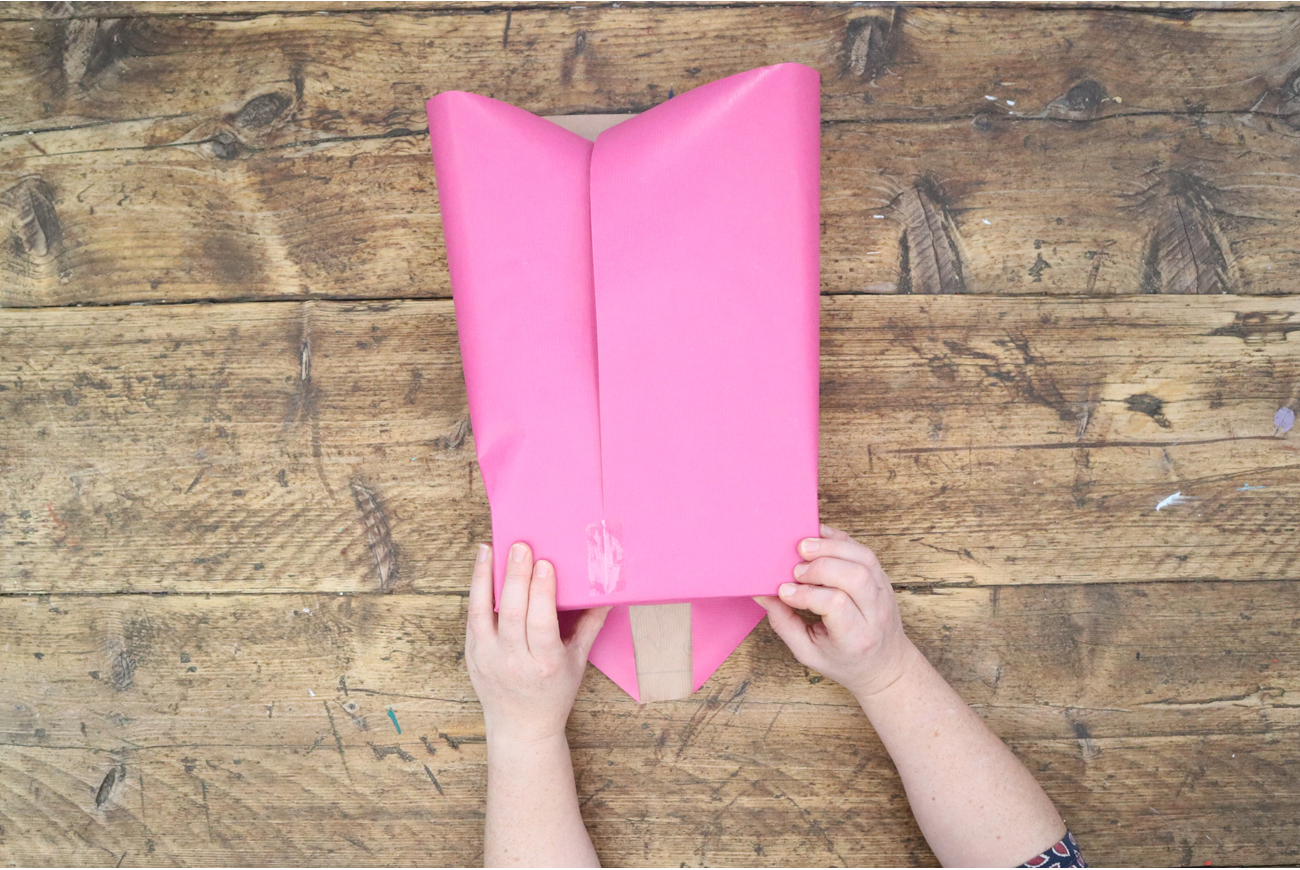
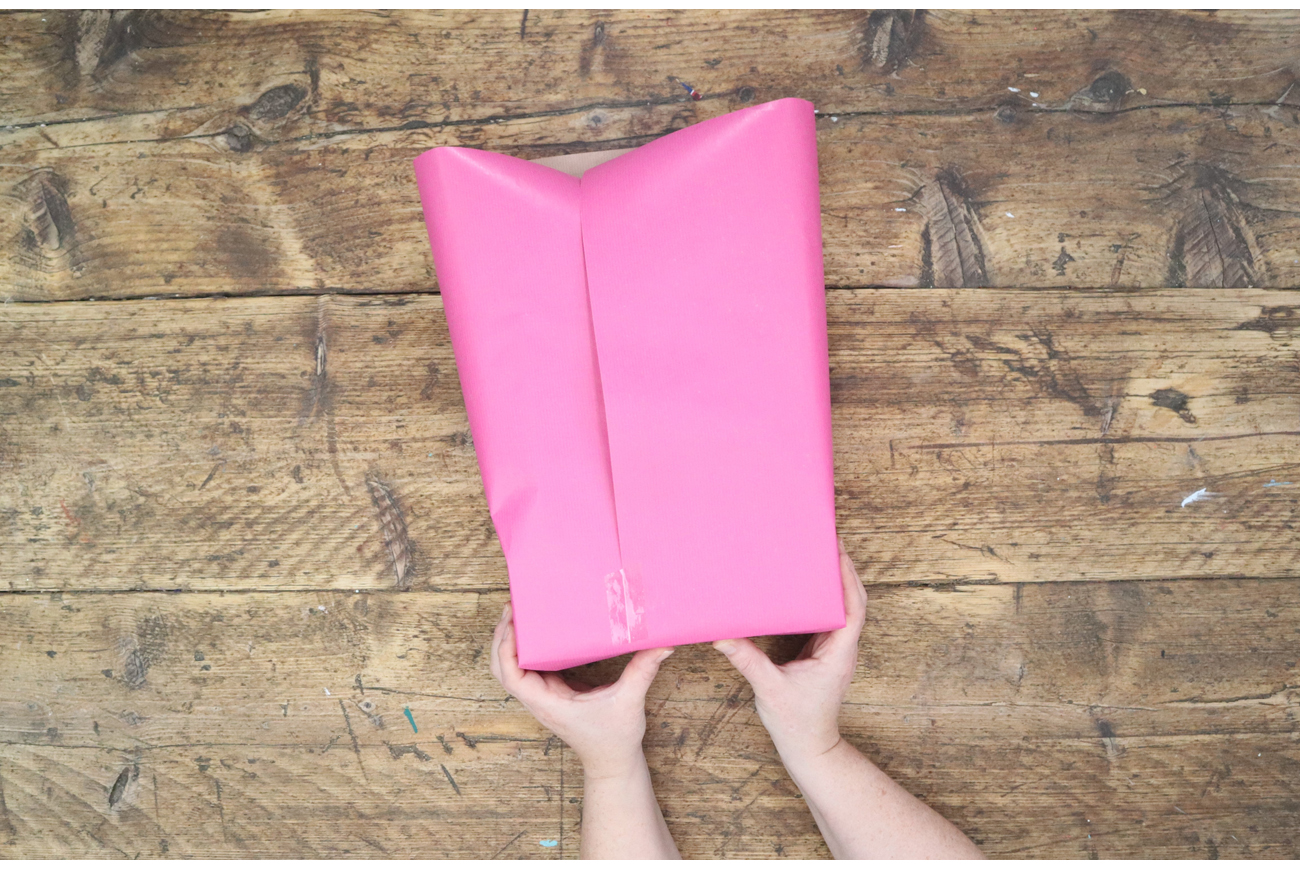
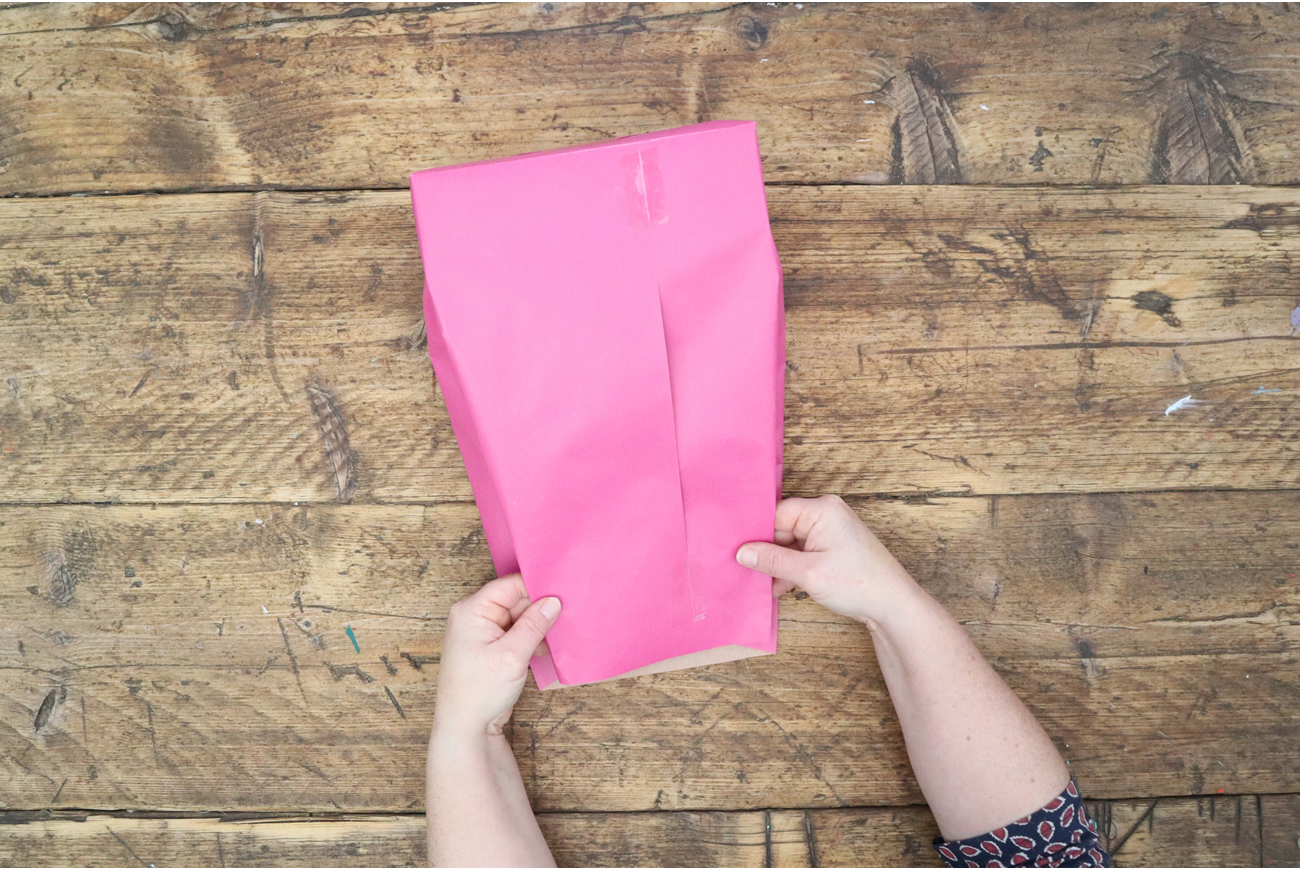
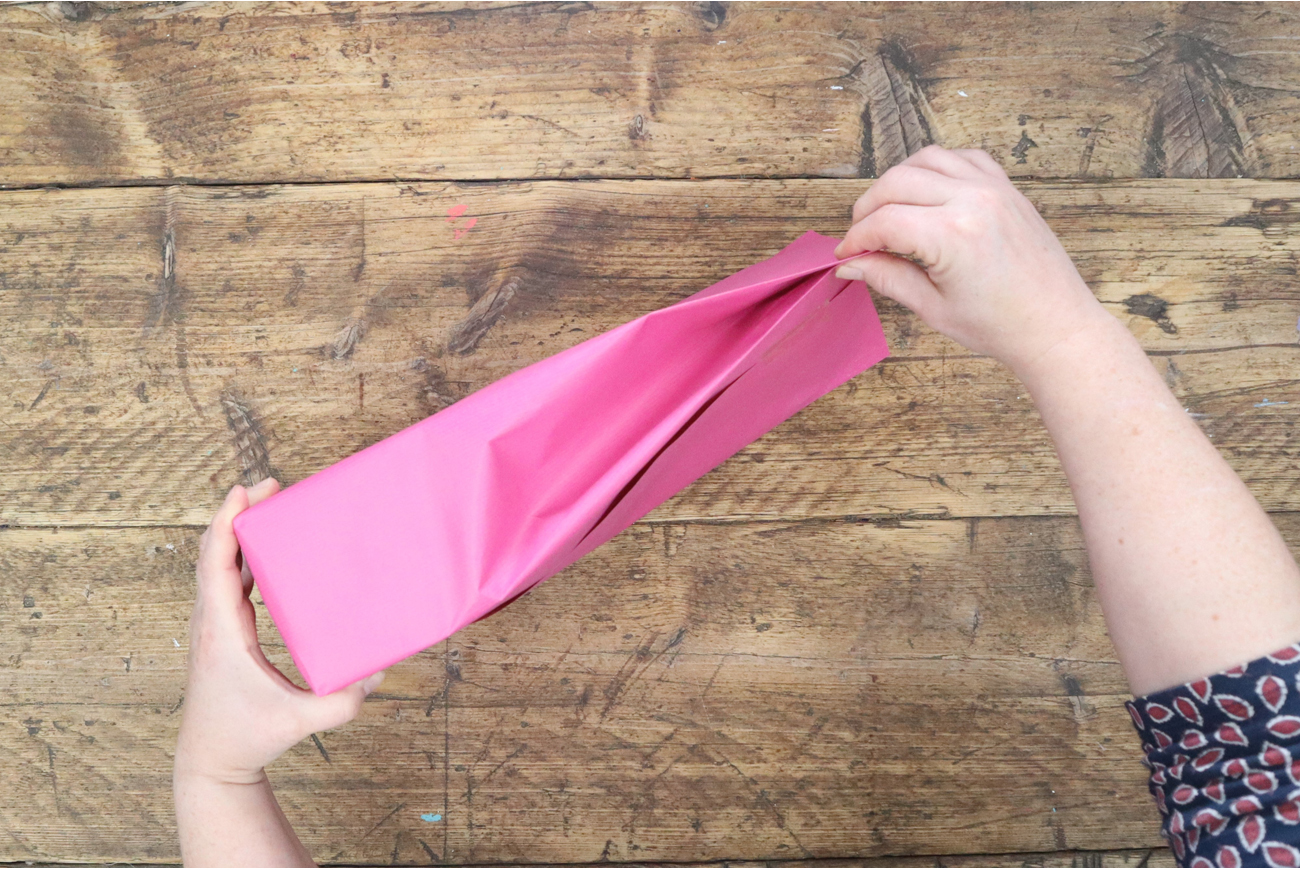
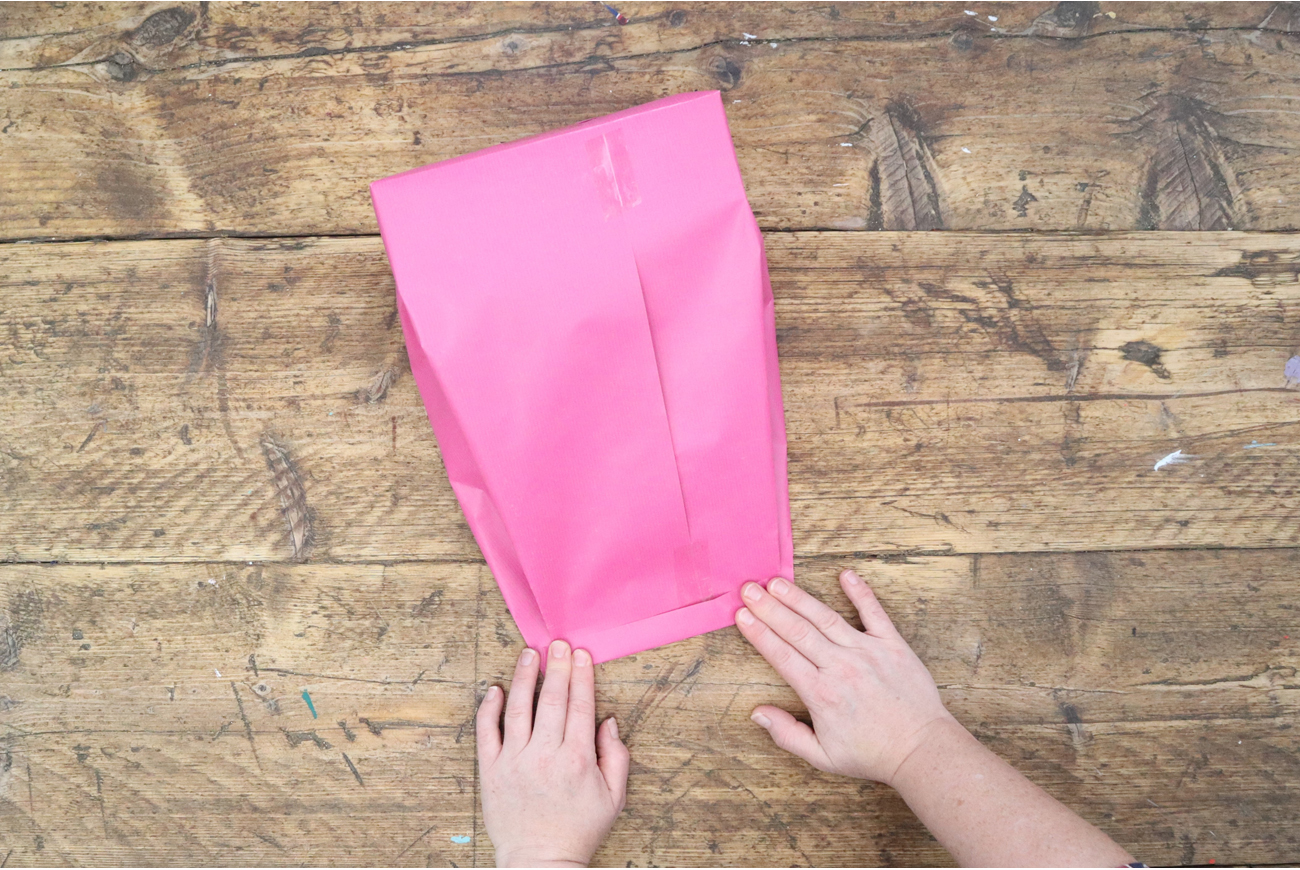
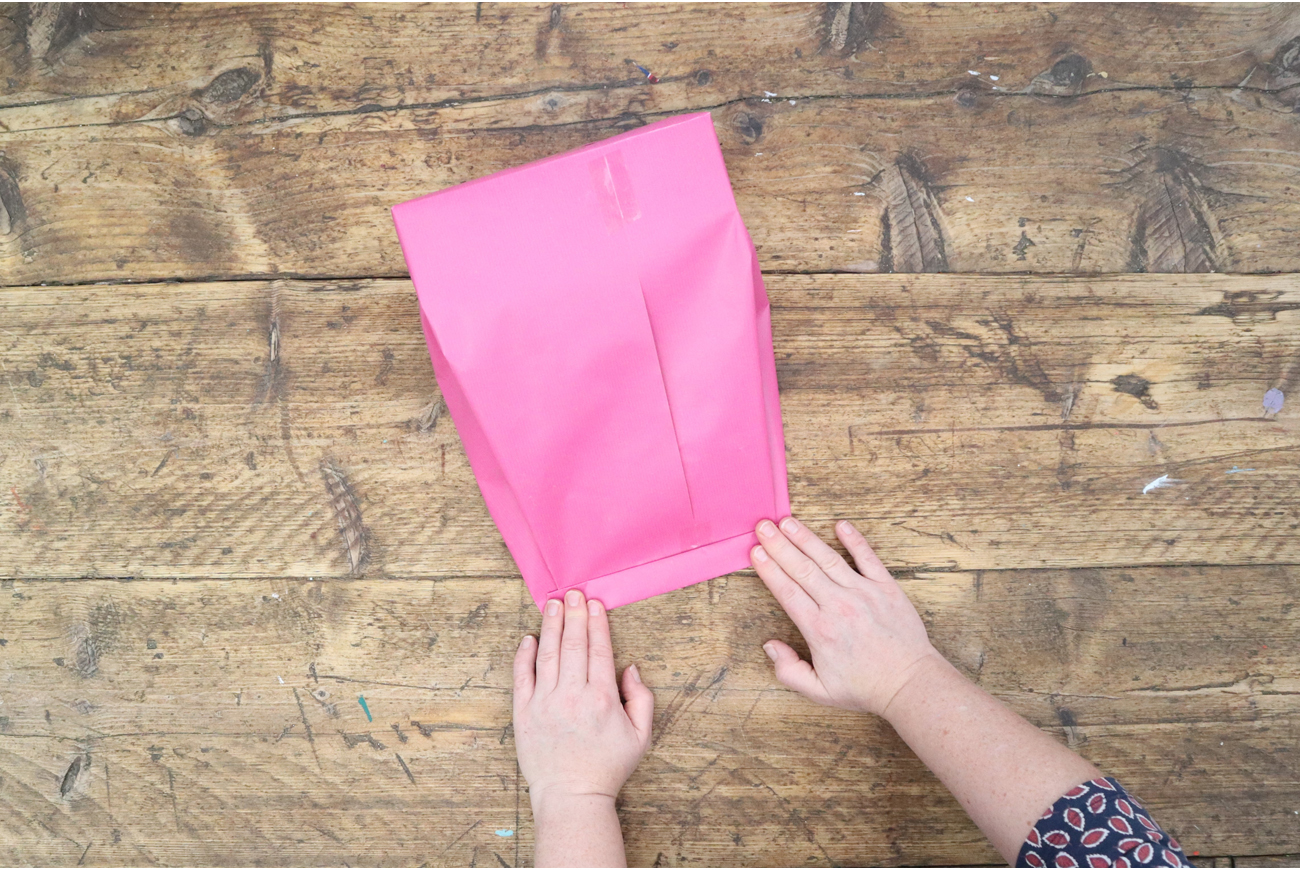
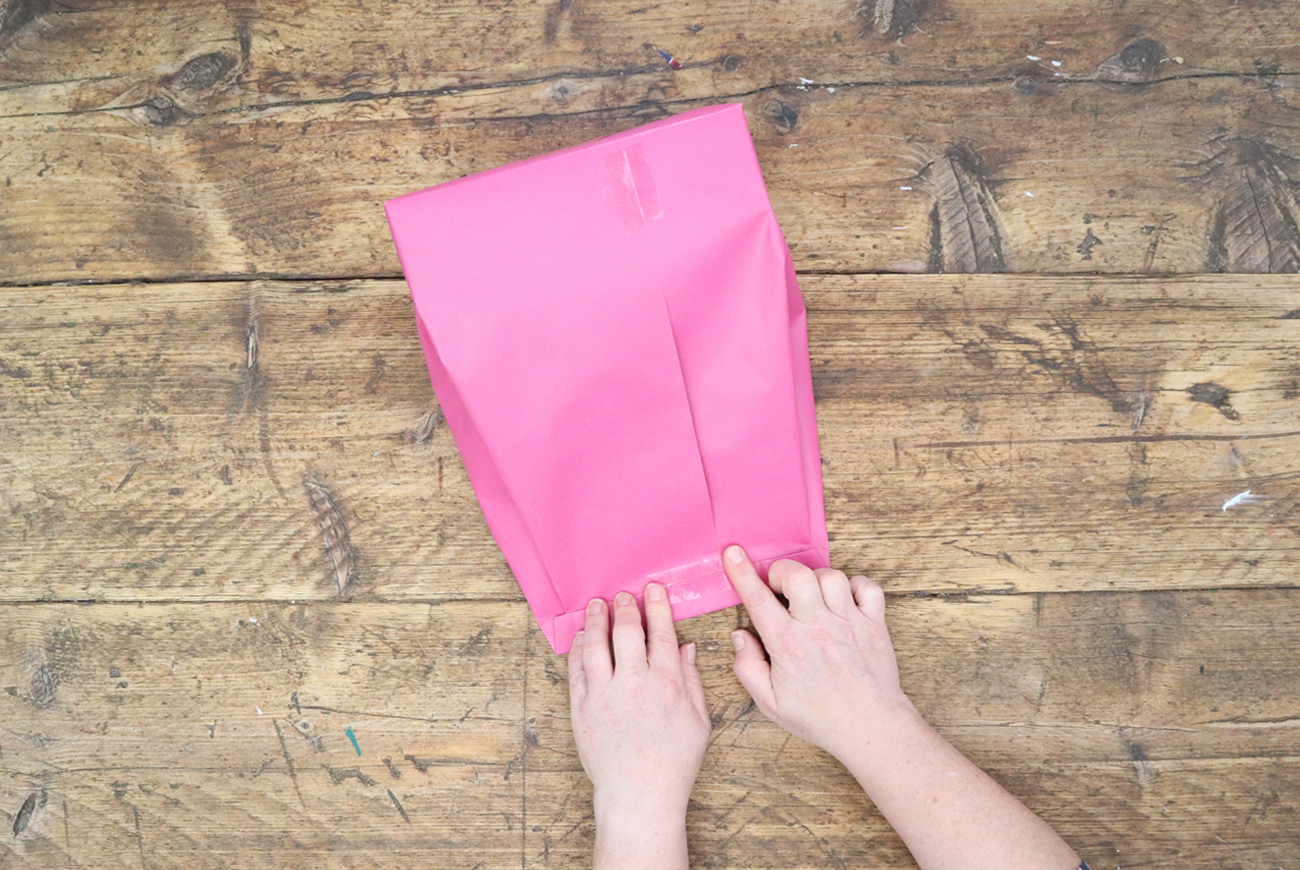
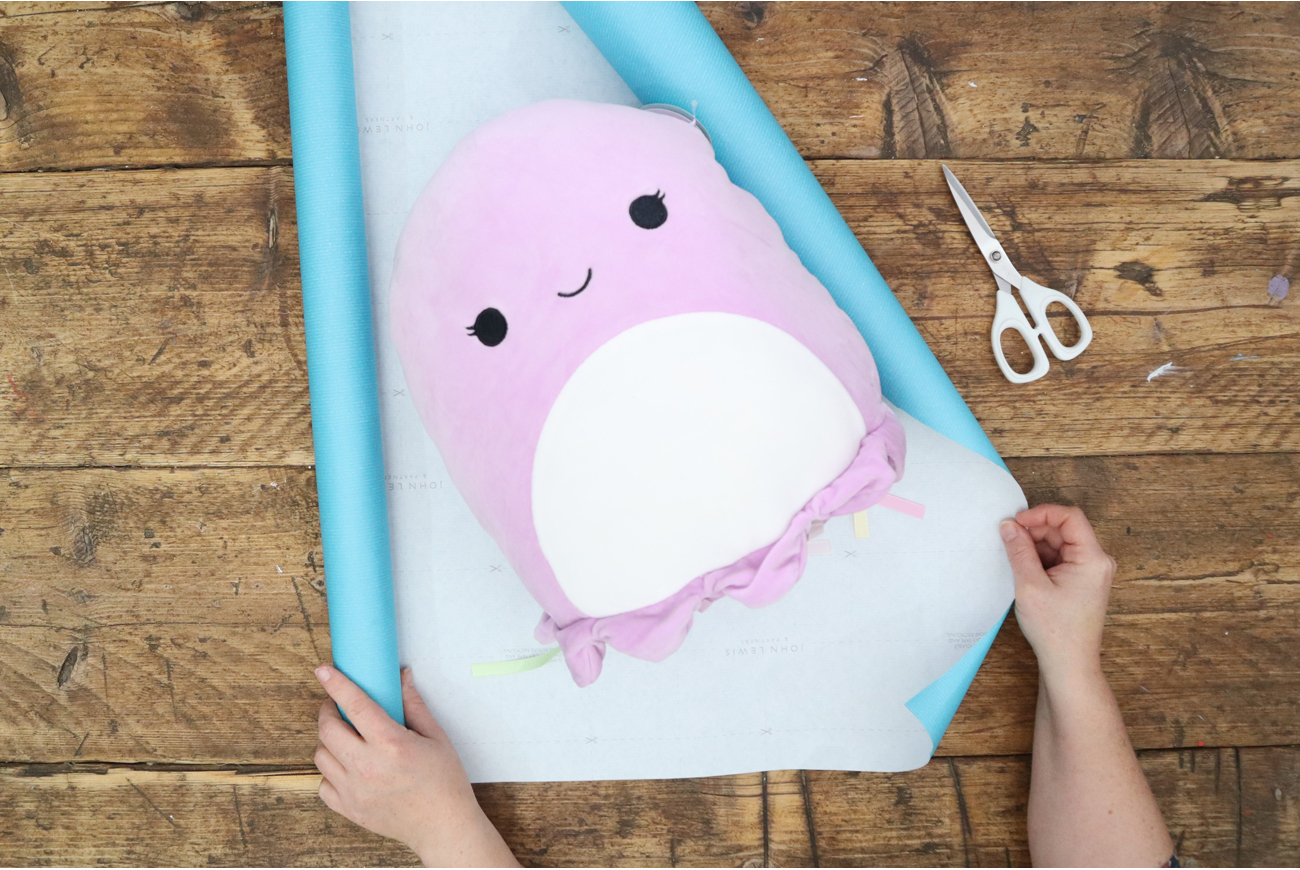
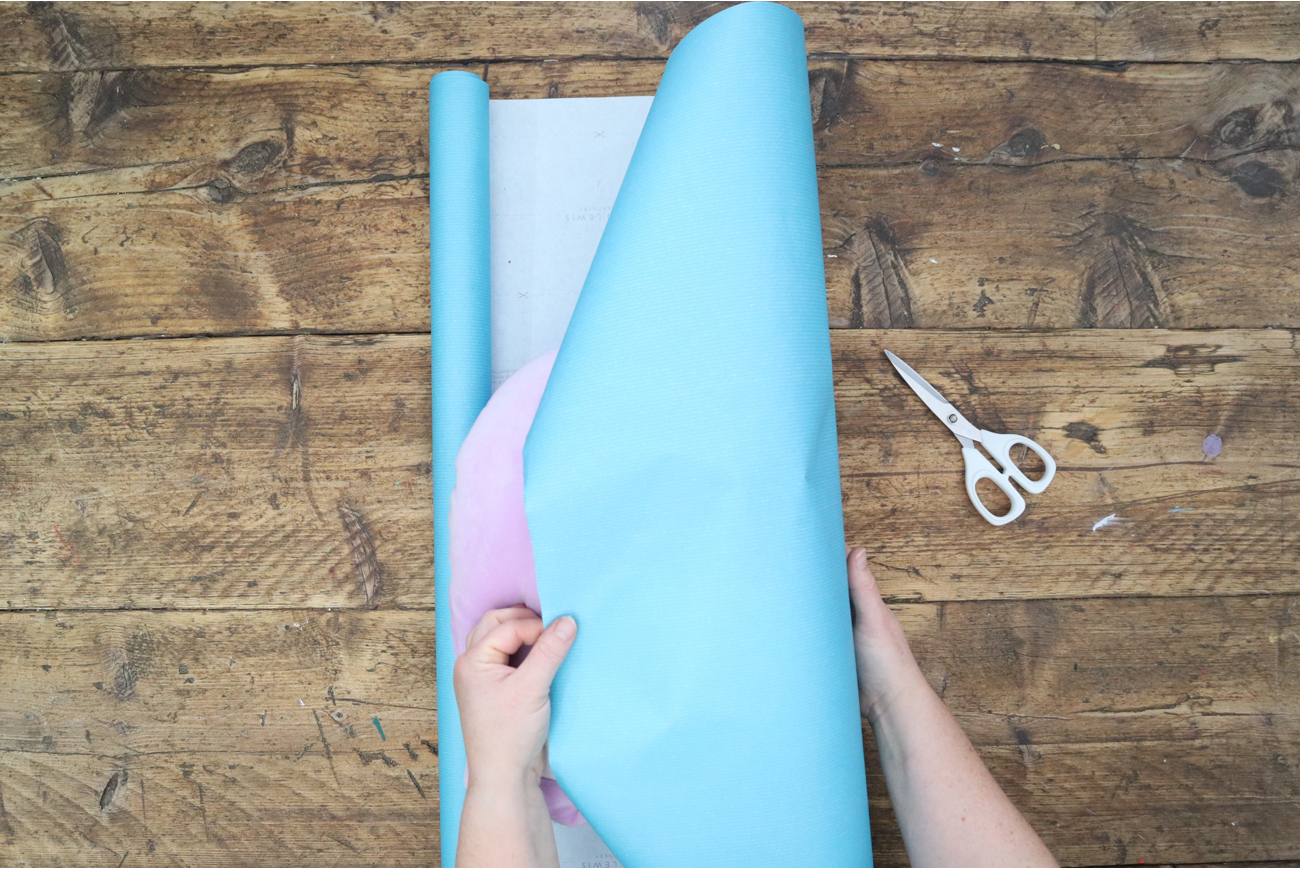
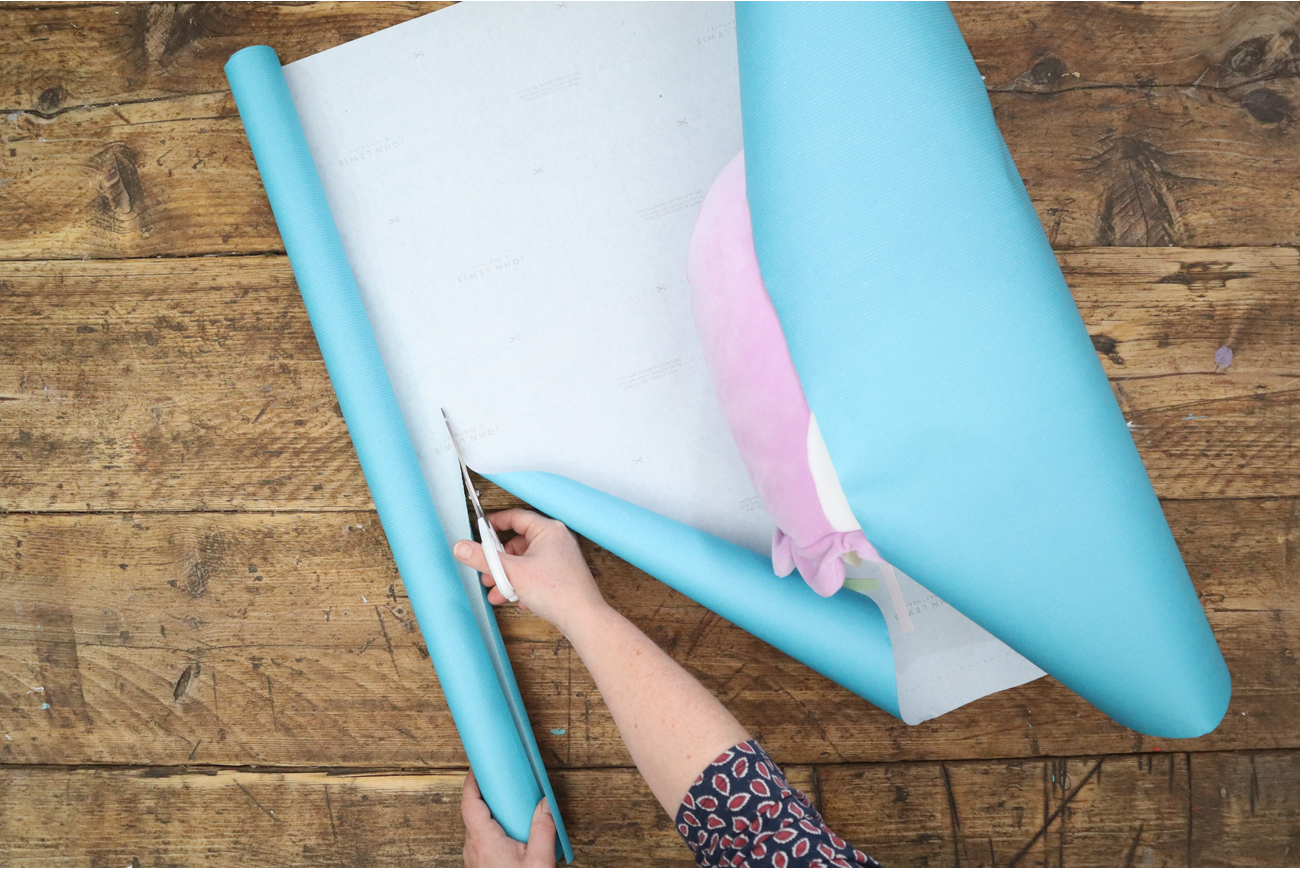
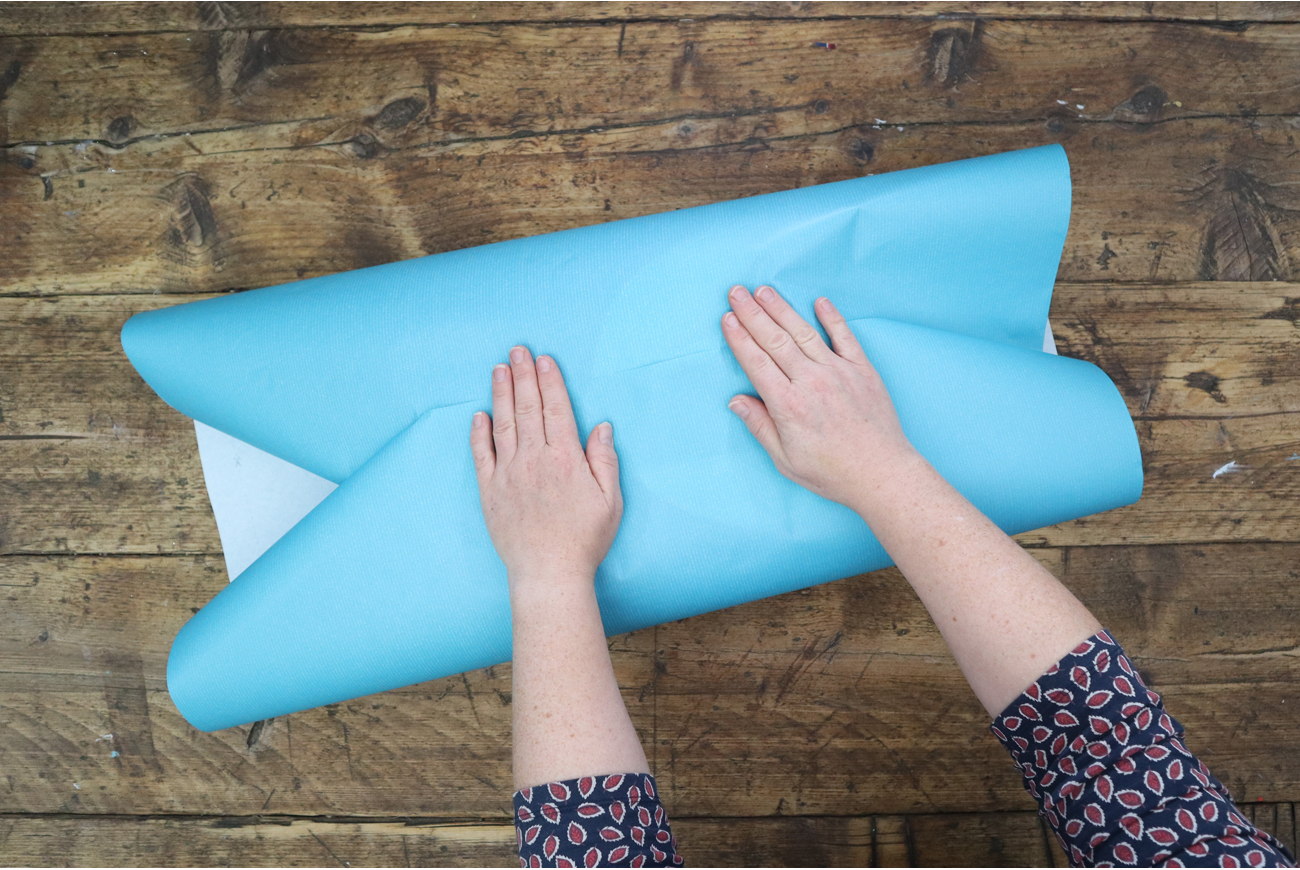
Irregular shaped gifts can be awkward to wrap, and it can be difficult to know where to start.
Whilst our present is an awkward shape – it hopefully has a flat box style base which we can use to our wrapping advantage. However, if your gift has awkward edges all around – you could use a similar sized box to help create the bag shaped form. Even a cereal packet could work depending on the size of your gift!
You will need: Wrapping paper, tape and scissors. Optional, a similar sized box.
You could now add a tag or decorations if desired.
Maybe you have run out of tape… Maybe you would like the present to be easily opened, or maybe you just like the look of a gift without tape! Using less tape might be an environmental choice too.
If you have a hot or cold glue gun – this can create a quick way to wrap, and a neat and secure finish.
You will need: Wrapping paper, ribbons, scissors.
And your wrapping is done! You could now add a tag or decorations if desired.
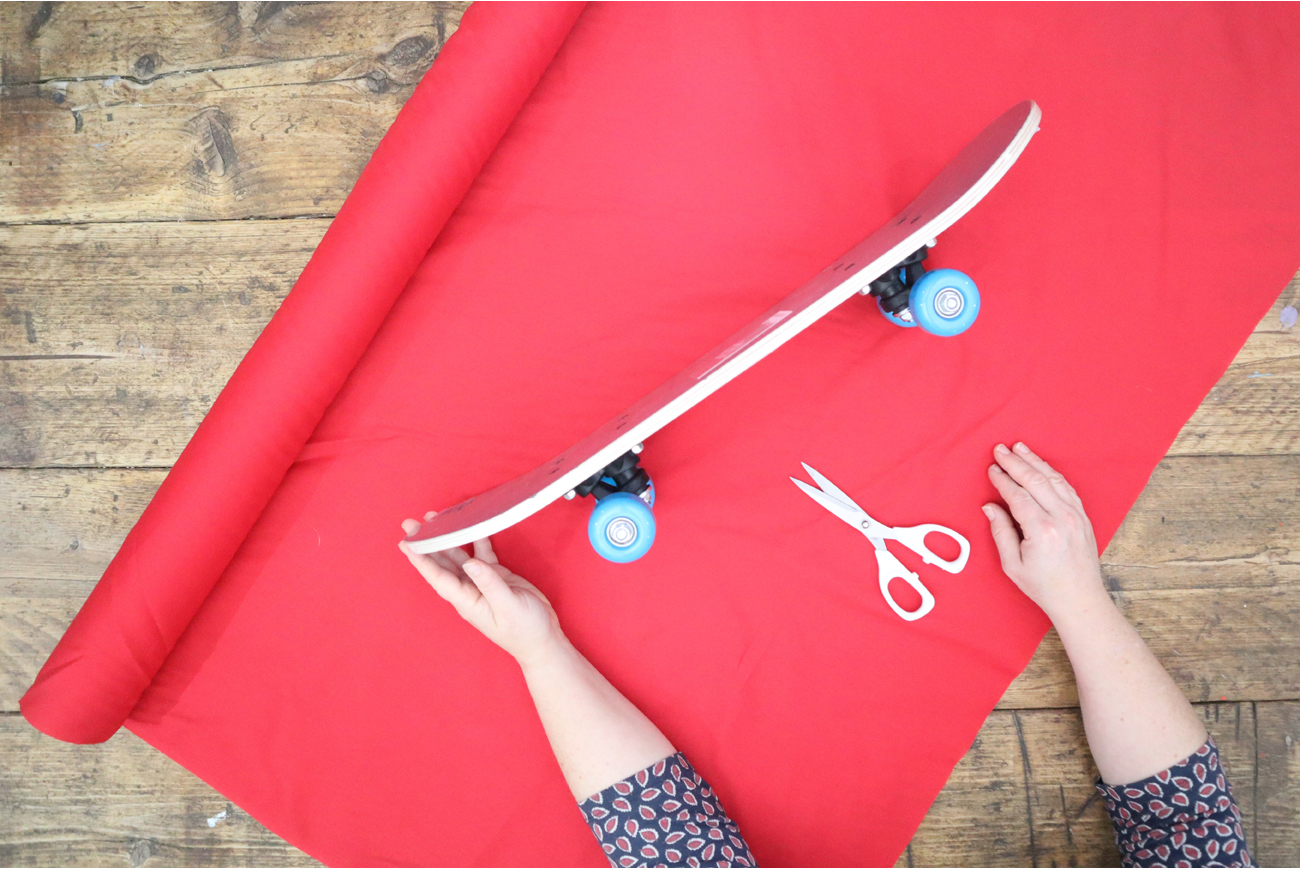
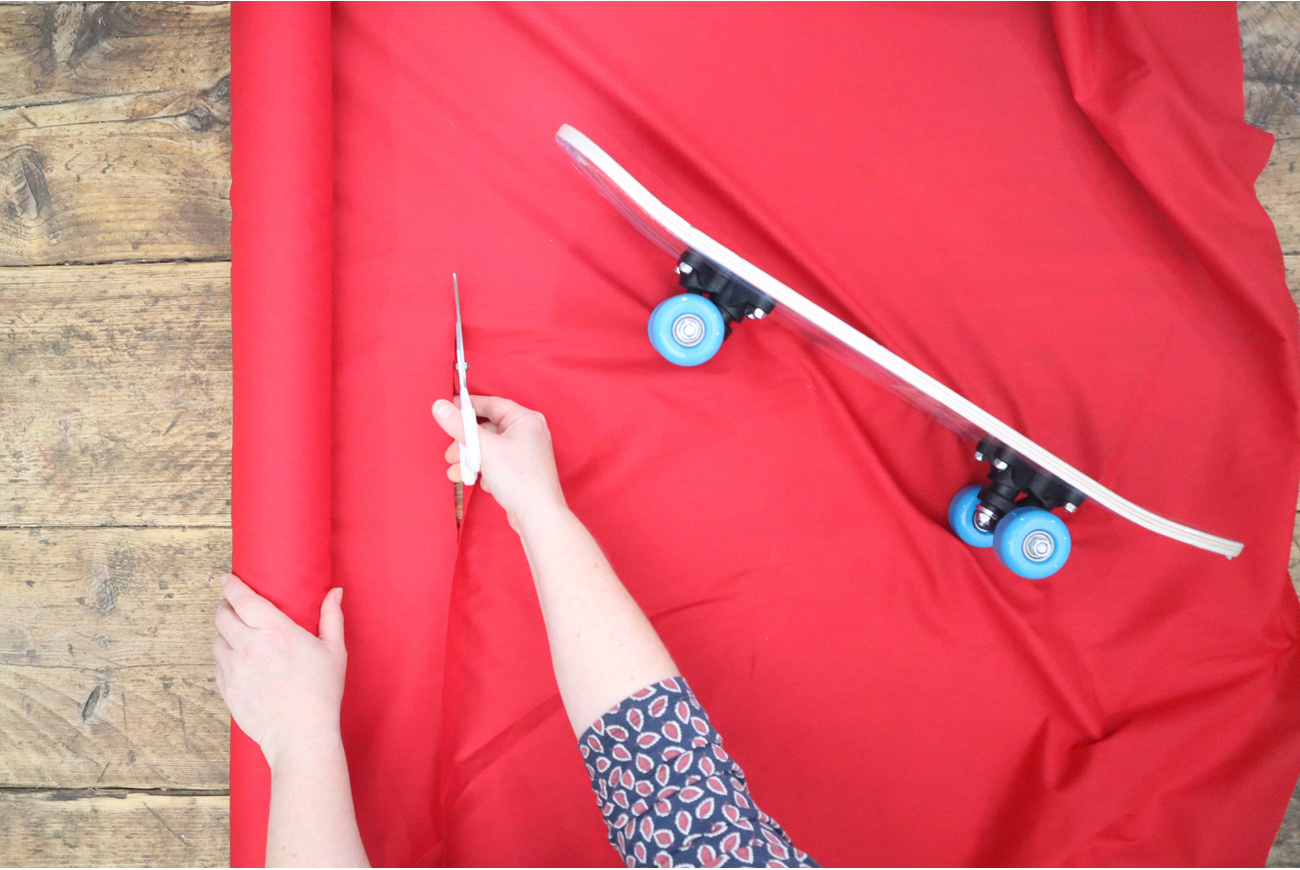
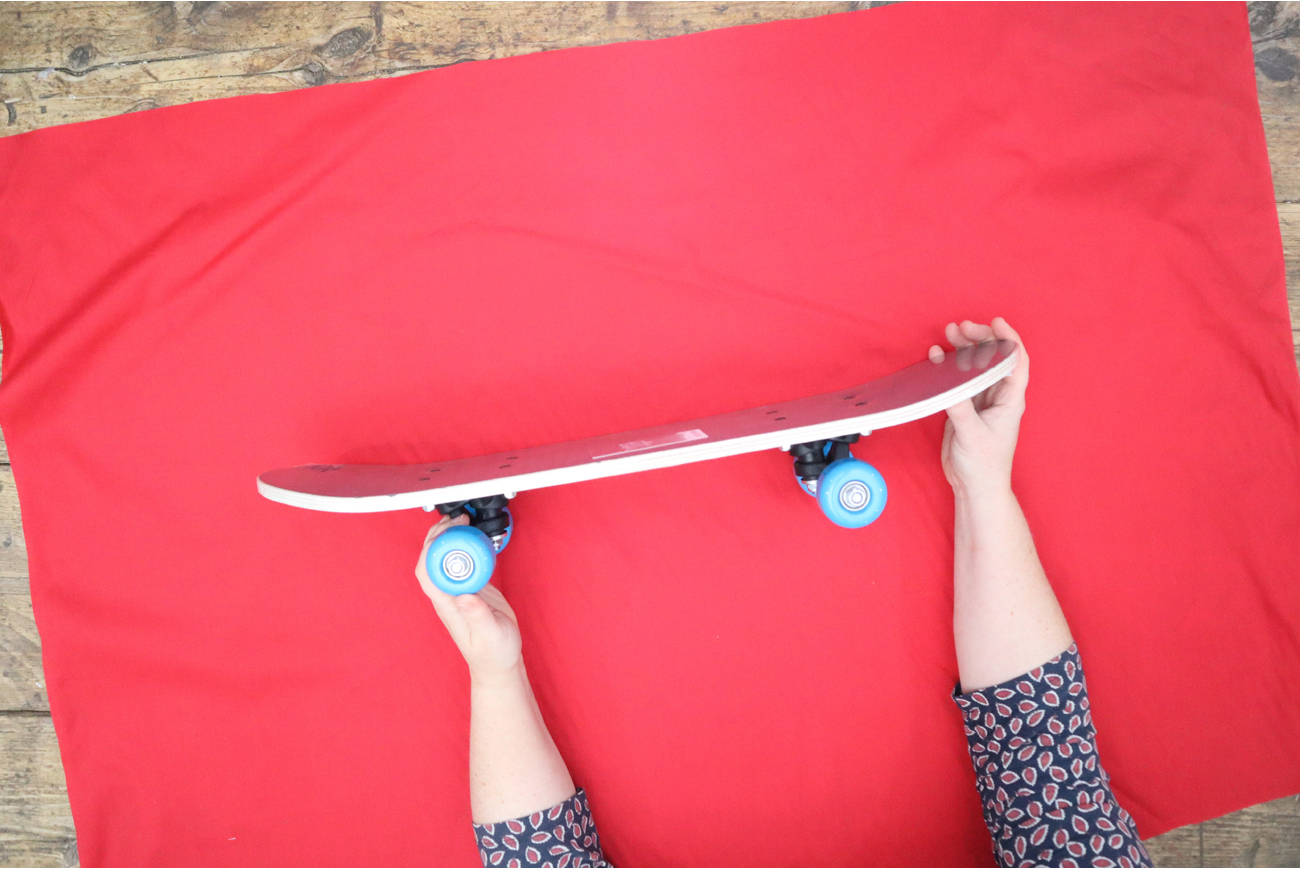
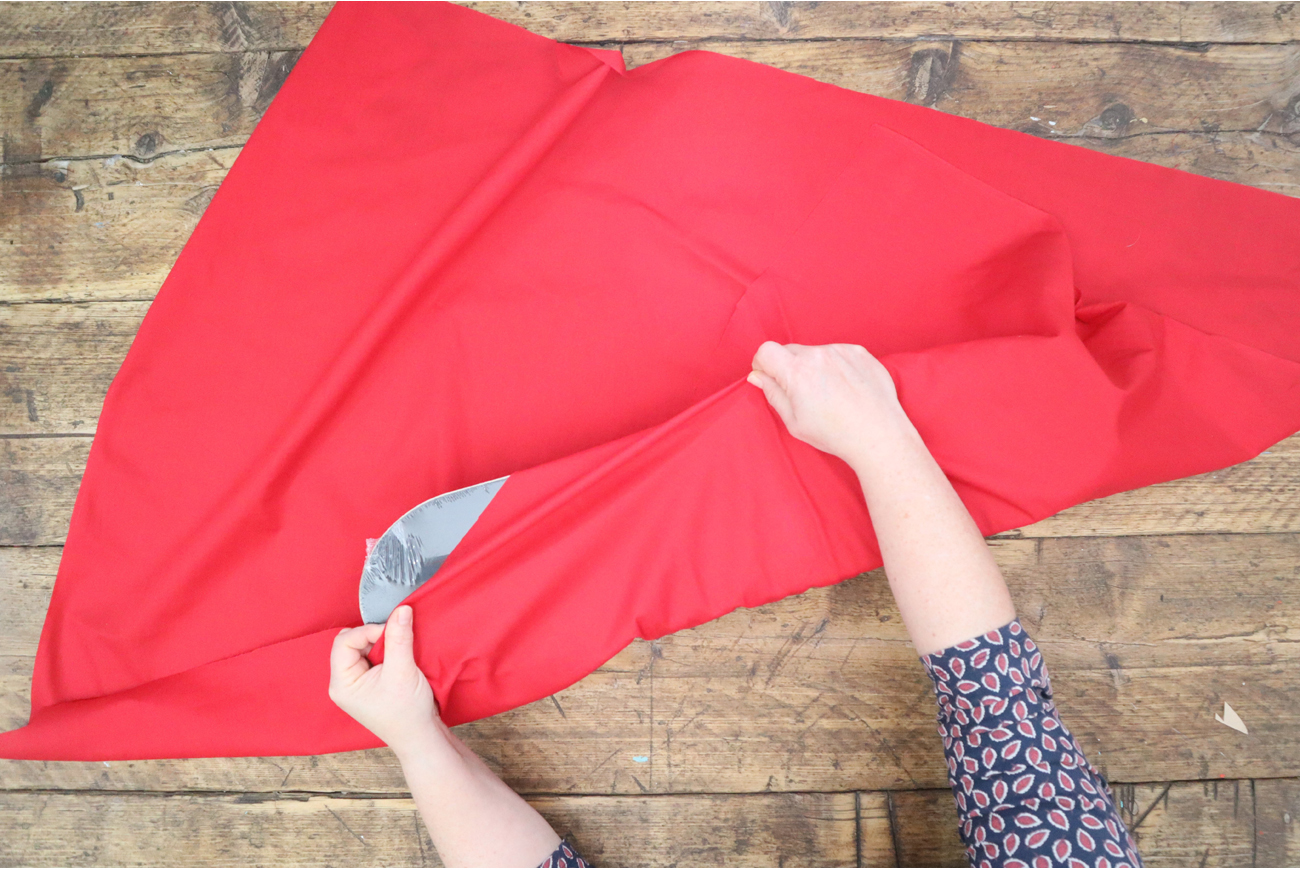
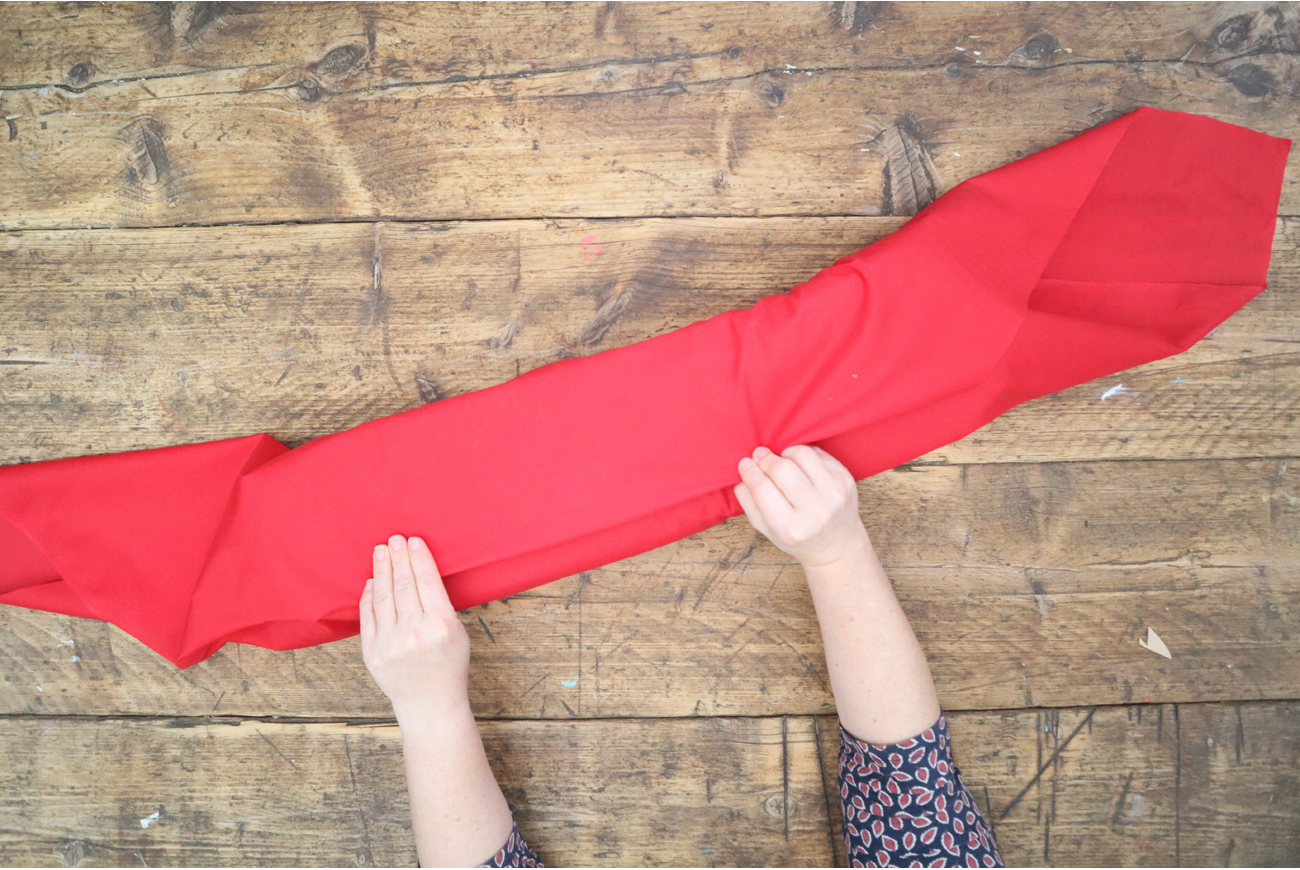
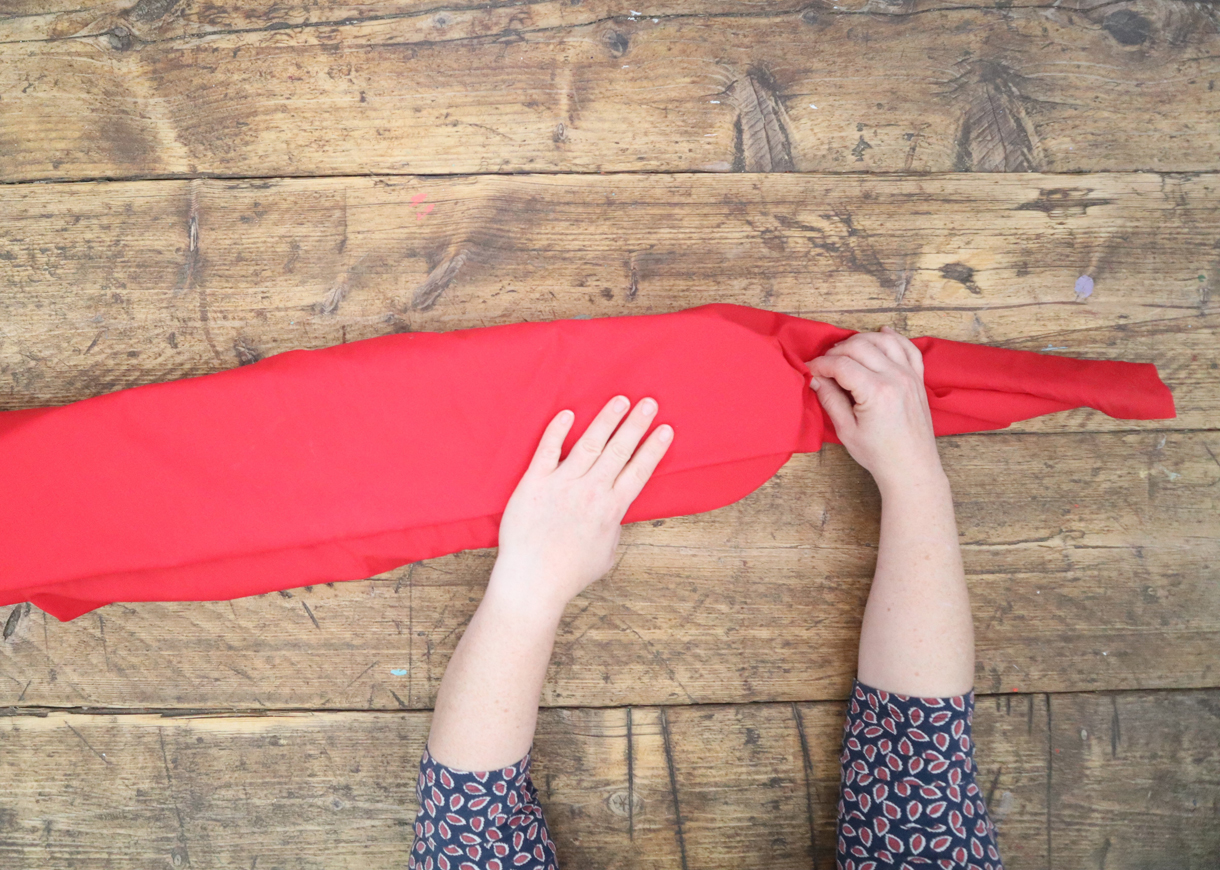
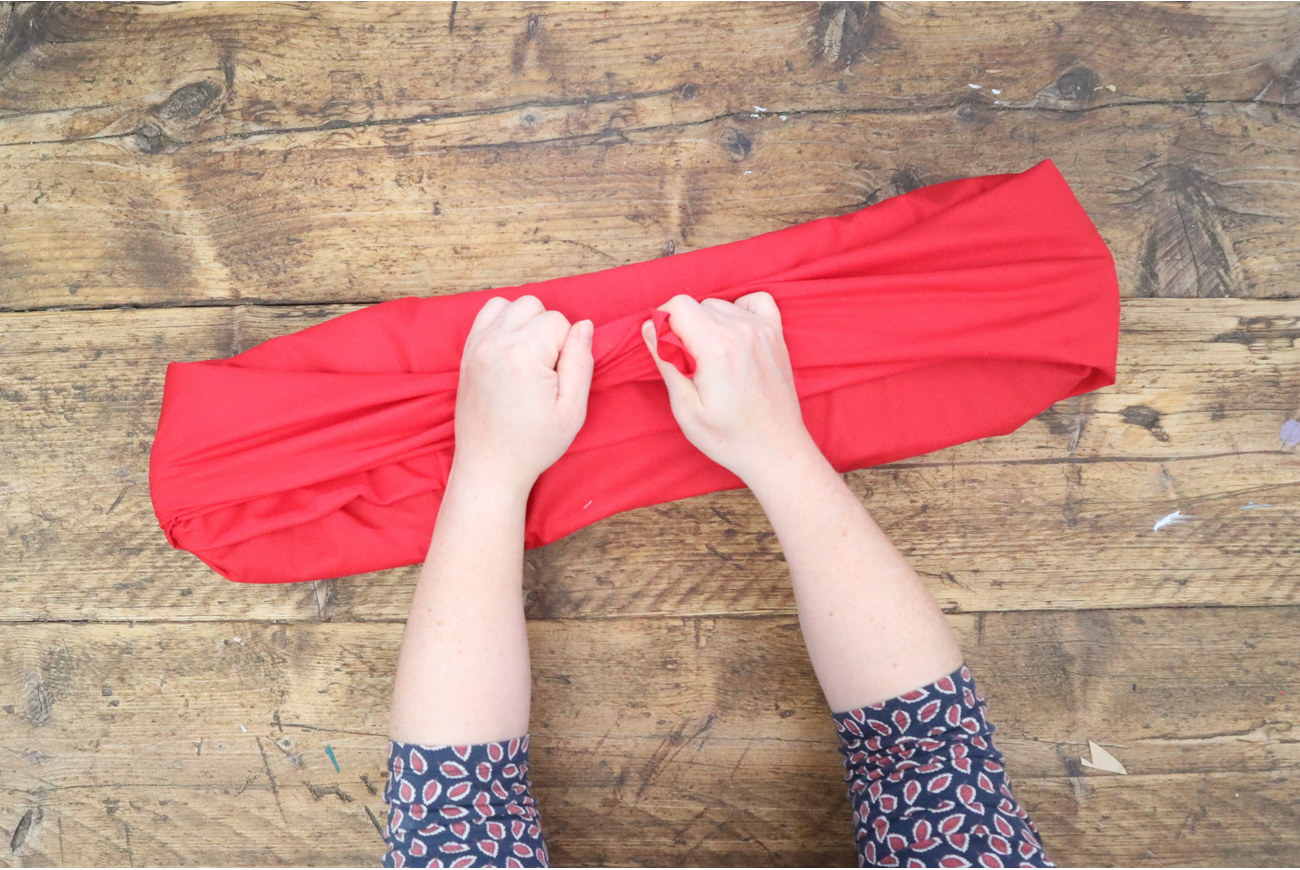
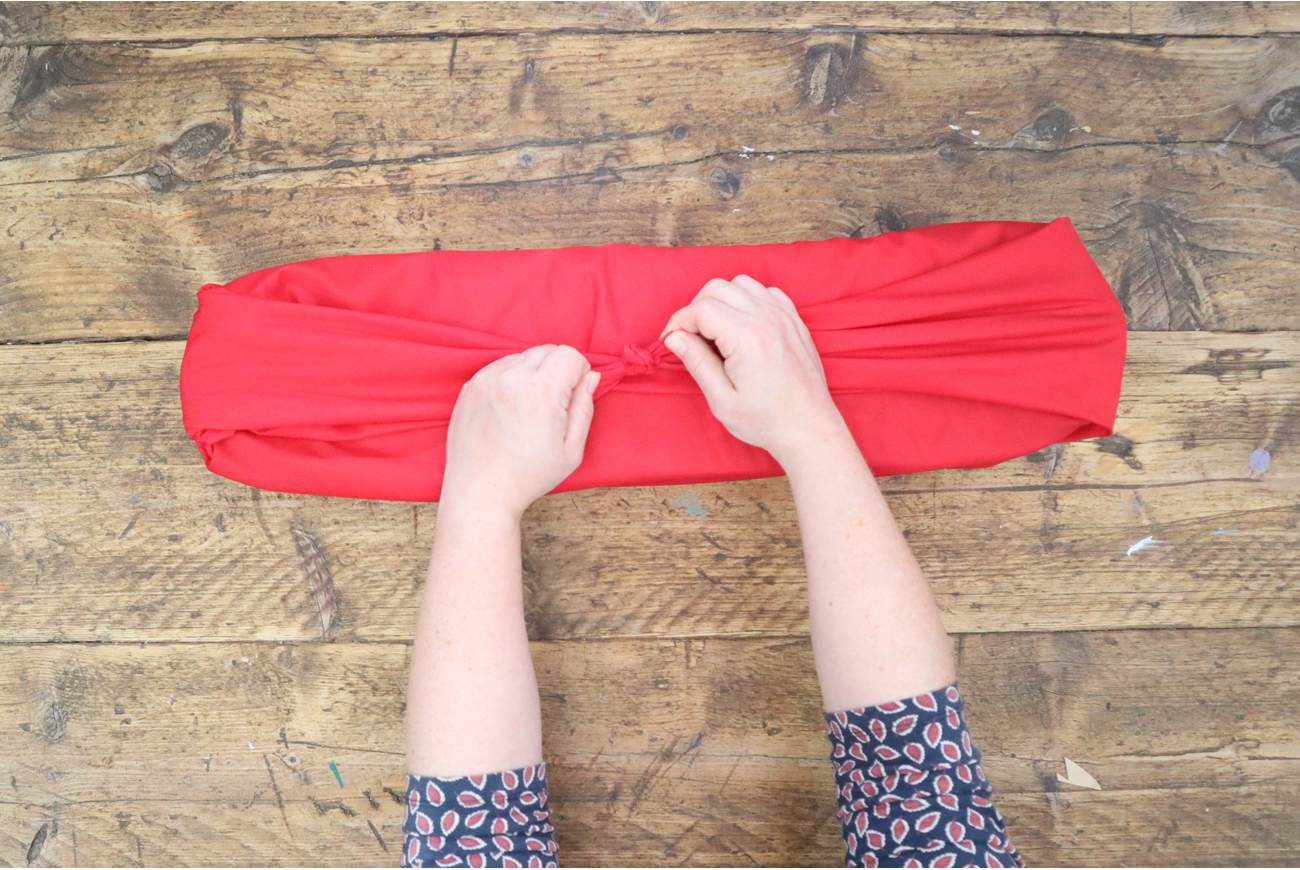
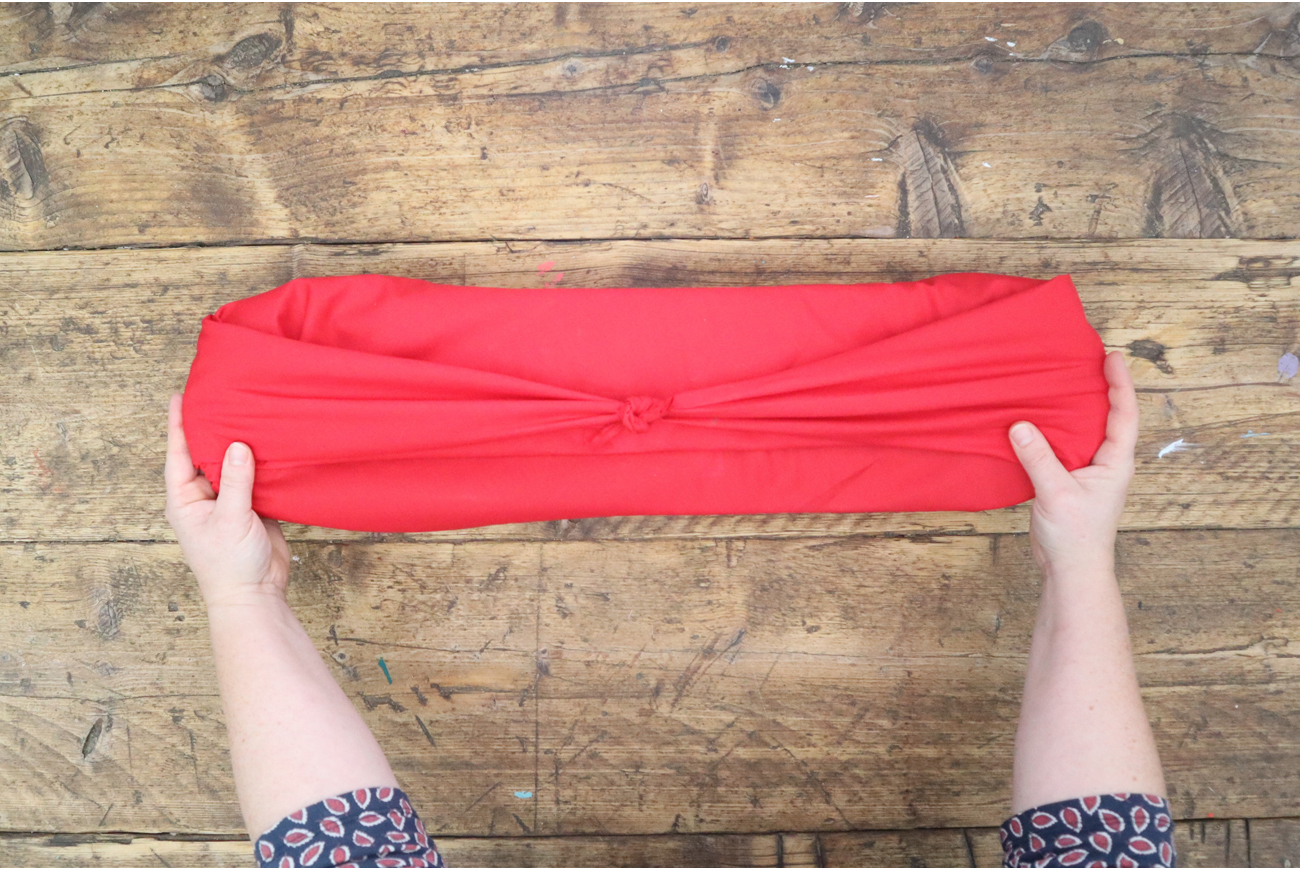
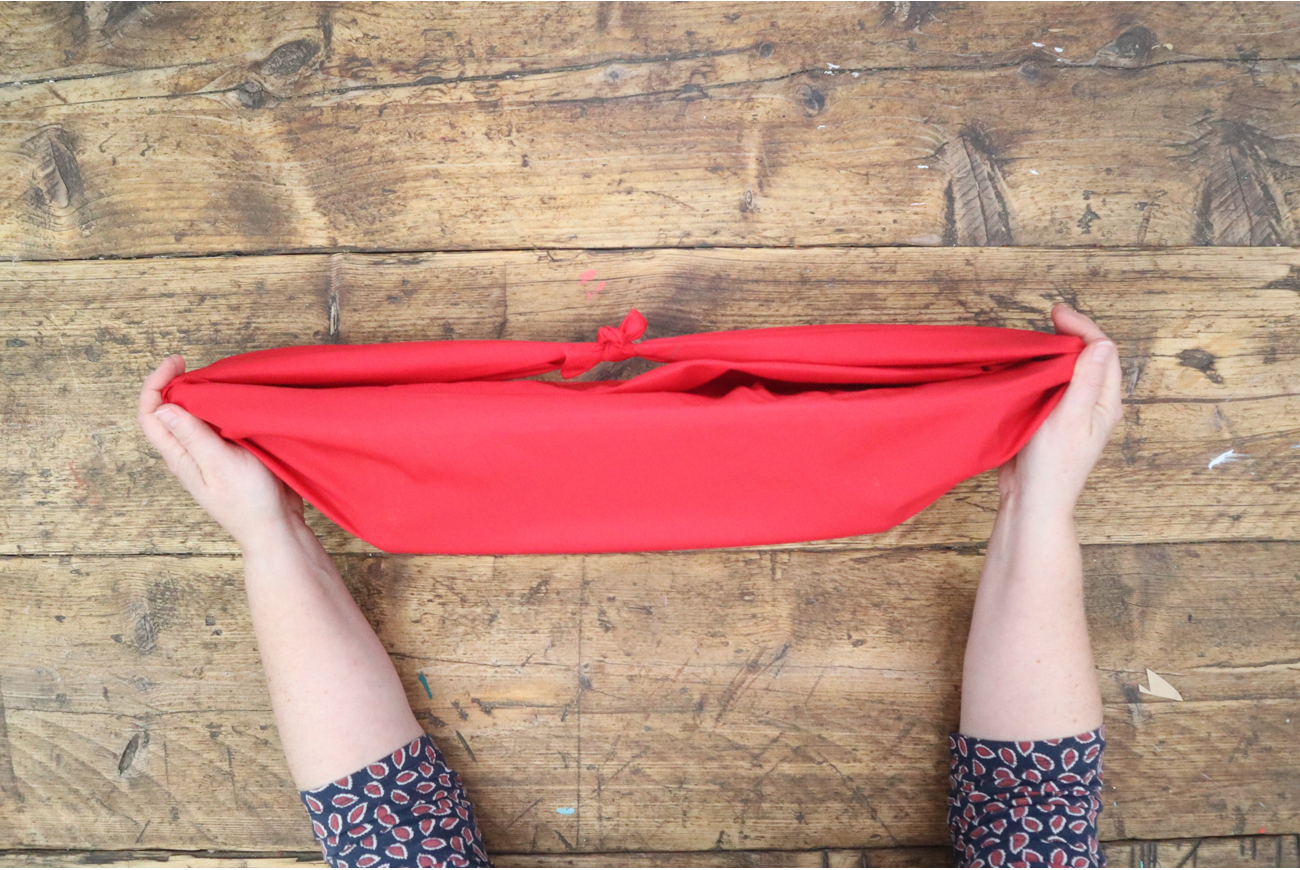
Fabric can be especially useful for wrapping irregular shaped gifts – the fabric is also something the recipient can keep and reuse!
We are using a larger roll of fabric in our example to wrap this skateboard – but smaller pieces of fabric could be useful for smaller gifts. You can pick up smaller ‘fat quarters’ or remnants of fabric from craft shops.
Follow our simple step-by-step guide using fabric to wrap this gift.
You will need: Fabric, scissors. Ribbon optional.
There are a wide range of paper gift bags and boxes available to purchase that will suit whatever shape and size of your gift. These are particularly useful for awkwardly shaped gifts, or last minute wrapping!
Whilst we often opt for traditional ‘wrapping paper’ or tissue paper for gifts – you could use any sort of paper you like! Classic brown postal paper, newspaper, perhaps a decorative page in a magazine. You could also upcycle things perhaps destined for recycling – old posters, old music sheets, old maps…
You could buy, or even make a Christmas stocking for your gift(s).

Once you’ve wrapped the presents, you can now add additional details to really decorate and personalise your gift. How and what you decide to do will most certainly be based on what materials you have available – and what your recipient would like.
Before wrapping – you could decorate your papers to include things such as drawings or ink stamping. Use pens, pencils, paints, inks, or even marbling to add colour and decoration. Create marks and patterns – you could add the gift recipient’s initials, names – or even a phrase! Or another way to make personal – you could add on stickers, stick on photocopied drawings – or even photocopied photographs of special moments.
Always allow your glue/ink/paints to fully dry before wrapping to ensure nothing transfers on to your gift.
We have included some ribbons in our step-by-step guides – but ‘ribbons’ don’t have to be bought ribbons. You could make them out of spare fabric such as lace, trims, garlands, wool – anything you like!
To add a coordinating gift tag, you could cut out a small square of coordinating paper before writing your message. However, you could also create tags from old greeting cards, or any other papers! You could also make little tags out of air-dry clay – or salt dough. You can stamp into airdry clay or salt dough with rubber stamps – perhaps to create a pattern or the recipient’s initial?
Why not add some additional decorations to your gift – how about things such as fresh, dried, or faux foliage, feathers, pompoms, sequins, buttons… You could tie on Christmas baubles or tree decorations – allowing the recipient to then keep this to hang on their own tree!
Do you think you will give some of these ideas a try? If you have learnt some new wrapping skills from this blog, and you decide to give them a go – we would love to see.
Please share them with us on Instagram and Facebook (@entertainer_toys).
As much as there is a wealth of ideas here for you to try… remember that it is not all about perfect wrapping. Be sure to check out our curated collection of Christmas Toys for the best deals this season.
Read our disclaimers.